Keeping With The Times

living, learning, and keeping with the times

  • Home
  • About
  • Site Information
  • Privacy Policy

How to Make Chokecherry Jelly

August 25, 2014 by Barb 22 Comments

I love picking berries! Yes I do.

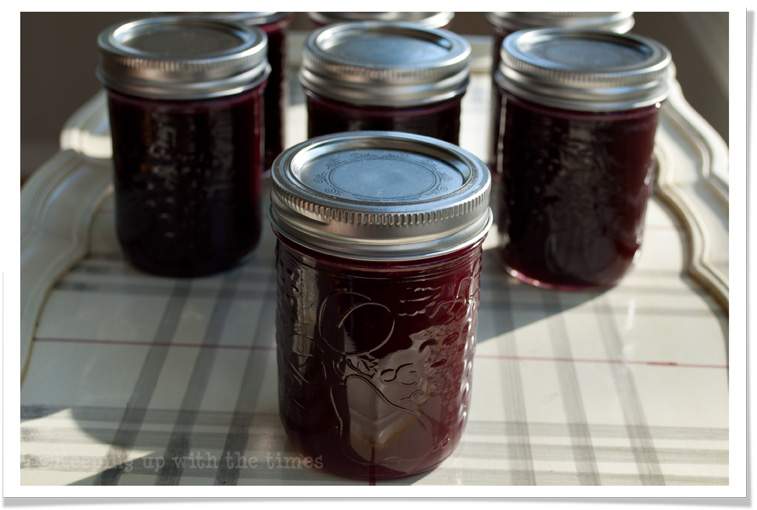
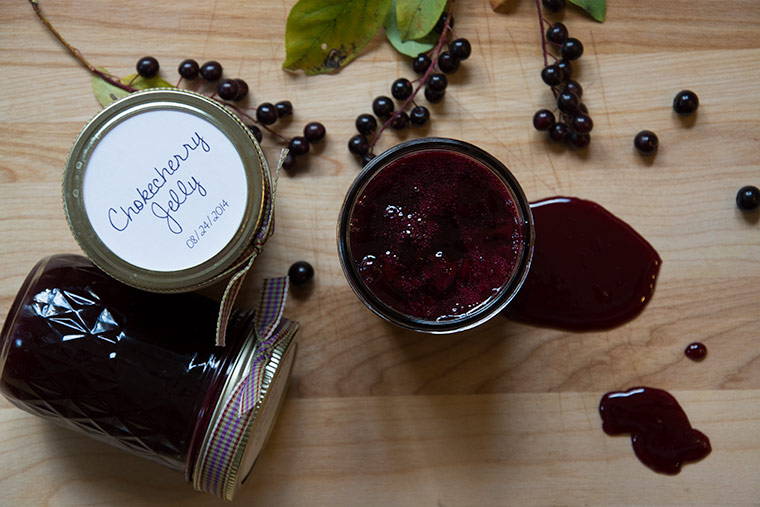
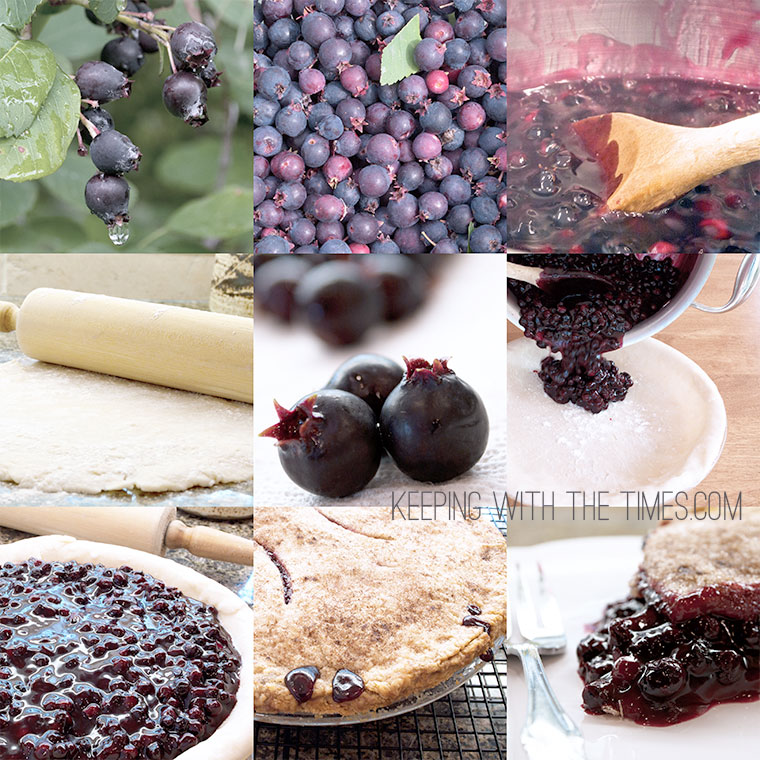
On Saturday I spent a couple hours picking enough chokecherries to make about 21 jars of jelly, many of which I will give away.

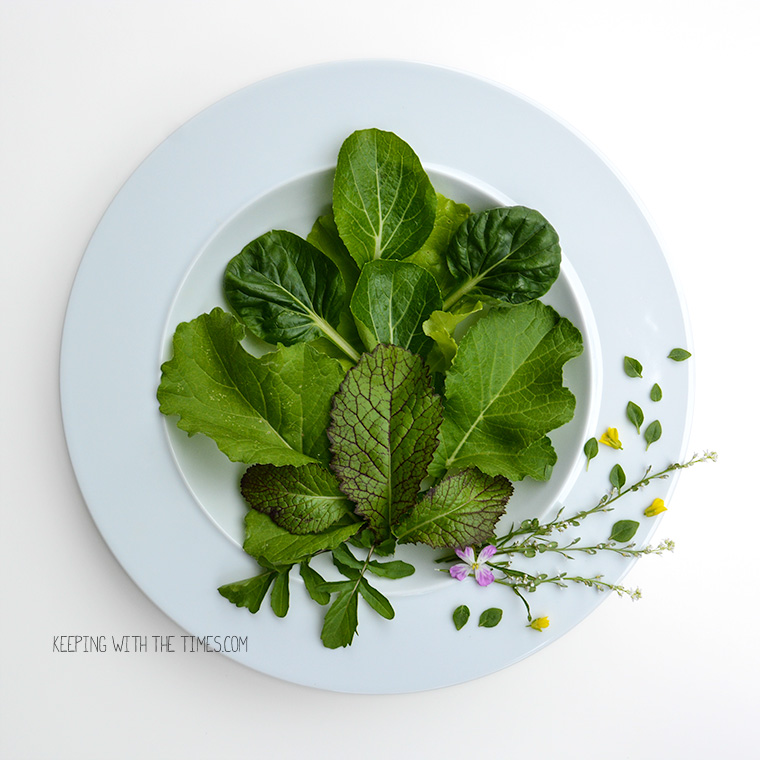
It was sunny and warm with a tinge of coolness in the air. Everything is still very lush and green but the trees are showing early signs of what’s to come. They look stressed, bug-eaten, and with some yellow leaves peeking out here and there. This is my favourite time of year … it’s still summer, but a bit cooler, and there’s so many wonderful fruits and vegetables available.

How to make chokecherry jelly, preserves, keeping with the times

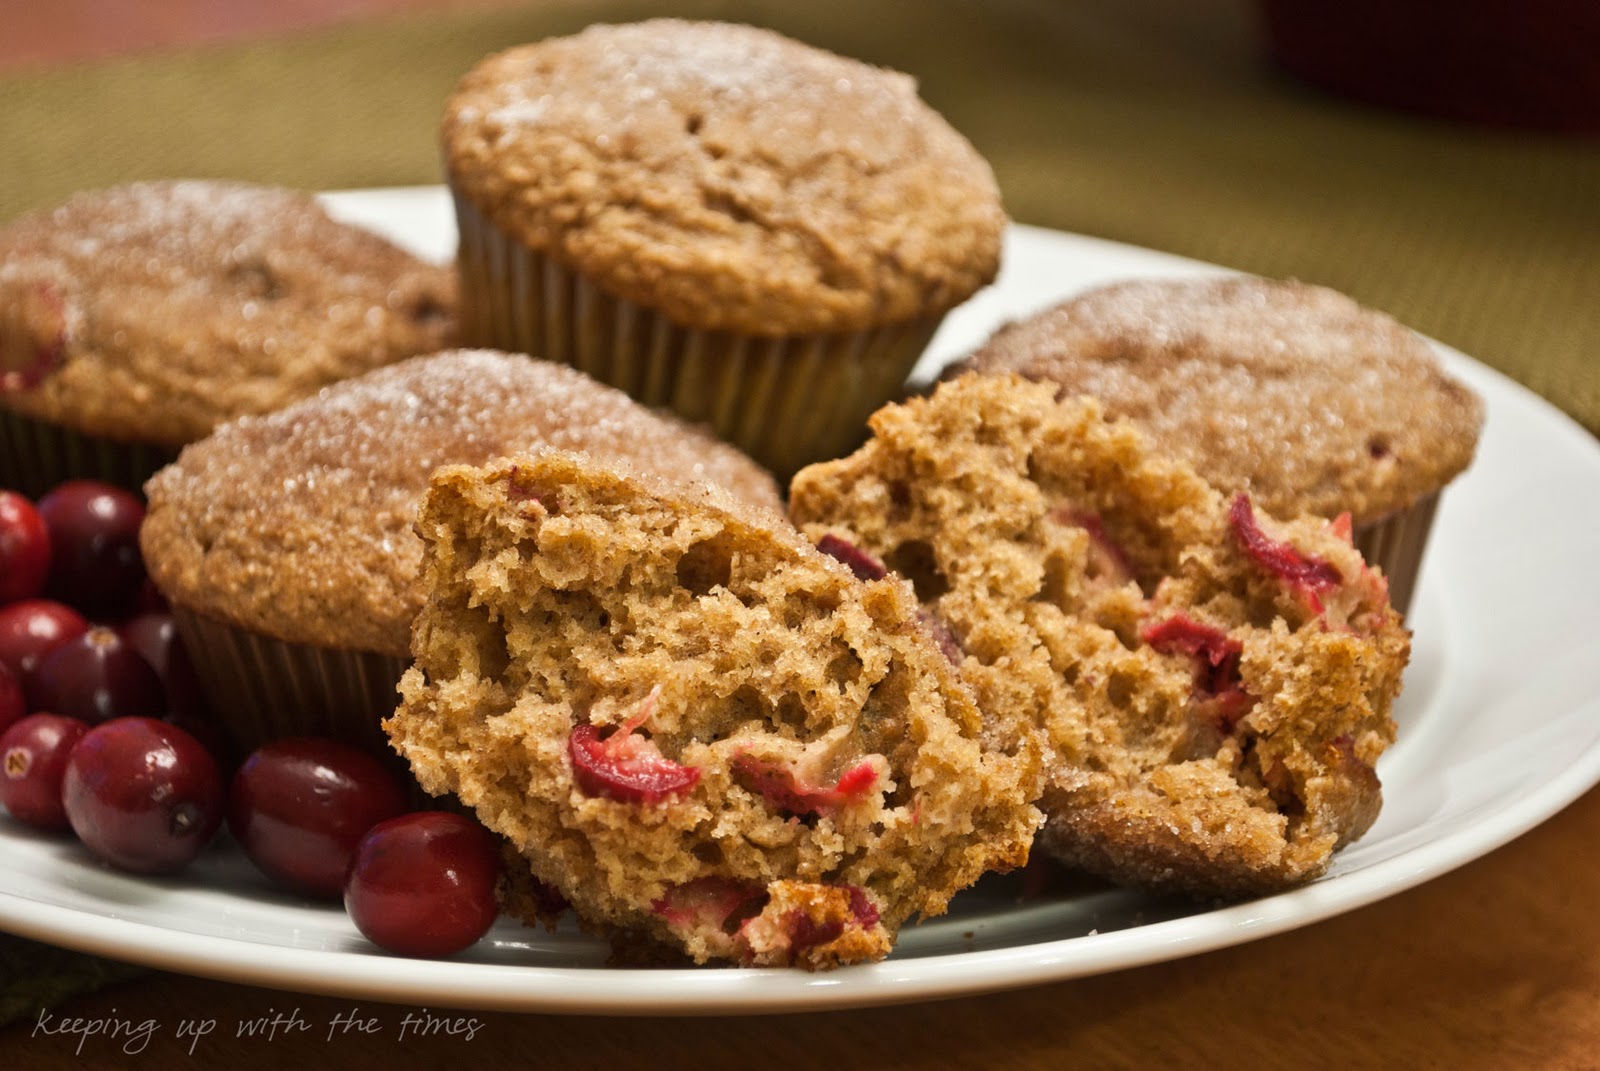
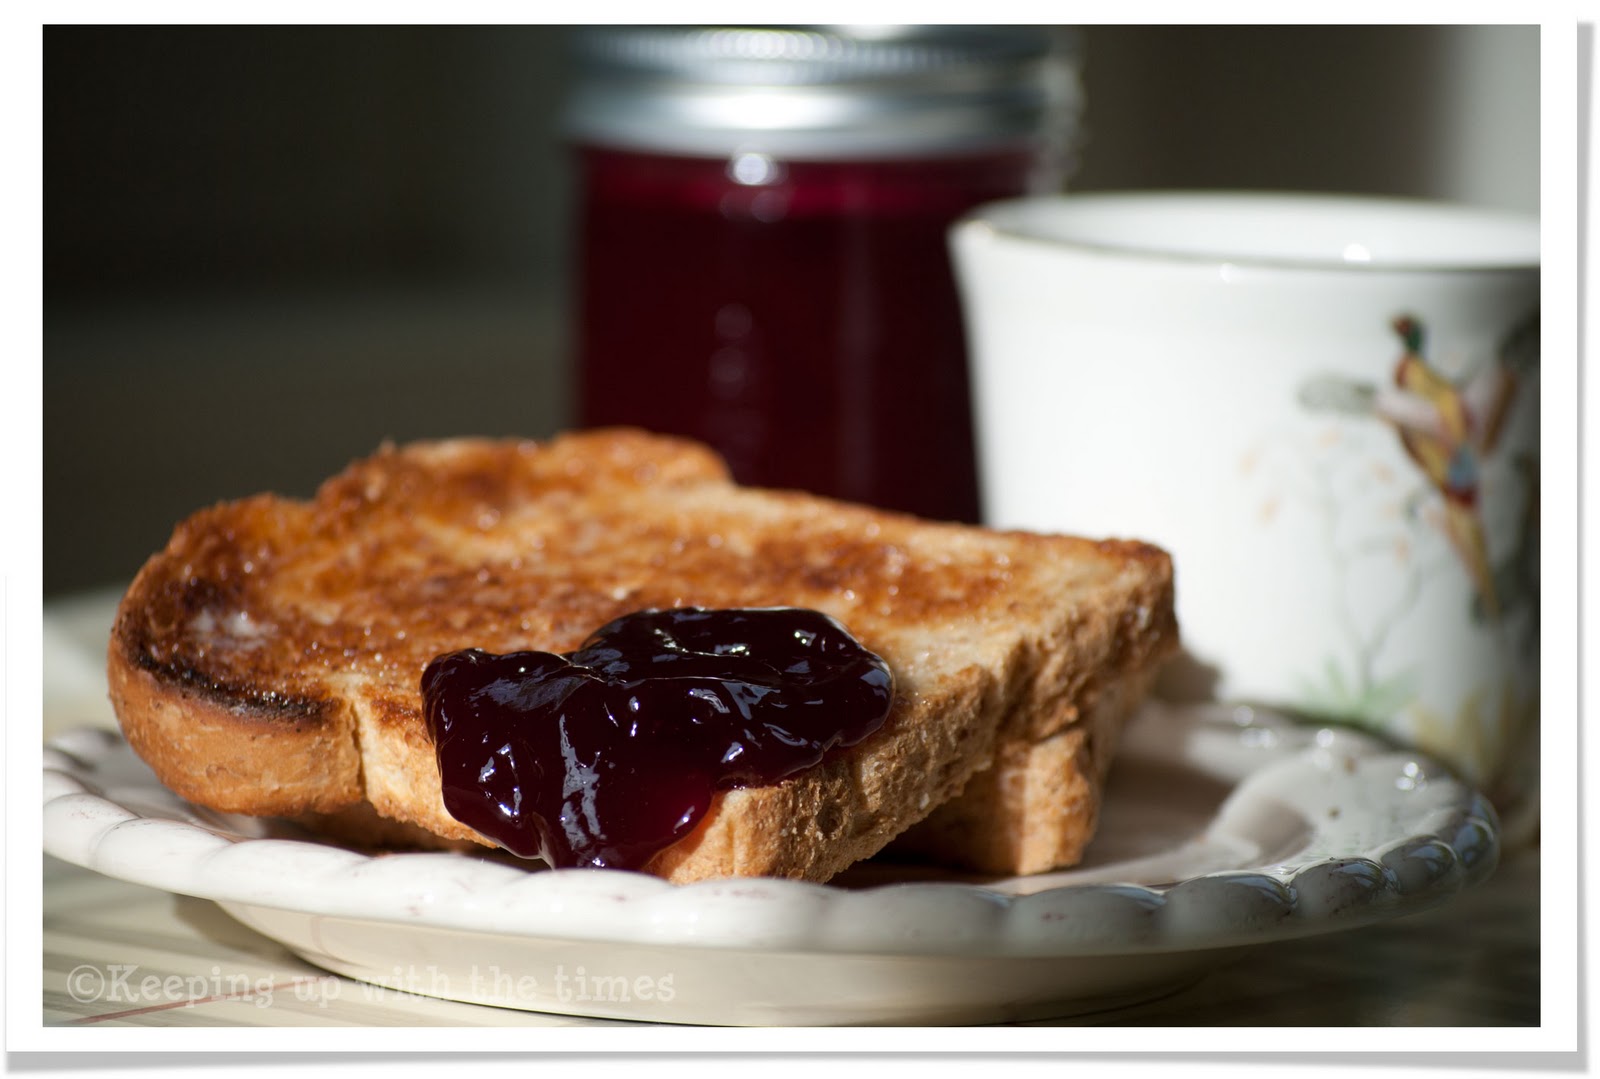
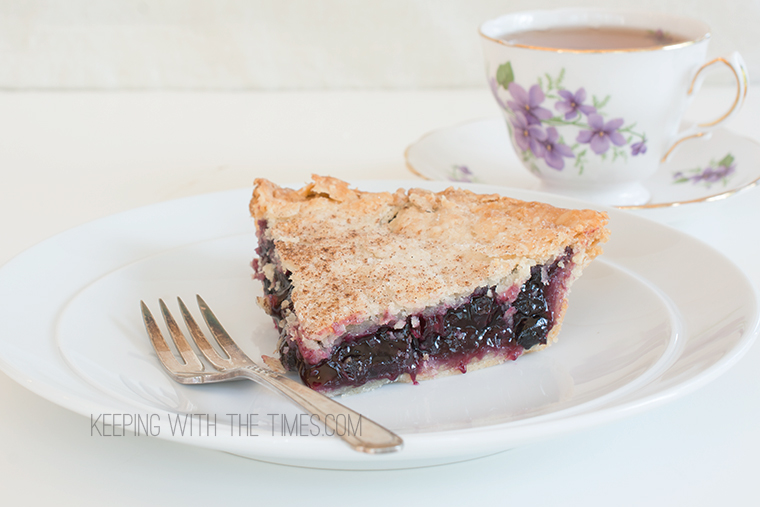
So after two hours of picking, one hour of washing and sorting, and four hours of cooking, here’s my reward.

How to make chokecherry jelly, preserves, keeping with the times

How to make chokecherry jelly, preserves, keeping with the times

I thought I would include the recipe I use. It’s straight from the Certo package and I never stray from the directions. Chokecherry jelly can be quite tricky. It can either not set at all, or become too hard. I seem to have luck if I do exactly as the recipe states.

Print
Chokecherry Jelly
 
Ingredients
  • 3 cups prepared juice
  • 6 1/2 cups granulated sugar
  • 2 pouches Certo Liquid Pectin
Instructions
Prepare the Juice
  1. To make the juice combine 12 cups chokecherries with 3 cups water in a large pot. Bring to a boil and simmer, covered, 15 minutes. Pour into a colander lined with 3 layers of cheesecloth. Bring edges of cheesecloth together gently (careful it is HOT, so hot that I use rubber gloves and even then it is HOT) and let the juice drip. You can squeeze the bag gently but try not to ... you only need 3 cups of juice.
Jelly
  1. In a large saucepan stir together juice and sugar. Bring to a boil over high heat. Boil hard 1 minute then at once remove from heat and add pectin. Stir and skim any froth for 5 minutes.
  2. Pour into sterilized jars and seal with sterilized lids.
3.2.2708


Enjoy!

Chokecherry Jelly, Preserves, Keeping with the Times


Filed Under: FOOD, Preserves Tagged With: chokecherries, jelly

Meyer Lemon Lemon Loaf

January 26, 2014 by Barb 18 Comments

At this time of year I always buy a gargantuan bag of Meyer lemons simply because they are #1 in season, and #2 they’re pretty.

Then I have to do something with them … so I photograph them, then I bake with them, then I squeeze and freeze the juice in ice cube trays to be used later.

I’ve been using this lemon loaf recipe since we were married (almost 39 years ago). It’s my mother-in-law’s recipe and one of my husband’s favourites. The best part of a lemon loaf is the tangy sugary syrup that you pour over it while it’s still in the pan and still hot. Yumm …

Meyer-Lemons-Lemon-Loaf

Meyer-Lemons-Lemon-Loaf

Meyer Lemons

Print
Meyer Lemon Lemon Loaf
 
Ingredients
Loaf
  • 1/2 cup butter
  • 1 cup sugar
  • 2 eggs
  • Rind of one lemon - grated
  • 1 1/2 cups flour
  • 1/2 tsp salt
  • 1 tsp baking powder
  • 1/2 cup milk
Lemon Sugar Syrup
  • Juice of one lemon combined with 1/4 cup sugar
Instructions
  1. Cream butter with sugar.
  2. Add eggs and lemon rind and beat well.
  3. Sift flour, salt and baking powder.
  4. On low speed, alternately add flour mixture and milk, a little of each at a time, beginning and ending with flour mixture.
  5. Pour into loaf pan.
  6. Bake at 350 degrees for 45 - 60 minutes.
  7. Remove from oven and drizzle the lemon sugar syrup over top while the loaf is still in the pan.
Notes
I added a couple teaspoons of poppy seeds for crunch (optional).
3.5.3226

Hope you’re having a wonderful sunny Sunday!

Filed Under: Loaves Tagged With: lemon

Orange Mincemeat Blender Muffins

January 12, 2014 by Barb 7 Comments

Amazingly we are already heading into the middle of January! and how did that happen?

I don’t know about you, but I had the tree down and out the door on January 1st. I’ve since packed all the decorations away and cleaned the house from top to bottom.

Today I bravely peeked into the back of the refrigerator to see what was left behind in the rush, and came up with some oranges and a jar of mincemeat. An old recipe that my Mom used to make came to mind. It’s unusual in that the whole orange, peel and all is used. Sounds kind of weird, but I can tell you that these muffins are pretty scrumptious. After a good whirring in the blender the orange and the mincemeat virtually disappear – and you are left with an aromatic, slightly spicy, moist muffin. Definitely worth a try!

Orange-Mincemeat-Muffins-copy

Orange-Mincemeat-Muffins1-copy

Print
Orange Mincemeat Blender Muffins
 
Ingredients
  • 1 whole, unpeeled orange, cut into quarters
  • 1/2 cup orange juice
  • 1/2 cup mincemeat
  • 1 egg
  • 1/2 cup cold butter
  • 3/4 cup sugar
  • 1 cup white flour
  • 1/2 cup whole wheat flour
  • 1 tsp soda
  • 1 tsp baking powder
  • 1/2 tsp salt
Instructions
  1. Sift flour, soda, baking powder and salt into a medium bowl.
  2. Blend whole orange in blender, add juice, mincemeat, egg, cold butter, and sugar. Blend very well. Add to flour mixture and mix well.
  3. Bake at 400 degrees for 15 minutes.
3.2.2208

Enjoy!

Filed Under: Muffins Tagged With: mincemeat, orange

Roasted Garlic, Onion, Raspberry, Rosemary Jam

December 3, 2013 by Barb 10 Comments

Roasted Garlic, Caramelized Onion, Raspberry, Rosemary Jam… now that’s a mouthful!

Roasted Onion Garlic Raspberry Rosemary Jam

There are lots of recipes for roasted garlic and onion jams, but this one has a twist that I haven’t seen before.

We were on holidays and I was trying to make this when I realized I didn’t have any sugar. As I rummaged through the cupboard I found a jar of (seedless) raspberry jelly… hmmmm… I wonder how that would taste….

Well, delicious, that’s how! The raspberry jelly makes this tasty treat go right off the charts.

Once I start eating it, quite honestly I can’t stop. Hubby and I have spent quite a bit of time debating as to how best to serve it.

Roasted Onion Garlic Raspberry Rosemary Jam

We came up with quite a few suggestions…

1. With a spoon (me)

2. With meat (he)

3. With crackers and brie (me, he)

4. On a whole baked brie (me, he)

5. With crackers and cream cheese (me)

6. With a fork, or even a knife if needs be (me)

So I thought I’d share my super not so secret recipe here with you, and for me, when next I go to make it and can’t remember what I did.

I hope you enjoy it as much as we do!

Print
Roasted Garlic, Caramelized Onion, Raspberry, Rosemary Jam
 
Ingredients
  • 3-4 large onions, chopped
  • 1 Tbsp butter
  • 2 heads garlic (roasted)
  • 1 Tbsp balsamic vinegar
  • 1 Tbsp water
  • 1 jar seedless red raspberry jelly
  • 4 garlic cloves - sliced
  • 3 - 4 Tbsp minced fresh rosemary
Instructions
  1. Cut the top off of the garlic heads and cover in foil. Roast in 350 degree oven for 45 minutes.
  2. In a heavy skillet, slowly saute onions in butter until they have turned a light caramel colour. It may take up to half an hour. Add the balsamic vinegar and water as needed to keep them from drying out. You can't really walk away from this task - you don't want to burn them, so stay close by, and stir often.
  3. Squeeze the roasted garlic into the onions.
  4. In another skillet, saute the garlic slices in butter until lightly browned - this will take about 5 minutes.
  5. Add the raspberry jelly to the onion, roasted garlic mixture and cook and heat until the jelly has melted. Simmer for 10 minutes.
  6. Add the garlic slices, and the fresh rosemary.
  7. Heat gently for about 5 minutes, and ladle into jars. Store in refrigerator.
3.2.2158

Roasted-Garlic-Onion-Rosemary-Jam-Collage

Don’t forget the fresh rosemary!

Roasted Onion Garlic Raspberry Rosemary Jam

Filed Under: Appetizers, Cooking With Herbs, Preserves Tagged With: jam, rosemary, savoury, sweet

Gingerbread with Apples and Caramel Sauce

November 24, 2013 by Barb 15 Comments

This is a simple dessert, but there’s nothing simple about the taste! I’ll be serving this for our Christmas Eve dinner (so that tells you something)…

It can all be made ahead – bake up the loaf and have it ready in the freezer, then on the morning of the day you plan to serve it, take it out and let it thaw.

The caramel sauce should be made only a day or two ahead. Let it cool a bit, store it in a jar and refrigerate. To serve, pour it into a saucepan and gently reheat.

Gingerbread-with-Caramel-Sauce-1

Gingerbread-with-Caramel-Sauce-Collage

Print
Gingerbread with Apples and Caramel Sauce
 
Ingredients
  • Cake
  • 1/4 cup butter
  • 1/4 cup sugar
  • 1 tsp cinnamon
  • 1 tsp ginger
  • 1 tsp cloves
  • 1 tsp salt
  • 1 tsp baking powder
  • 1 1/4 cups flour
  • 1/2 teaspoon baking soda
  • 1/2 cup molasses
  • 1/4 tsp baking soda
  • 3/4 cup boiling water
  • 1 egg, beaten
  • Caramel Sauce
  • 1 cup brown sugar
  • 1/2 cup butter
  • 1/2 cup whipping cream
Instructions
  1. Cream butter and sugar.
  2. In a separate bowl, sift together cinnamon, ginger, cloves, salt, baking powder and flour.
  3. Beat baking soda into molasses until foamy, and add to butter mixture.
  4. Add the 1/4 tsp baking soda to the boiling water.
  5. Add this alternately with the dry ingredients to the butter/molasses mixture.
  6. Fold in beaten egg (batter will be thin).
  7. Pour into greased, or parchment-lined loaf pan and bake 30 minutes at 400 degrees F (200 degrees C).
  8. For the caramel sauce, melt butter in pan, add brown sugar and stir thoroughly. Add cream, stir and cook on medium heat until sugar is dissolved and sauce bubbles a tiny bit and thickens.
  9. Place gingerbread on serving dish, pour sauce over and serve warm. Add sauteed apples if desired.
Notes
Recipe from The Best of Bridge
3.2.2124

ummm… you may want to double everything… :)

Filed Under: Loaves Tagged With: caramel, gingerbread

Simply Sunday

November 10, 2013 by Barb 5 Comments

barb brookbank, waffles, keeping with the times

Guess what time I crawled out of bed this morning? It was almost 10:30… you see, we had a bit of a late night last night.

Our 3 hour flight from Arizona left around 9:20 pm and we landed around 12:30 am. As we stepped out into the icy blast of a minus 14 degree Celcius night, all we could do was look at each other, no words were spoken.

We grabbed a shuttle to get our car and as hubby was cleaning off the ice and snow, he scraped his hand on the ice. Ugly. Oh, and did I mention that I fell as I was leaving the airport? That was a tad embarrassing.

Anyway, we made it home safely and crawled into bed at 2:00 am – totally grateful for our big soft bed, comforter, and pillows.

It’s amazing what a good nights sleep will do, because we both woke up feeling pretty good about being home. The sun was shining, the snow was sparkling, and it was Sunday. Yay!

I made coffee, hubby made waffles, and in honour of all his hard work, I decided to post his recipe. They are delish! Hearty, crispy, and decadent.

Print
Simply Sunday Waffles
 
I'm not saying these are good for you... well, maybe good for the soul...
Ingredients
  • 2 eggs
  • 2 cups all-purpose flour
  • 1 3/4 cups milk
  • 1/2 cup vegetable oil
  • 1 tablespoon white sugar
  • 4 teaspoons baking powder
  • 1/4 tsp salt
  • 1/2 teaspoon vanilla extract
Instructions
  1. Preheat waffle iron.
  2. Beat eggs in large bowl with hand beater until fluffy.
  3. Beat in flour, milk, vegetable oil, sugar, baking powder, salt and vanilla.
  4. Lightly grease preheated waffle iron.
  5. Pour mix onto hot waffle iron, and cook until golden brown.
Notes
Recipe from "allrecipes"

It says you can keep the batter covered in the fridge for up to one week, making sure to whisk well before using.
3.2.2124

.

Filed Under: FOOD Tagged With: photoshop

Dill Carrot Pickles

August 24, 2013 by Barb 5 Comments

I make these wonderful pickled carrots every summer when carrots and dill are plentiful. The process is super easy and if you need some tips on canning, check out Bernardin Home Canning for instructions.

A good friend and neighbor gave this recipe to me years ago. It was meant for cucumbers (which are good too) but the recipe called for cucumbers, and one carrot. Well, everyone wanted the carrot, of course. So being the rocket scientist that I am, I thought . . . why not just make carrots, and so I did and have for years. This is one of those recipes that would be closely guarded by women entering a cooking/baking contest and here I am sharing it with the world. Thank you, Eleanor, for sharing the love.

These are a family favourite and it may be quite possible that we’ve eaten a whole jar at one sitting… just sayin’…

Dilled-Pickled Carrots

Print
Dill Carrot Pickles
 
Ingredients
  • Per Quart
  • 1 or 2 garlic cloves, 2 dill weed heads (preferably gone to seed)
  • Brine
  • 4 cups water
  • 1 cup vinegar
  • 2 Tbsp brown sugar
  • 2 Tbsp pickling salt
Instructions
  1. Check out Bernardin Home Canning for instructions on how to prepare for pickling. Download their step-by-step guide.
  2. Put 2 dill weed heads, and 2 garlic cloves in each jar.
  3. Wash, peel, and cut carrots into finger size pieces, and place into jars.
  4. Boil the brine and pour over carrots, filling to about 1/2 inch from the top.
  5. Put on seals and lids and process in a hot water bath for 1/2 hour.
  6. Let marinate for at least a week.
3.2.2124

Enjoy! and have a happy weekend!

Filed Under: Preserves Tagged With: carrots, pickles

Zucchini Bisquick Casserole

August 21, 2013 by Barb 7 Comments

Zucchini-CasseroleThis is one of those dishes that I make only during certain seasons.

In August, when zucchini is plentiful, I use it to make casseroles, stir fries,  and loaves. That makes it a special treat and we all look forward to having it.

Here’s a recipe that I found years ago (must have been on a Bisquick box). It’s become a family favourite.

Print
Zucchini Bisquick Casserole
 
Ingredients
  • 3 cups zucchini, cored, and cut into 1/2 inch cubes
  • 1/2 cup chopped onions
  • 2 Tbsp parsley
  • 1/2 tsp oregano
  • 1 clove garlic, minced
  • 1/2 tsp Lawry's Seasoned Salt
  • dash of pepper
  • 1 cup Bisquick
  • 1/2 cup Parmeson cheese
  • 4 eggs, slightly beaten
  • 1/2 tsp salt
  • 1/2 cup vegetable oil (or olive oil)
Instructions
  1. Mix together, and pour into a greased 13 x 9 x 2 inch pan.
  2. Bake at 350 degrees for 25 minutes.
3.2.2124

The Inspiration Gallery at Craftberry Bush

Filed Under: FOOD, Main Course

How to Make Saskatoon Berry Pie

August 17, 2013 by Barb 22 Comments

There is nothing that says prairie like a good old Saskatoon Berry Pie!

I’ve raved about Saskatoon berries so many times and every time people ask me “well what are they like, are they like a blueberry?”

I can only say that to me, they just kind of look like one. Other than that, not so much. Others would disagree, and say they are very much like a blueberry.

What I can tell you is that they:

1. look like a blueberry

2. are a bit firmer than a blueberry

3. have tiny seeds somewhat like a raspberry

4. maybe they are similar to a wild blueberry

The Saskatoon Berry’s name is derived from the Cree word Mis-sask-quah-toomina, a word that sounds similar to Saskatoons. The Aboriginal people and early pioneers used Saskatoons as a staple food in traditional foods such as pemmican.

I practically grew up on them and so did my husband, and a summer would not be complete without at least one pie.

I will still pick any I find along the roadsides, but now I usually go to a Saskatoon farm where they are grown in an orchard setting. The domestic Saskatoons are quite a bit bigger, and more tender than the wild ones. But the key to a great Saskatoon pie is to not just mix them with sugar and throw them into a prepared crust. Years ago I discovered a fantastic recipe for pie filling which results in the most tender, mouthwatering Saskatoon pie ever! (Now for the disclosure: I mix two parts Saskatoons with one part blueberries, totally confusing, I know). But I’ve found that the combination is out-of-this-world. So for you folks who are lucky enough to have these berries, you’ll find my secret recipe at the bottom of this post.

Saskatoon Berry Pie, Saskatchewan Desserts

Saskatoon Berry Pie, Saskatchewan Desserts

Saskatoon Berry Pie, Saskatchewan Desserts

Saskatoon Berry Pie, Saskatchewan Desserts

Print
Saskatoon Berry Pie Filling
 
Ingredients
  • 2 cups fresh Saskatoons
  • 1 cup fresh blueberries
  • 1/4 cup water
  • 1 Tbsp lemon juice
  • 3/4 cup sugar
  • 2 Tbsp cornstarch
  • 1 Tbsp butter
Instructions
  1. Combine berries, water and lemon juice.
  2. Mix the dry sugar with the cornstarch, and add to the berries.
  3. Cook over medium heat just until mixture thickens, and cornstarch has cooked.
  4. Add butter (don't forget!)
  5. Cool before placing into pie shell (recipe to follow).
  6. Set the oven to 425 degrees. Set the pie on the lowest rack and bake for 15 minutes. Reduce heat to 350 degrees and continue to bake 15 - 20 minutes longer.
  7. Cool before serving.
3.2.2124

If you want to make a delicious pie crust that is easy, and will not fail – try this one, it’s a family favourite! The dough freezes beautifully (forever actually!). Just let it sit at room temperature before trying to roll it out!
Print
No Fail Pie Crust
 
Ingredients
  • 1 pound lard
  • 5 cups flour
  • 1 tsp salt
  • 3 tbsp brown sugar
  • 1 tsp baking powder
  • 2 tsp vinegar in water
  • 2/3 cup water
  • 1 egg, well beaten
Instructions
  1. Mix dry ingredients together and cut into lard.
  2. Mix vinegar, water, egg and beat until fluffy.
  3. Blend together until dough starts to stick together nicely – sometimes I don’t use all the water, but if you did, I don’t think it would make a difference.
  4. Form into 5 or 6 discs and chill for 1/2 hour.
  5. Roll out the barrel, er dough, and make your pies!!
  6. **This dough will freeze beautifully (forever actually). Just take it out and let it sit at room temperature for a few minutes before rolling it.
3.2.2124

Enjoy!


Filed Under: Pies Tagged With: berries, saskatoons

Mesclun Mix Salad Presentation

June 20, 2013 by Barb 6 Comments

I created this salad from a “Mesclun Mix” which is a term used to describe a “mix of salad greens grown closely together, and harvested while young”.

Mesclun Mix, Salad, Balsamic Dressing

I have a little herb/lettuce garden growing in pots on my deck. I have to keep it on the deck because this creature roams our yard and would clean it up in short order. There would nothing left.

I created this salad from a “Mesclun Mix” which is a term used to describe a “mix of salad greens grown closely together, and harvested while young”.

All mixes are a bit different, combining Royal Oak Leaf lettuce, Red Salad Bowl lettuce, Curled Chervil, Green Ice lettuce, Paris White Cos lettuce, spinach, radicchio, arugula, mustard greens, and endive, just to name a few.

I purchased a pot “ready-made” so I don’t really know exactly what’s in this salad, but I think there is spinach, beet leaves, mustard greens, and green lettuce. Some of the plants have flowers, and flower spikes, and I also used a few leaves from my tiny basil bush.

The colours, and textures, and shapes are all so unique and beautiful, which inspired me to have a little fun and make a salad bouquet! Of course, this is not something you are going to serve at your next family reunion, but maybe next time you are having only a few people (adults) for a special dinner, this would be an elegant and fun way to start the meal. Serve this delicious Balsamic Poppy Seed Dressing on the side and sit back and wait for the rave reviews!

Print
Balsamic Poppy Seed Dressing
 
Ingredients
  • 2 Tbsp balsamic vinegar
  • 2 Tbsp orange juice
  • 1 Tbsp poppy seeds
  • 1 tsp sugar
  • 1/2 tsp dry mustard
  • 1/4 tsp salt
  • 2 Tbsp white wine
  • 2 Tbsp olive oil
Instructions
  1. Combine, shake well and drizzle over salad greens.
3.2.1682

Nutritional Value


Filed Under: Cooking With Herbs, Salads Tagged With: herbs, lettuce, mesclun, salad dressing

Vichyssoise, Summer in a Cup

June 19, 2013 by Barb 6 Comments

It’s funny how things go. I was at HomeSense the other day, and came across these gorgeous soup cups. The first thing that popped into my mind was Vichyssoise … I have to make Vichyssoise.

Have you ever tried Vichyssoise? It’s an amazing delicacy. Cool, creamy, and so easy to make.

Apparently there is some controversy as to whether it originated in France or the United States. I didn’t know that… I thought it was French.

Oh well, no matter the origin, it is a must-try. Summer in a cup.

Vichyssoise


Print
Vichyssoise, Summer in a Cup
 
Ingredients
  • 5 leeks, sliced (white part only)
  • 2 small onions, chopped
  • 1 1/4 Tbsp butter
  • 7 medium potatoes
  • 5 cups chicken broth
  • 1 2/3 tsp salt
  • 5 cups rich milk
  • 1 1/4 cups whipping cream
  • chives for garnish
Instructions
  1. In a saucepan, saute leeks and onions in butter until soft, but not brown.
  2. Peel and slice potatoes thinly (3 cups).
  3. Add potatoes, broth, and salt to the saucepan and cook until soft (35-40 minutes).
  4. Blend in blender, return to heat, add milk, stir constantly and bring just to the boiling point.
  5. Cool, and blend again.
  6. Add cream and chill 2 - 3 hours.
  7. Serve in well chilled bowls, garnish with chives.
3.2.1682

Filed Under: Soups Tagged With: potato

Olive Salad and Easy Mini Muffulettas

May 16, 2013 by Barb 6 Comments

olive salad, muffulettas, mardi gras menu

Well, our dinner party has come and gone. Whew!

I should explain that we belong to a “gourmet” dinner group where each couple hosts a dinner once a year. There are 5 couples–I think I said earlier that there were 4 (oops).

Anyhow, we have been doing this since 1995. The dinner is based on a country or theme, and we chose Mardi Gras this year. One of the appetizers that we made was the classic Muffaletta sandwich.

The thing that sets this little delicacy apart from a regular sandwich is the olive salad. Oh, my… if you like olives… this will knock your socks off…

Print
Olive Salad and Easy Mini Muffulettas
 
Ingredients
  • 2 cans sliced black olives
  • 2 cans sliced green olives
  • 2 cans sliced Calamatta olives
  • 1 small jar capers
  • 3 fresh garlic cloves, chopped
  • 2 Tbsp green onions, sliced
  • 1 Tbsp oregano
  • 3 Tbsp red wine vinegar
  • 1 tsp hot sauce
  • 1/4 cup roasted red peppers (instructions to follow)
  • Enough olive oil to moisten and meld the salad (about 1/2 cup), but use your judgement.
Instructions
  1. Drain, and chop the black, green, and Calamatta olives.
  2. Combine with the rest of the ingredients.
  3. Let sit in refrigerator for at least 24 hours.
Notes
Roast your own red peppers. Don't use the ones you buy in a jar--they are mushy and don't taste great. Cut pepper in half, remove seeds, place on baking sheet and roast for 15 minutes. Turn over and roast another 15 minutes. Remove from oven, cover and let sit 10 minutes. Remove skins, and chop.
3.2.1682

Print
Easy Mini Muffulettas
 
Ingredients
  • 24 mini Italian sliders
  • Genoa salami, thin slices
  • Deli ham slices
  • Swiss cheese slices
  • Provolone cheese slices
Instructions
  1. Cut sliders in half.
  2. Place 2 Tbsp olive salad on bottom half.
  3. Add 1 - 2 slices Genoa salami.
  4. Add one slice Swiss cheese.
  5. Add 1 slice deli ham.
  6. Add 1 slice Provolone cheese.
  7. Add 1 slice Genoa salami.
  8. Top with 1-2 Tbsp of olive salad.
  9. Place on baking sheet and cover loosely with foil. Heat oven to 350 degrees. Bake about 15 minutes until cheese begins to melt.
3.2.1682

Serve some of that yummy olive salad on the side!

So, our dinner party was a success once again.

The big news is, that after all these years, we are going to reduce the frequency of the dinners to twice a year. We are all getting (older) and most of us are travelling a fair bit so it’s hard to set a date.

That means we don’t have to host again until 2016. What a relief.


Inspiration Gallery at Craftberry Bush, Friday Flair Linky Party at Whipperberry

Filed Under: FOOD

Buttermilk Oatmeal Muffins – A Family Favourite

February 14, 2013 by Barb 20 Comments

I felt so good this morning. I haven’t felt so good in quite a long time it seems. Not that there’s anything wrong – I’ve just been overwhelmed with some projects I have on the go and haven’t had a breather since the beginning of January. I haven’t had time to play. No time to just play and create for fun. So, I haven’t felt inspired – at.all.

But today I feel different. Aside from the fact that I had a good sleep, there is one other thing that seemed to have lifted my inertia.

Yesterday, I cleaned my house. I put all my magazines, and books, and dishes, and photography and project stuff in their proper places. I dusted. I vacuumed. I scrubbed and cleaned the kitchen and bathroom. I cleaned the fridge. I took the garbage out. I stripped the mantel and put back only the bare minimum (I had some Christmas stuff there for Heavens sake). How refreshing that felt!

oatmeal muffins baking buttermilk


I finally got around to arranging the pretty white tulips I had bought two days ago. One arrangement went on the mantel, the other on the dining room hutch. I changed the hutch runner to something more (springy) and strung some sparkly lights on it.

And then I sat around in awe at how much better I felt. I turned on Norah Roberts and just chilled out for the rest of the day.

So that brings me to these muffins. Because I wasn’t feeling overwhelmed by dust and clutter this morning, I was inspired to bake (a real bakethrough for me)… doing/creating something because I felt inspired!

Then I proceeded to eat about 5 of them… that might not be so good… but they are delicious and I’ve justified the fact that I ate so many by deciding that muffins are going to be my breakfast, lunch and dinner today.

Enjoy!


Print
Buttermilk Oatmeal Muffins
 
A family favourite!
Ingredients
  • 1 cup oats
  • 1 cup buttermilk
  • 1 cup flour
  • 1 tsp salt
  • 1/2 tsp soda
  • 1 tsp baking powder
  • 1/2 cup oil
  • 1/2 cup brown sugar
  • 1 egg (beaten)
Instructions
  1. Combine oats and buttermilk.
  2. Sift flour, salt, soda, baking powder.
  3. Add oil, sugar and egg to the oat mixture.
  4. Stir oat mixture into the dry ingredients.
  5. Pour into muffin tins lined with paper muffin cups.
  6. Bake at 400 degrees 15 - 20 minutes.
3.2.1682


Let cool and try not to eat too many!

Filed Under: Muffins Tagged With: buttermilk, oatmeal

Rustic Pear Tart

December 28, 2012 by Barb 23 Comments

I’ve discovered a new go-to recipe for a dessert that is not only easy but definitely a 10 when it comes to the wow factor!

I had purchased some beautiful Bosc pears simply to photograph but when I was finished I had to find a way to use them up.

As luck would have it, I was asked to bring something to a housewarming party to help welcome some friends to the neighborhood. Aha! wouldn’t it be interesting to try making a pear tart…

I had a pleasant afternoon making this creation. It was snowing and chilly outside – warm and toasty inside. As the mouthwatering smells of butter and almond filled the house I felt so peaceful. Baking can be a form of meditation if you choose to make it so.

pear tart

Rustic-Pear-Tart

Print
Rustic Pear Tart
 
Ingredients
Butter Crust
  • 1 1/4 cups flour
  • 1/2 tsp salt
  • 1 1/2 tsp sugar
  • 8 Tbsp very cold butter
  • 3 - 4 Tbsp ice water
Filling (frangipane)
  • 1/3 cup almond paste
  • 2 tsp sugar
  • 2 Tbsp unsalted butter
  • 1 Tbsp flour
  • 1 egg
  • Pinch of salt
  • 3 large Bosc Pears
  • Lemon juice
Instructions
Butter Crust
  1. Cut the cold butter into the flour, salt, sugar mixture with a pastry cutter or food processor until the pieces of butter are no larger than a small pea.
  2. Add the ice water, blending with a fork until mixture starts to stick together.
  3. Form the dough into a disc and place it on a lightly floured counter top. Roll it out like a pie shell, using small dustings of flour to keep it from sticking. Place in the tart pan, patting it down and into the edges of the pan.
  4. Chill in refrigerator for 30 minutes.
Filling (frangipane)
  1. Beat together the almond paste and sugar.
  2. Beat in the butter.
  3. Add flour, egg, and salt, beat thoroughly until light and fluffy.
  4. Core and slice the pears into 1/8 - 1/4 inch slices, sprinkling lightly with lemon juice to prevent browning. I didn't peel the pears - the skins add to the visual appeal and are not noticeable when eaten (but of course you can peel them if you like). See below on how to easily cut and core the pear.
  5. Spread the almond mixture (frangipane) on the bottom of the crust.
  6. Arrange the pears in a circle, overlapping each one slightly.
  7. Bake for 30-35 minutes until the frangipane and crust are lightly browned.
  8. Remove from oven and brush with glaze.
Glaze
  1. In a small pot, heat 1/4 - 1/2 cup apple jelly until it has melted. Set aside and let cool slightly.
3.2.2124

Rustic-Pear-Tart

Filed Under: Pies Tagged With: pears

Refrigerator Cookies

December 5, 2012 by Barb 10 Comments

I just love.love.love. refrigerator cookies at Christmas time. Such convenience! Whip up a batch of dough, roll into logs, wrap in parchment paper. You can store the logs in the fridge for a day or two or freeze for a month. Take them out any old time and you can have fresh baked cookies in an instant!

They also make an awesome little hostess gift if you wrap them up in a cellophane bag and add a pretty Christmas topper with a tag.

After countless years of using an old family recipe, I decided to try something new. I couldn’t have been happier with the results. They are buttery, light, and tender with a bit of chewy goodness from the cherries. They are also prettier!! And we all know it’s all about how it looks, right? OK, maybe not, but it’s nice.

I like to bake these cookies just before guests arrive so that the buttery sweet smell fills the house and makes me feel like Mrs. Claus herself…

Print
Refrigerator Cookies
 
Ingredients
  • 1 cup unsalted butter
  • 1 cup white sugar
  • 1 egg
  • 1 1/2 tsp pure vanilla extract
  • 2 2/3 cup flour
  • 1/2 tsp baking powder
  • 1/4 tsp salt
  • 3/4 cup very finely chopped red and green glace cherries
  • 1/2 cup toasted sliced almonds
Instructions
  1. Cream butter, sugar, egg, and vanilla.
  2. Sift together dry ingredients. Add to the butter/sugar mixture. Mix well. Fold in the cherries and almonds.
  3. Divide the dough into thirds, place each on a separate piece of wax or parchment paper. Shape into 7" rectangular logs. Wrap the paper around each one and chill for several hours.
  4. Slice the logs into 1/4" slices and bake at 375 degrees for 8-10 minutes. Watch closely--you don't want to brown the bottoms too much.
Notes
*The uncooked logs can be frozen for one month. When you want to make cookies, remove logs from freezer and let sit for a few minutes to warm up before slicing. *Adapted from The Joy of Baking
3.2.1682


Slice into 1/4 inch slices.
Watch the bottoms so they don’t burn!
Package up for gifts.
Add a pretty homemade tag.

Filed Under: Cookies

Hazelnut and Chocolate Pinwheels

November 28, 2012 by Barb 29 Comments

I always admired the pinwheel cookies that other people made but never considered trying it myself. I thought it was just too much work. But wait a minute… I’m the person who has made hundreds of perogies, cabbage rolls and pyrizhky and I can tell you it doesn’t get any pickier than that.

These do take a bit of patience but the satisfaction of having these pretty little delicacies is so worth it! Just take your time and don’t give up if the first ones aren’t perfect… they taste as delicious and because you won’t want to display them on your Christmas cookie plate, you’ll just have to eat them…

hazelnut, chocolate, cookies, pinwheels

Print
Hazelnut and Chocolate Pinwheels
 
Ingredients
  • 1 cup unsalted butter
  • 3/4 cup sugar
  • 1 egg
  • 1 1/2 tsp vanilla
  • 2 1/2 cups flour
  • 1/8 tsp salt
  • 1/3 cup toasted ground hazelnuts*
  • 2 Tbsp cocoa powder
Instructions
  1. Cream together the butter and sugar until fluffy. Add egg and vanilla and blend well.
  2. Sift flour with salt and add to the butter mixture--blend well.
  3. Divide dough into two balls - making one ball about 1/3 cup smaller.
  4. Mix the hazelnuts with the cocoa and add to the smallest ball of dough. Return to mixer and blend well.
  5. Divide the white dough and form into two flat rectangular shapes about 8 inches long. Divide chocolate dough and form into two flat rectangular shapes about 8 inches long. Wrap in plastic film and chill for 30 minutes.
  6. Roll out one piece of the white dough to about a 10 x 8 inch rectangle (rolling it on parchment paper will help to lift it off the counter). Repeat with one chocolate piece.
  7. Place one piece of rolled out chocolate dough on top of one white one. With a piece of parchment paper on top, roll gently over the top with a rolling pin to help stick the two pieces of dough together.
  8. Start from the 10 inch edge and roll tightly into a 2 inch diameter log and chill again for 30 minutes.
  9. Slice into 1/4 inch slices, place on cookie sheet and bake at 375 degrees for 8 - 10 minutes.
Notes
*Toasting hazelnuts adds a richer, nuttier flavour. Spread nuts out on a cookie sheet and toast in the oven at 250 degrees for 10 - 15 minutes--stirring several times. Let cool and then grind.
3.2.2124


Enjoy!

Filed Under: Cookies Tagged With: chocolate, cocoa, sweet

Stuffed Pork Tenderloin

November 15, 2012 by Barb 8 Comments

I’ve been cooking pork for years and will somewhat jokingly announce that ‘I think the pork is cooked, but it’s not dry enough yet so I’m going to let it cook for 5 or 10 more minutes…‘ (not a good idea).

So I was pretty amazed with the results when I recently discovered a little secret on how to cook pork tenderloin to perfection (I just never knew).

Two tenderloins should serve four people but if your guests are big eaters, you might want to prepare three of these or you could just be sure to have several side dishes, such as baked acorn squash and roasted or mashed potatoes. I usually serve a chunky applesauce too–sweetened very lightly.

When I serve it during the holidays, my favourite method is to stuff it with a bit of dressing similar to what I use for turkey. I really like the festive feel to it–it reminds me of Christmas dinner but is 1,000 times easier.

pork tenderloin


Print
Stuffed Pork Tenderloin
 
Ingredients
  • 2 pork tenderloins * butterflied (see photos at bottom)
  • 4 cups toasted bread crumbs
  • 1/2 onion, minced
  • 1/2 cup celery, minced
  • 3 Tbsp butter
  • 1/4 tsp each of dried sage, rosemary and thyme
  • Salt and pepper to taste
  • 1 Tbsp butter
Instructions
  1. Melt butter in skillet, saute onions and celery until translucent. Add bread crumbs, sage, rosemary, thyme, salt and pepper.
  2. Fill the tenderloins with the bread crumb mixture, preserving 1 cup for the crust. Roll each tenderloin and tie with kitchen string. Rub with butter and roll in the preserved crumbs.
  3. Place on broiler pan that has 1 1/2 cups of water in the bottom (tenderloins are not sitting in the water).
  4. Now for the big secret to success! Preheat oven to 500 degrees--yes, 500 degrees! Apparently, because pork tenderloin is very low in fat, cooking at lower temperatures drys the meat out before it is cooked. I just never knew...
  5. So...
  6. Place tenderloins in oven and bake for 30 - 35 minutes. Watch closely so as not to overcook. It should remain juicy with a pale pink colour. If using a thermometer the temperature should reach 150 degrees. Remove from oven and let rest for 10 minutes - the meat continues to cook.
3.2.1682


Enjoy!

Here’s a brief visual ‘how to’

  • Remove tough sinew (if present). Slice through the loin but not completely. This is how to ‘butterfly’ meat. The one on the left has been butterflied.
  • Place wax paper on top and pound with wooden mallet. This flattens the meat so that it’s all the same thickness. It also tenderizes it.
  • Prepare stuffing.
  • Place on top of tenderloins (reserve some stuffing to coat tenderloins).
  • Roll each tenderloin separately and tie together with kitchen string. (Roll each tenderloin in the reserved stuffing to coat). Place on broiler pan with 1 1/2 cups of water in the bottom. Meat is not in the water – the water serves to steam them.

Filed Under: Main Course Tagged With: pork

Roasted Sugar Pumpkin Soup

October 18, 2012 by Barb 14 Comments

This year when I decorated my Autumn Mantel, I used several sugar pumpkins in my display. I also used them for my Thanksgiving Tablescape  (in Canada, Thanksgiving was October 8th).

When I bought the pumpkins, I thought (but didn’t really believe) that after Thanksgiving, I would cook them up and use them for soup and baking. But will wonders never cease! I have roasted them all, made soup, and frozen the remaining puree for use on a cold winter day.

Pumpkin-Soup

Pumpkin-Soup

Did you know that sugar pumpkins are the best choice for cooking and baking? They are smaller and denser than a regular field pumpkin that you might carve for Jack-O-Lanterns. Field pumpkins are generally watery and stringy.

I cut them into 1″ cubes, put them on a pan, and roasted them for 45 minutes, stirring several times. Roasting gives them a rich, sweet flavour. Then I peeled the skin off using a small paring knife. I found it too hard to peel them raw – I cut my thumb and my pointy finger before I got the message…

These are real antique candle holders given to me by my mother-in-law. She has given me so many wonderful treasures… Funny, though. I didn’t know what they were until I saw some ‘fake’ ones at our local gift shop. They had set little candles in them and a light bulb went off in my head… I’m slow that way… Anyway, now I appreciate them a thousand times more.

Pumpkin-Soup2


Print
Roasted Sugar Pumpkin Soup
 
Ingredients
  • 3 cups roasted, pureed sugar pumpkin (I used my food processor)
  • 1 Tbsp butter
  • 1 cup minced onions
  • 2 cups chicken broth
  • 2 cups half & half cream
  • 1 Tsp brown sugar
  • Dash of nutmeg
  • Salt & pepper to taste
Instructions
  1. In a large pot, saute onions in butter until translucent.
  2. Add chicken broth and bring to a boil. Lower heat and stir in pumpkin puree and brown sugar. Pour into a blender and puree. Return mixture to saucepan. Stir in the half and half.
  3. Add salt and pepper to taste. Throw in the nutmeg - I use about 1/4 tsp.
  4. Reheat but do not boil. Serve at once.
3.2.1682


Filed Under: Soups Tagged With: pumpkin

Halloween horror d’oeuvres

October 12, 2012 by Barb 16 Comments

Looking for Halloween party ideas? When we hosted a Halloween dinner party for our friends, one of the things I served was this HEAD cheese. Seriously? you ask. Well, yes I did.

I found the mold at Michaels so it can’t be that bizarre can it? OK, maybe it is… and it was a little hard to make that first cut into it. No one wanted to do it so I had to take matters into my own hands and I chopped off a cheek.

I would have chopped off the nose but wait… there was no nose…

 .
resting in a bed of lettuce…

.

chin up…

.

serious set of choppers going on here…

.
RIP Mr. Head Cheese
.

I will stand by the recipe though – I’ve made it several times and if you like head cheese, this is pretty darn good!
bwahahahahaha!!
.
Print
Head Cheese
 
Ingredients
  • 2 tablespoons vegetable oil
  • 3 pounds pork shoulder, trimmed and cubed
  • 2 cups chopped onion
  • 1 cup chopped green bell pepper
  • 1/2 cup chopped celery
  • 2 tablespoons minced garlic
  • 2 tablespoons dried parsley
  • 2 teaspoons dried basil
  • 1 teaspoon salt
  • 1 teaspoon ground black pepper
  • 2 teaspoons Cajun seasoning
  • 3 cups water
  • 4-5 envelopes unflavored gelatin
  • 1 cup boiling water
Instructions
  1. Heat the oil in a 4 quart pot over medium-high heat. Add the cubed pork, and brown on all sides.
  2. Reduce heat to medium, and add the onion, bell pepper, celery, and garlic.
  3. Season with parsley, basil, salt, pepper, and Cajun seasoning. Pour in 3 cups water and bring to a boil. Cover, and simmer over medium heat for 2 hours, stirring vigorously every 15 minutes. When the pork is ready, it should be completely shredded and reduced to a stringy consistency.
  4. Dissolve the gelatin in 1 cup of boiling water, then stir into the pork mixture very well. Pour into a mold or casserole dish, and chill until set, about 8 hours. To unmold, dip the bottom of the mold in hot tap water for about 1 minute, then invert onto a serving tray. If it doesn't seem to be setting - reheat and add more gelatin.
  5. Serve with your favourite crackers.
3.2.1682
 .
.

Filed Under: Appetizers Tagged With: halloween, savoury

Rustic Zucchini Quinoa Bread

September 1, 2012 by Barb 17 Comments

I love zucchini bread and I have a basic recipe that I’ve used my whole life. But for some reason I wanted to change things up a bit and experiment this year.

I don’t know why quinoa came to mind . . . it just did . . .

It turned out quite yummy  . . .

Quinoa is a complex carbohydrate, gluten-free and high in protein. It’s not a grain–it’s a fruit of a broadleaf plant and is in the same family as spinach and beets.

So I thought I’d substitute quinoa for half the white flour and see what would happen. First I had to process it in my food processor to turn it into quinoa flour (it ended up being a bit coarse).

Apparently you can buy quinoa flour and if you prefer a finer loaf–it might be a good idea to use that. We kind of liked the rustic nature and I think I would stick to processing my own. We eat quinoa often and I buy it in a big bag at Costco.

Print
Rustic Zucchini Quinoa Bread
 
Ingredients
  • 1 cup salad oil
  • 1 cup white sugar
  • 1 cup brown sugar
  • 3 eggs
  • 2 tsp vanilla
  • 1 1/2 cups white flour
  • 1 1/2 cups quinoa flour
  • 1 tsp salt
  • 1 tsp soda
  • 1/2 tsp baking powder
  • 1 Tbsp cinnamon
  • 2 cups zucchini--grated--I remove the centres of the zucchini before I grate them and I drain a little liquid off if it seems too watery
  • 1/2 cup walnuts
  • 1/2 cup raisins
Instructions
  1. Mix together oil and sugars and beat for one minute. Add eggs and beat until combined. Add vanilla.
  2. Sift together flours, salt, soda, baking powder and cinnamon. Add to egg mixture and blend until smooth.
  3. Add zucchini and blend until it is evenly distributed and batter is smooth. Add walnuts and raisins.
  4. Line 2 loaf pans with parchment paper and fill with batter.
  5. Bake 325 degrees for 1 hour and 15 minutes. Test with toothpick. Remove loaf to rack and cool.
  6. Makes 2 loaves.
3.2.1682

and guess what? it passed the ‘hubby’ test …

Filed Under: Loaves Tagged With: quinoa

Summertime salad with edible flowers

July 11, 2012 by Barb 5 Comments

I’ve always been intrigued by the fact that some flowers are edible. During the summer I like to use them as garnishes and also in salads.

It’s such an incredibly beautiful presentation for a special dinner with family or friends.

Some people may move the flowers (nasturtiums and pansies are the most commonly seen) to the side of the plate just like they do with parsley. Not to worry . . . just the presentation itself is enough to impress and delight your guests and is well worth the effort.

.
.

Summertime Salad with Edible Flowers
PREP 20 MIN | TOTAL 35 MIN

To start with I purchased a spring mix of organic baby lettuces (red & green romaine, red & green oak leaf, red leaf, lollo rosa, tango), organic baby spinach, red and green chard, mizuna, arugula mache, and radicchio.

*From my own garden I picked nasturtium flowers, nasturtium leaves, and violas. I rinsed them lightly and set on a paper towel for a few minutes to drain.

PLACE lettuce on individual serving plates.

PREPARE flowers by removing the stamens, styles and sepals. Place on top in a pleasing manner.

WHISK together some olive oil and balsamic vinegar and drizzle lightly over the salad. Serve immediately.


So pretty!

*Important things to note:

Eat flowers only when you are positive they are edible. If uncertain, consult a good reference book on edible flowers prior to consumption. Do not use flowers that have been sprayed with pesticides or herbicides.


Remove the stamens and styles from the flowers before eating. Remove the sepals of all flowers except violas, Johnny-jump-ups, and pansies.


Only the petals of some flowers are edible. When using just the petals, separate them from the rest of the flower just prior to use to keep wilting to a minimum. Edible Flowers at ‘What’s Cooking America

Warning: Individuals consuming the flowers, plants, or derivatives listed on this page, do so entirely at their own risk. I cannot be held responsible for any adverse reaction to the flowers.

Filed Under: FOOD, Salads

Got bananas?

June 30, 2012 by Barb 16 Comments

If you have a bunch of really ripe bananas and are wondering what to do with them – here’s your answer!

This truly is ‘The Best-Ever Banana Bread’! It’s dense, and moist, and is a bit like a pudding, I think.

The key is to use ripe ripe bananas and make sure you use cake flour as the recipe directs.

We’re enjoying our holiday weekend with family and this is the perfect thing to serve with coffee before the real breakfast hits the table!

Print
Best Ever Banana Bread
 
Ingredients
  • 2 cups sugar
  • 1 cup butter
  • 6 ripe bananas - mashed (3 cups)
  • 4 eggs, well-beaten
  • 2 1/2 cups cake flour
  • 2 tsps baking soda
  • 1 tsp salt
Instructions
  1. Preheat oven to 350 degrees.
  2. Cream butter and sugar until light and fluffy. Add bananas and eggs and beat until well mixed.
  3. Sift dry ingredients three times. Blend with banana mixture - but do not over-mix.
  4. Pour into two lightly greased loaf pans. Bake 45 minutes to 1 hour; test for doneness.
  5. Cool on rack for 10 minutes before removing from pans. These freeze beautifully! Enjoy!
  6. *Recipe from The Best of Bridge
3.2.1682


Filed Under: Loaves Tagged With: bananas

Brownie Cookies and Peppermint Icing

March 2, 2012 by Barb 26 Comments

I can’t even tell you how delicious these cookies are.

I had frozen some dough that was left over from the Brownie Cookies that I made for Valentine’s Day (from the Smitten Kitchen) and it has been calling me from the freezer ever since.

So today I pulled it out, defrosted it, and rolled it out.

I kept thinking shamrocks, and green, and hmmmm, brownies and hmmmmm . . .  peppermint icing!

Brownie-Peppermint-Cookies

Egad, I almost made myself sick on the icing alone!

It’s just the usual butter icing – 2 cups icing sugar, 4 – 5 Tbsp butter, a splash of milk, a drop of green food colouring and a dash of peppermint flavour. Splash. Drop. Dash. Then I made some green tea to serve as a bit of a tonic to my sugar overdose and I had myself a simply divine teatime all by myself. No regrets.

Print
Brownie Cookies
 
Ingredients
  • 3 cups all-purpose flour
  • 2/3 cup unsweetened cocoa powder
  • 1/2 teaspoon salt
  • 1/2 teaspoon baking powder
  • 1 cup butter
  • 1 1/2 cups sugar
  • 2 large eggs
  • 1 teaspoon vanilla extract
Instructions
  1. Preheat oven to 350 degrees.
  2. Sift flour, cocoa, salt and baking powder together and set aside. Mix butter, sugar, eggs, vanilla in mixer. Gradually add flour mixture, and mix until smooth.
  3. Form into two discs, wrap in plastic and chill for at least one hour.
  4. Roll out cookie dough on counter – I use a bit of cocoa to dust on the surface to keep the dough from sticking. Cut into desired shapes – of course I used hearts for Valentine's Day and Shamrocks for St. Patrick's Day!
  5. Bake on cookie sheets for 8 to 11 minutes until the edges are firm and the centres are slightly soft and puffed. Transfer to a wire rack to cool.
Notes
Recipe from the Smitten Kitchen
3.2.1682


Filed Under: Cookies Tagged With: cocoa, peppermint

Hamburger soup

February 27, 2012 by Barb 5 Comments

This is a family staple at our house. It’s hearty, tasty, and very easy to make. I usually start it right after lunch and let it simmer until dinner. And since today we have over 20cm of fresh snow and it’s -19C . . . brrrrr . . . this soup is a good thing to have on hand!

hamburger soup

Print
Hamburger soup
 
Ingredients
  • 1 1/2 lbs ground beef
  • 1 onion, chopped fine
  • 1 28 oz can tomatoes
  • 2 cups water
  • 3 cans consomme
  • 1 can tomato soup
  • 4 carrots, chopped
  • 1 bay leaf
  • 3 sticks celery, chopped
  • parsley
  • 1/2 tsp thyme
  • pepper to taste
  • 8 Tbsp barley
Instructions
  1. Brown meat and onions. Drain well.
  2. Combine all ingredients in large pot, simmer covered at least 2 hours, or all day!
3.3.3077


*Recipe from The Best of Bridge


Filed Under: Soups Tagged With: hamburger

Little sticky toffee puddings

December 23, 2011 by Barb 15 Comments

Little Sticky Toffee Puddings, Keeping With The Times
These mouthwatering, tender puddings/cakes with a caramel sauce are to die for! Try them for your next dinner party. Your guests will love you!

Print
Little Sticky Toffee Puddings
 
Ingredients
  • Pudding
  • 1 cup water
  • 1/2 tsp baking soda
  • 3/4 tsp vanilla
  • 1 cup raisins, or cranberries
  • 3/4 cup butter
  • 2/3 cup sugar
  • 2 eggs
  • 1 cup flour
  • 1/4 tsp baking powder
  • Toffee Sauce
  • 1 cup brown sugar
  • 1/2 cup butter
  • 1/2 cup whipping cream
Instructions
  1. Grease well (I use butter) eight, 1/2 cup ramekins.
  2. Boil water, add baking soda, vanilla and raisins. Stir then set aside to cool.
  3. Cream butter and sugar until fluffy. Lightly beat eggs and add to the butter and sugar, mix thoroughly.
  4. Sift flour and baking powder then gently mix into butter mixture, ALTERNATING with the water/baking soda/vanilla and raisins mixture (batter will be a bit runny, but trust me . . .)
  5. Pour into ramekins, place in middle of oven and bake at 350F for 25 minutes. Remove from oven, let cool for 10 minutes, then run a knife around the outside of each ramekin and flip over so that the pudding falls out onto cooling racks (I use a bit of force and 'pound' the ramekin onto the rack so the pudding falls out quickly).
  6. For the toffee sauce, melt butter in pan, add brown sugar and stir thoroughly. Add cream, stir and cook on medium heat until sugar is dissolved and sauce bubbles a tiny bit and thickens.
  7. Place pudding on serving dish, pour sauce over and serve warm.
Notes
Recipe from The Best of Bridge
3.2.2124


Filed Under: Puddings Tagged With: toffee

‘Land of Nod’ cinnamon buns

December 22, 2011 by Barb 13 Comments

Cinnamon-BunsThese cinnamon buns have become MANDATORY for our Christmas morning. Try them once, and you’ll see why!

Print
'Land of Nod' Cinnamon Buns
 
Ingredients
  • 20 frozen dough rolls
  • 1 cup brown sugar
  • 1/4 cup vanilla instant pudding
  • 1 - 2 Tbsp cinnamon
  • 3/4 cup raisins
  • 1/4 - 1/2 cup melted butter
Instructions
  1. Grease a 10" bundt pan and add frozen rolls.
  2. Sprinkle with brown sugar, pudding powder, cinnamon and raisins.
  3. Pour melted butter over all.
  4. Cover with a clean, damp cloth and leave out at room temperature over night.
  5. In the morning, preheat oven to 350F and bake for 25 minutes.
  6. Let sit for 5 minutes and then turn out on a serving plate.
  7. Grab a coffee, pull apart a bun (before they disappear) and go watch your family open presents or whatever it is you do on Christmas morning. Enjoy.
3.2.2265


Filed Under: Breads Tagged With: cinnamon

Cranberry-bran muffins

December 17, 2011 by Barb 15 Comments

When hosting guests overnight at Christmas it’s always a good idea to have some muffins at the ready for early risers. Before I go to bed I put the muffin containers on the counter and set the coffee pot so that I just have to push the button when I get up. This way Grandma gets her coffee hit and the grandkids don’t have to eat dry Honeycombs until the real breakfast is served. I don’t cook breakfast (hubby does) and when that bacon fat starts flying – I’m outta there! It’s about that time that I decide that the bed needs to be made and I need a shower . . . I hate bacon fat . . . love bacon, just hate cooking it and hate smelling like it . . . So, having some homemade muffins makes my disappearing act a little less guilt-ridden.

Cranberry-Bran Muffins
moist and satisfying, and because we don’t get enough sugar and fat at Christmas I dip the tops in melted butter and then sugar and cinnamon . . .
I like to have my ‘ducks in a row’ when I’m baking – learned that in “Home Economics” (ahem) many years ago
see this baby? a surprise from hubby about a month ago – out of the blue (well, I did grumble a bit about my old mixer that I’d had for over 30 years . . .)
love my mixer, and my hubby :)

Cranberry-Bran Muffins
PREP 25 MIN | TOTAL 50 MIN

4 cups flour
3 cups wheat bran
2 Tbsp baking powder
1 tsp each of baking soda, salt, cinnamon and nutmeg
1/2 tsp allspice

5 eggs
2 1/2 cups buttermilk
1 cup packed brown sugar
3/4 cups vegetable oil
1/3 cup molasses
1 1/2 tsp vanilla

300g pkg frozen cranberries
3/4 cup raisins

PREHEAT oven to 375F. Combine flour, bran, baking powder, baking soda, salt, cinnamon, nutmeg and allspice in a large bowl. Whisk eggs lightly then add buttermilk, sugar, oil, molasses and vanilla, whisk lightly again. Add flour mixture and stir until just mixed – do not overmix. Stir in cranberries and raisins to evenly distribute.

FILL 24 (or more) muffin cups to the rim (I always use paper liners – just so much easier to get out of the pan).

BAKE until a toothpick inserted in middle comes out clean, about 15 – 20 minutes. Watch them closely and rotate and alternate muffin tins on racks (mine got a little too brown on the bottoms because I didn’t rotate them).

Remove from pans and place on cooling racks. If you like, melt some butter, dip each muffin in it and then in a sugar cinnamon mix – yumminess!

NOTES: I used fresh cranberries, chopped

Filed Under: Muffins

Buttermilk, cheddar, cornmeal scones

December 16, 2011 by Barb 13 Comments

When I’m hosting Christmas and cooking THE BIG MEAL, I sometimes forget that people – adults and children – still need a lunch! This is where I have trouble.

My appetite dictates that I can go from breakfast to dinner with a tiny little snack in between (OK, I admit – it’s the popcorn, chocolates and slices that put a damper on my appetite . . .)

Anyhoo, to get ahead of the game this year I’ve put a plan in place. I made these savoury scones to serve with a bowl of soup. They are in the freezer right now and all I have to do is take them out, put them on a cookie sheet and re-heat. Instant, homemade, tasty, and satisfying. Hmmmm, now what soup am I going to serve . . .

Cheddar-Cornmeal-Scones

Print
Buttermilk, cheddar, cornmeal scones
 
Ingredients
  • 1 3/4 cups flour
  • 1 Tbsp baking powder
  • 1 Tbsp granulated sugar
  • 3/4 tsp salt
  • 1/4 cup cold butter, cut into cubes
  • 1 cup grated old cheddar
  • 1/2 cup diced ham
  • 2 green onions, sliced
  • 3/4 cup buttermilk
  • 1/4 cup cornmeal
  • 1 egg
  • 1 Tbsp buttermilk for bushing
  • 2 Tbsp cornmeal for dusting
Instructions
  1. Preheat oven to 400F
  2. Combine flour with baking powder, sugar and salt in a large bowl. Using a fork or a pastry blender, work in butter until flour mixture is crumbly.
  3. Stir in cheese, ham and onions.
  4. Combine 3/4 cup buttermilk and 1/4 cup cornmeal, add egg, whisk lightly.
  5. Pour into flour mixture. Using a wooden spoon, stir until just combined. Gently gather into a ball. Slice into 2 equal-sized portions.
  6. Sprinkle remaining 2 Tbsp cornmeal on counter, or a board. Place 1 portion of dough on top and gently pat into a 6 in circle. Cut into 6 wedges.
  7. Repeat with remaining dough, pressing into remaining cornmeal on counter before cutting.
  8. Place wedges on baking sheet at least 1 in apart, brush lightly with buttermilk. Bake in centre of oven until lightly golden 14 - 16 min.
  9. Makes 12 scones.
  10. NOTES: I used back bacon instead of ham and added some rosemary to one half of the batch because I love it!
  11. *Recipe from Chatelaine Holiday 100 + best recipes
3.2.2124


Filed Under: FOOD

Handmade gifts – baked caramel popcorn

November 24, 2011 by Barb 29 Comments

This baked caramel popcorn was a recipe from my Mom. She loved her sweets and Christmas was a veritable sugar feast for her.

I make it now but I usually regret it because I eat far, far too much of it. I just have to remember to brush my teeth 5 times a day . . . anyway, I like to package it up in cellophane bags and give it as gifts (evil, I know).

Baked Caramel Popcorn, Keeping With The Times

Print
Baked Caramel Popcorn
 
Ingredients
  • 1 cup butter
  • 2 cups brown sugar
  • 1/2 cup corn syrup
  • 1/2 tsp salt
  • 1/2 tsp baking soda
  • 1 tsp vanilla
  • 6 quarts (24 cups) popped corn
Instructions
  1. Melt butter, stir in brown sugar, syrup and salt.
  2. Heat to boiling stirring constantly. When it comes to a boil stop stirring and let boil for 4 - 5 minutes (watch it close).
  3. Remove from heat and stir in soda and vanilla.
  4. Pour over corn, turn out onto cookie sheets and bake at 250 degrees for one hour stirring every 15 minutes.
3.2.2158

Enjoy! but make sure you give at least half of it away!

Filed Under: Snacks Tagged With: popcorn, sweet

Nuts and bolts – with a twist!

November 16, 2011 by Barb 27 Comments

I have been making Nuts and Bolts at Christmas forevah! and I still use my Mom’s original recipe with just a few different cereals.

However, this year I made it with a twist . . . hmmmm, an accidental twist. I bought the wrong Cheerios! Blasphemous! I thought multi grain Cheerios meant ordinary whole grain . . . not sweet!

Imagine my horror after mixing up all the cereals together when I popped a Cheerio in my mouth and it was sweet! Oh No! What to do? I certainly wasn’t going to pick out every single Cheerio and start over.

The only thing to do was to go with it . . . and make another regular batch later.

Well, I have to tell you – it turned out to be delicious – sweet and salty – yeeeummmy! Really, truly. The Cheerios are the best part in my opinion and I always pick them out and eat them before anyone else gets a chance.

I have eaten nuts and bolts for dinner, and I have eaten them for lunch, and now that they are sweet I may be eating them for breakfast . . . gotta get a spoon . . .

20111116_6670-copy
They also make a great little gift to take when you are out and about visiting family and friends at Christmas. I put some in cellophane bags (available at most craft/baking stores) and stapled them shut with a piece of pretty scrapbook paper.

Nuts and Bolts Snacks

A homemade gift at the ready!

Print
Nuts and bolts - with a twist!
 
Ingredients
  • 2 lbs salted mixed nuts
  • 345 gram box Life Brand cereal
  • 280 gram box Cheerios (original or multi grain - they're both delicious) (insert smile)
  • 180 gram box Crispix
  • 140 gram box pretzels
  • 2 cups salad oil
  • 2 Tbsp Worcestershire Sauce
  • 1 Tbsp garlic powder
  • 1 Tbsp Lawry’s Seasoned Salt
Instructions
  1. Mix all cereals, nuts, and pretzels in large roaster (should just about fill it up).
  2. Whirl oil, sauce and salts in a blender.
  3. Drizzle over cereal and bake in a slow oven - 250 degrees for 2 hours turning and stirring every 15 minutes.
3.2.2158


Filed Under: Appetizers Tagged With: savoury

From tree to table

September 22, 2011 by Barb 23 Comments

chokecherry jelly on toast . . . such a simple thing . . .
. . . four hours picking . . .
. . . cleaning and sorting . . .
. . . yummy bokeh . . .
 . . . four hours cooking and preserving . . .
. . . well, maybe not so simple . . . but definitely worth it . . .
.
Chokecherry Jelly

Juice
12 cups chokecherries
3 cups water

Bring to a boil, reduce heat and simmer 15 – 20 minutes. Mash with potato masher. Strain through cheesecloth.

Jelly

Combine:
3 cups chokecherry juice
6 1/2 cups sugar

Bring to a full rolling boil – one that cannot be stirred down. Boil hard for one minute. Remove from heat and add:

2 pouches liquid Certo, stir and skim off any foam.

Pour into sterilized jars and and immediately seal with lids sterilized in boiling water, place metal ring over top and tighten lightly. The middle of the lid should quickly ‘pop’ down for a perfect seal. If not, store in refrigerator.


Filed Under: FOOD, Preserves

« Previous Page
Next Page »

Welcome! I'm Barb, and this is where I practice my mantra to "learn something new, try something different". It's my hope that something I do here may inspire you! Read More…

Categories

Archives

Copyright 2020 * Keeping with the Times * All rights reserved.