Keeping With The Times

living, learning, and keeping with the times

  • Home
  • About
  • Site Information
  • Privacy Policy

Linzer Cookies for Valentines

January 29, 2015 by Barb 15 Comments

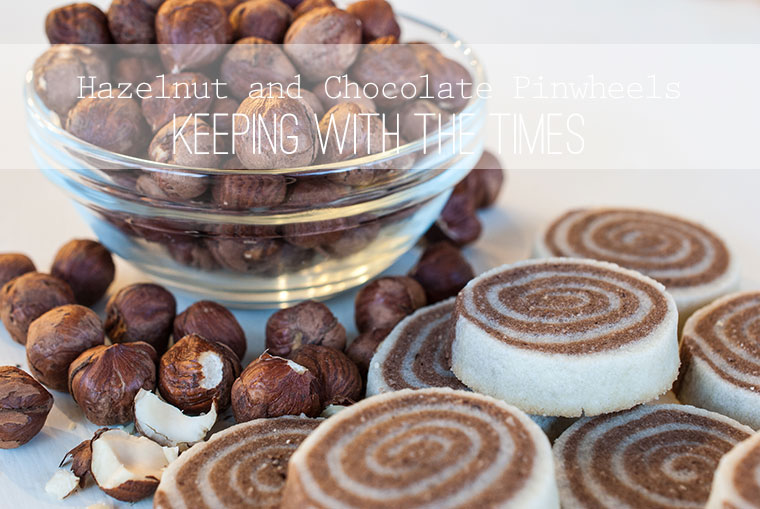
Linzer cookies are something I hadn’t tried baking until late last year when I made my Hazelnut Star Cookies for Christmas. I have to tell you – they are so fun to make … and eat for that matter.

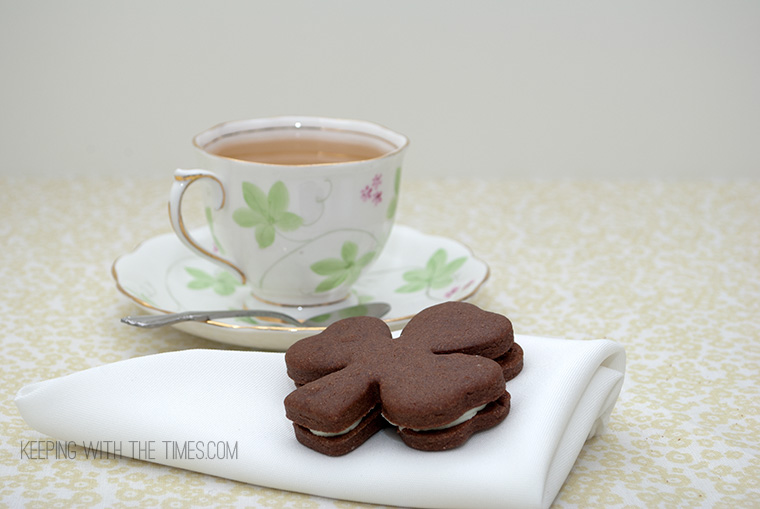
These cookies look innocent enough, but this yummy chocolate version with a Nutella filling scored a 10 at our house! A Nutella and chocolate cookie lovers dream!

Linzer Cookies, Valentines, Chocolate Hearts, Keeping With the Times dot com

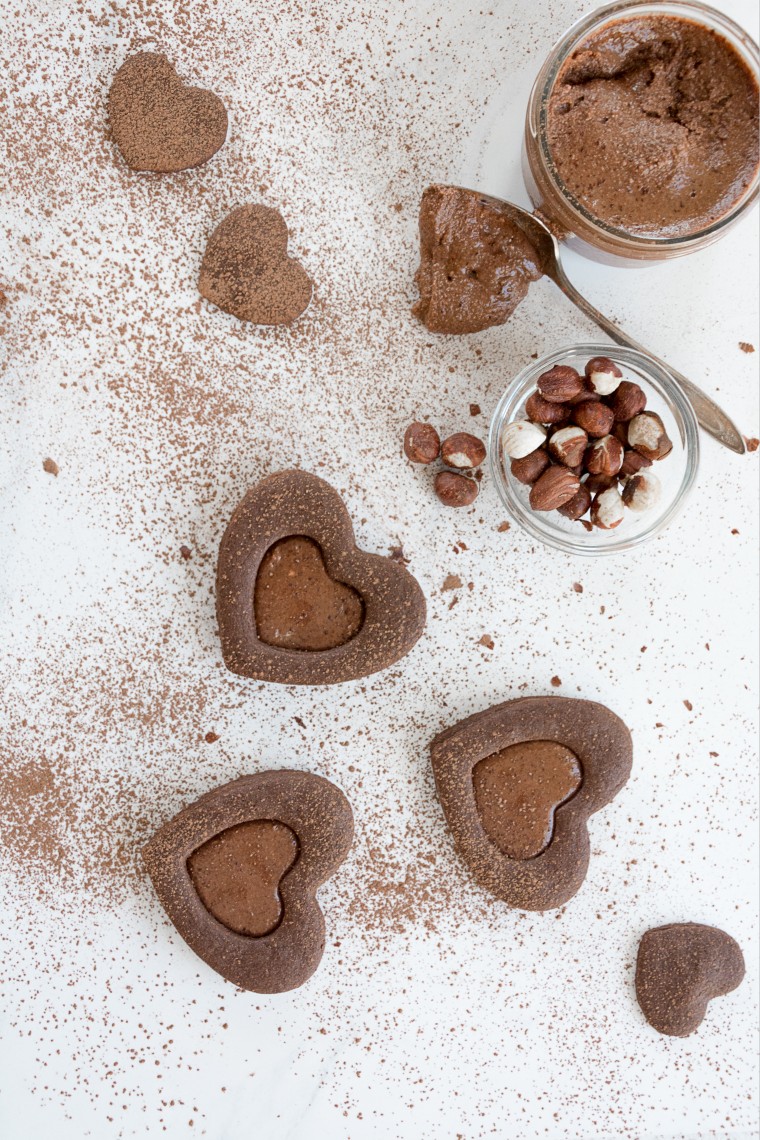
On the day I made these cookies, I didn’t have any Nutella in the house … so I made my own using chocolate, hazelnuts, cream, etc … but I would recommend buying the Nutella since I think the texture would be better. Although, I mean … my home-made version was absolutely delicious … and no one was complaining that’s for sure (especially not me since I was eating it out of the jar). I can’t remember where I got the Nutella recipe, but you could search around for one like I did.

Linzer Cookies, Valentines, Chocolate Hearts, Keeping With the Times dot com

Linzer Valentines, Chocolate Hearts, Keeping With the Times dot com

Linzer Cookies, Valentines, Chocolate Hearts, Keeping With the Times dot com

Linzer Valentines, Chocolate Hearts, Keeping With the Times dot com

Linzer Cookies, Valentines, Keeping With the Times

So here’s the long awaited recipe! I found it at The Smitten Kitchen quite a few years ago and it’s the perfect recipe for rolled and cut out cookies since it really holds its shape when baked. Enjoy!

Print
Linzer Chocolate Nutella Cookies
 
Ingredients
  • 3 cups flour
  • 1/2 teaspoon salt
  • 1/2 teaspoon baking powder
  • 1 cup butter
  • 1 1/2 cups sugar
  • 2 large eggs
  • 1 teaspoon vanilla
  • 2/3 cup unsweetened cocoa
Instructions
  1. Preheat oven at 350 degrees.
  2. Sift flour, salt and baking powder in bowl and set aside.
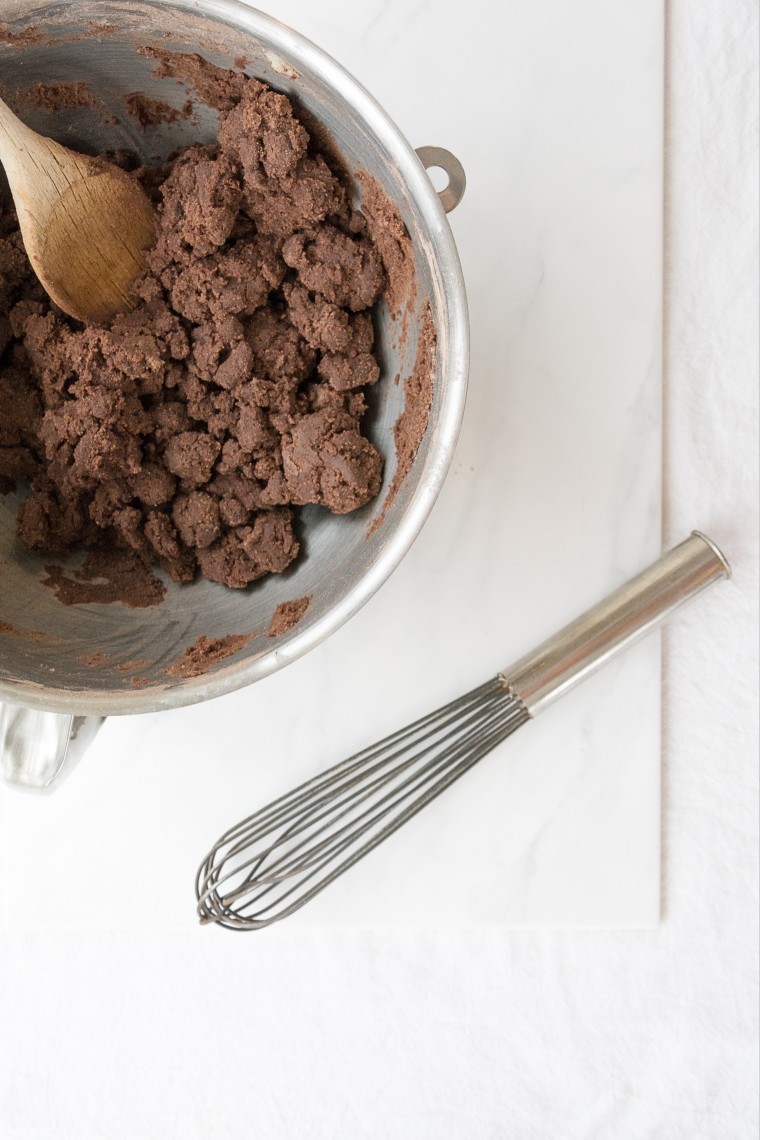
  3. Mix butter, sugar, eggs, vanilla and cocoa in mixer.
  4. Gradually add flour mixture, and mix until smooth.
  5. Wrap in plastic and chill for at least one hour.
  6. Roll out cookie dough on floured counter. Cut into desired shapes.
  7. Bake for 8 to 11 minutes until the edges are firm and the centers are slightly soft and puffed.
Notes
Recipe from The Smitten Kitchen
3.2.2925

Linzer Cookies, Keeping With the TimesOh, and I’m sending out the link to this word art in my next newsletter!

Chocolate Word Art, Keeping With the Times

Filed Under: Cookies Tagged With: chocolate, cocoa, sweet

Chocolate Truffle Cookies

October 23, 2014 by Barb 8 Comments

I spent the better part of a day baking, photographing, and then eating these decadent Chocolate Truffle Cookies … oh. my. heavens… be sure to put this one on your holiday baking list. They’re like a cross between a truffle and a snowball; totally down my alley.

But now the kitchen in an epic mess, I need to have shower to get all the cocoa off me, and I think I’ve gained 5 pounds. Egads, I feel like I’ve been up to no good.

Don’t let all that put you off. If you don’t want to eat them all, you could package them into little containers and give as gifts … (ahem) that’s if you don’t want to eat them all …chocolate truffle cookies

Photographic ingredients: chocolate, brown paper, and one kitchen utensil.

chocolate truffle cookies

chocolate truffle cookies

kk_darklight

So here’s the recipe for you. Please, throw caution to the wind and try making these. I don’t think you will regret it!

Print
Chocolate Truffle Cookies
 
Ingredients
  • 1 cup butter, softened
  • 1/2 cup icing sugar
  • 1 1/2 teaspoon vanilla
  • 1 oz. square unsweetened chocolate, melted
  • 2 1/4 cups flour
  • 1/4 tsp salt
  • 1 cup semi-sweet chocolate chips
  • Coating
  • 1/4 cup icing sugar
  • 2 Tbsp cocoa
Instructions
  1. Preheat oven to 375F.
  2. In a large bowl, cream butter and 1/2 cup icing sugar.
  3. Blend in vanilla and melted chocolate.
  4. At low speed, blend in flour and salt.
  5. Stir in chocolate chips.
  6. Shape into 1 inch balls and place on cookie sheet.
  7. Bake for 10 minutes and let cool.
  8. In a small bowl, combine icing sugar and cocoa, roll cooled cookies in cocoa mixture.
  9. Store in an airtight container.
Notes
*Recipe from The Best of Bridge
3.2.2807

… now I’m going out for a very long walk.

Filed Under: Cookies Tagged With: chocolate, cocoa, sweet

Hazelnut and Chocolate Pinwheels

November 28, 2012 by Barb 29 Comments

I always admired the pinwheel cookies that other people made but never considered trying it myself. I thought it was just too much work. But wait a minute… I’m the person who has made hundreds of perogies, cabbage rolls and pyrizhky and I can tell you it doesn’t get any pickier than that.

These do take a bit of patience but the satisfaction of having these pretty little delicacies is so worth it! Just take your time and don’t give up if the first ones aren’t perfect… they taste as delicious and because you won’t want to display them on your Christmas cookie plate, you’ll just have to eat them…

hazelnut, chocolate, cookies, pinwheels

Print
Hazelnut and Chocolate Pinwheels
 
Ingredients
  • 1 cup unsalted butter
  • 3/4 cup sugar
  • 1 egg
  • 1 1/2 tsp vanilla
  • 2 1/2 cups flour
  • 1/8 tsp salt
  • 1/3 cup toasted ground hazelnuts*
  • 2 Tbsp cocoa powder
Instructions
  1. Cream together the butter and sugar until fluffy. Add egg and vanilla and blend well.
  2. Sift flour with salt and add to the butter mixture--blend well.
  3. Divide dough into two balls - making one ball about 1/3 cup smaller.
  4. Mix the hazelnuts with the cocoa and add to the smallest ball of dough. Return to mixer and blend well.
  5. Divide the white dough and form into two flat rectangular shapes about 8 inches long. Divide chocolate dough and form into two flat rectangular shapes about 8 inches long. Wrap in plastic film and chill for 30 minutes.
  6. Roll out one piece of the white dough to about a 10 x 8 inch rectangle (rolling it on parchment paper will help to lift it off the counter). Repeat with one chocolate piece.
  7. Place one piece of rolled out chocolate dough on top of one white one. With a piece of parchment paper on top, roll gently over the top with a rolling pin to help stick the two pieces of dough together.
  8. Start from the 10 inch edge and roll tightly into a 2 inch diameter log and chill again for 30 minutes.
  9. Slice into 1/4 inch slices, place on cookie sheet and bake at 375 degrees for 8 - 10 minutes.
Notes
*Toasting hazelnuts adds a richer, nuttier flavour. Spread nuts out on a cookie sheet and toast in the oven at 250 degrees for 10 - 15 minutes--stirring several times. Let cool and then grind.
3.2.2124


Enjoy!

Filed Under: Cookies Tagged With: chocolate, cocoa, sweet

Brownie Cookies and Peppermint Icing

March 2, 2012 by Barb 26 Comments

I can’t even tell you how delicious these cookies are.

I had frozen some dough that was left over from the Brownie Cookies that I made for Valentine’s Day (from the Smitten Kitchen) and it has been calling me from the freezer ever since.

So today I pulled it out, defrosted it, and rolled it out.

I kept thinking shamrocks, and green, and hmmmm, brownies and hmmmmm . . .  peppermint icing!

Brownie-Peppermint-Cookies

Egad, I almost made myself sick on the icing alone!

It’s just the usual butter icing – 2 cups icing sugar, 4 – 5 Tbsp butter, a splash of milk, a drop of green food colouring and a dash of peppermint flavour. Splash. Drop. Dash. Then I made some green tea to serve as a bit of a tonic to my sugar overdose and I had myself a simply divine teatime all by myself. No regrets.

Print
Brownie Cookies
 
Ingredients
  • 3 cups all-purpose flour
  • 2/3 cup unsweetened cocoa powder
  • 1/2 teaspoon salt
  • 1/2 teaspoon baking powder
  • 1 cup butter
  • 1 1/2 cups sugar
  • 2 large eggs
  • 1 teaspoon vanilla extract
Instructions
  1. Preheat oven to 350 degrees.
  2. Sift flour, cocoa, salt and baking powder together and set aside. Mix butter, sugar, eggs, vanilla in mixer. Gradually add flour mixture, and mix until smooth.
  3. Form into two discs, wrap in plastic and chill for at least one hour.
  4. Roll out cookie dough on counter – I use a bit of cocoa to dust on the surface to keep the dough from sticking. Cut into desired shapes – of course I used hearts for Valentine's Day and Shamrocks for St. Patrick's Day!
  5. Bake on cookie sheets for 8 to 11 minutes until the edges are firm and the centres are slightly soft and puffed. Transfer to a wire rack to cool.
Notes
Recipe from the Smitten Kitchen
3.2.1682


Filed Under: Cookies Tagged With: cocoa, peppermint

Welcome! I'm Barb, and this is where I practice my mantra to "learn something new, try something different". It's my hope that something I do here may inspire you! Read More…

Categories

Archives

Copyright 2020 * Keeping with the Times * All rights reserved.