Keeping With The Times

living, learning, and keeping with the times

  • Home
  • About
  • Site Information
  • Privacy Policy

Cream Cheese and Hazelnut Cookies

December 11, 2017 by Barb 13 Comments

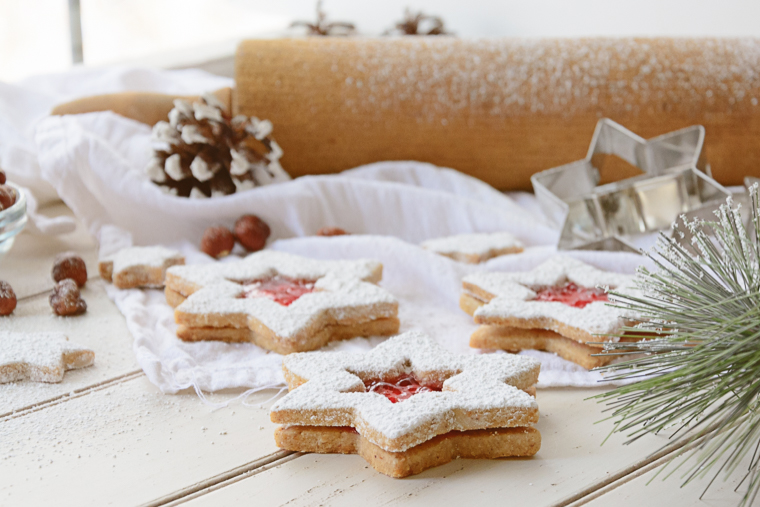
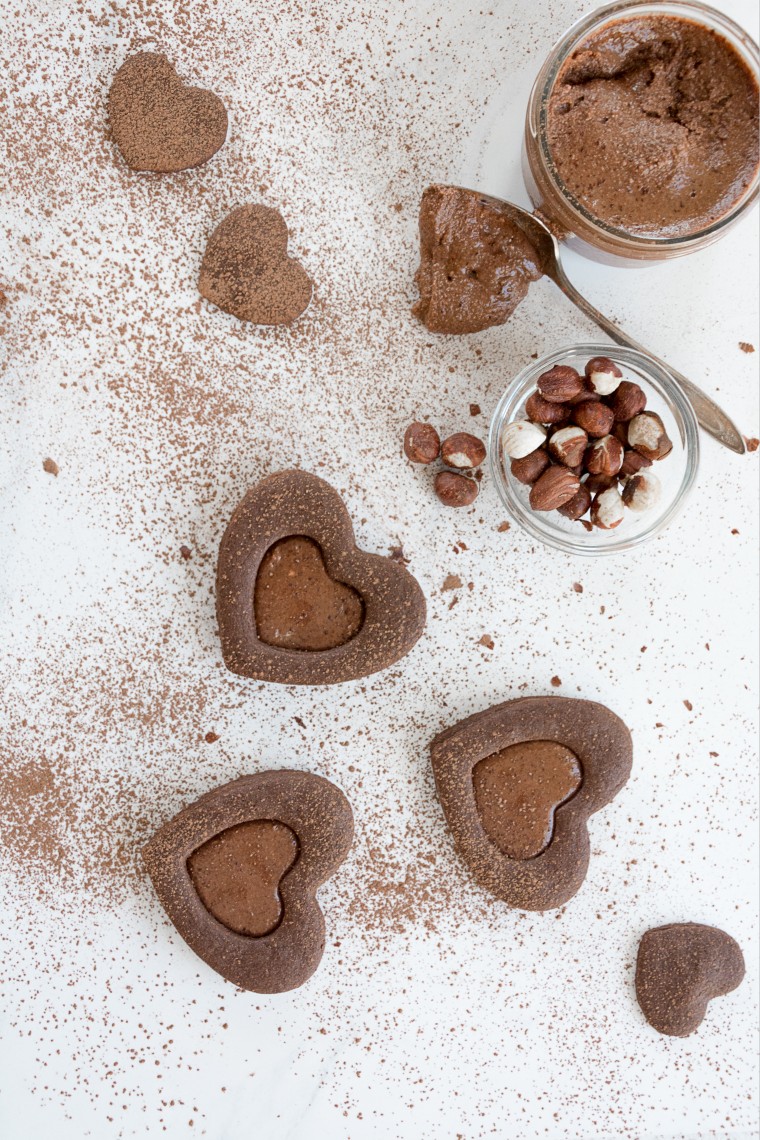
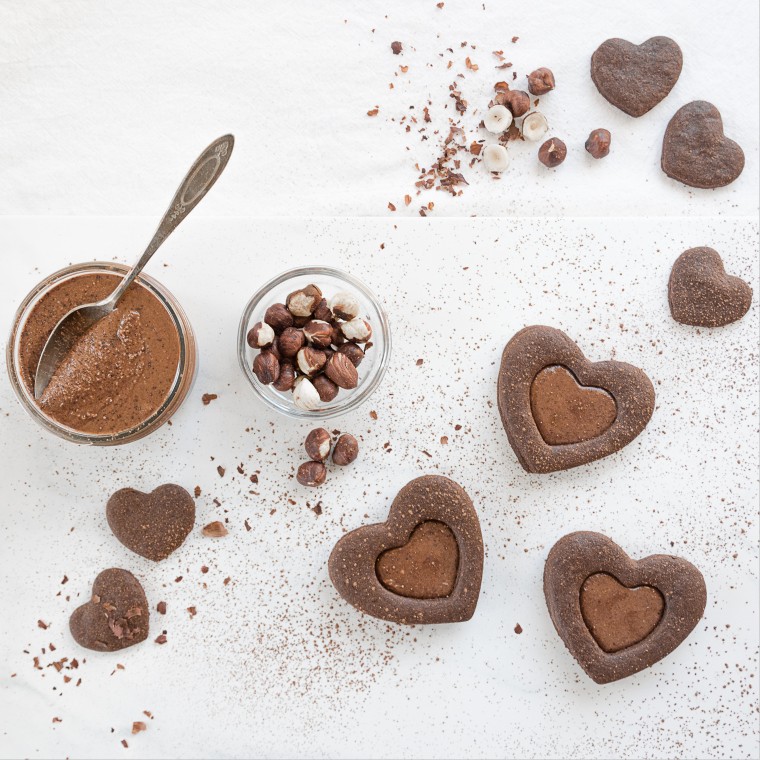
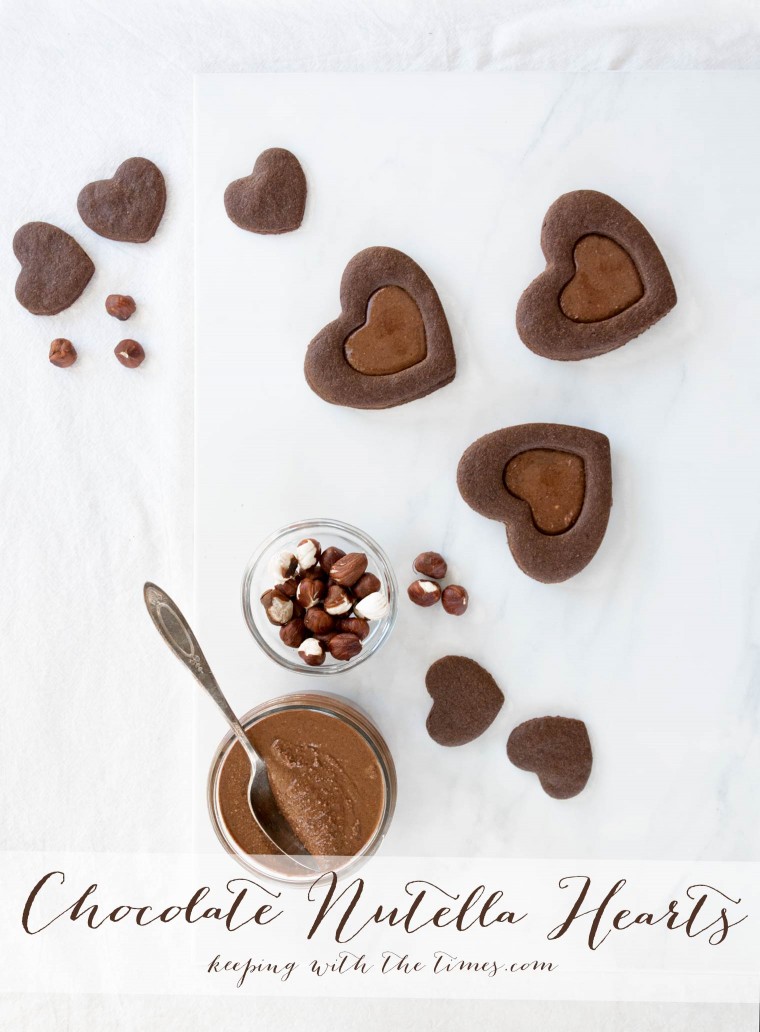
Cream cheese and hazelnut cookies people! Need I say more?

PLUS!! I dipped them in melted chocolate and AGAIN in hazelnuts. OMGoodness.

All I can say is ’tis the season (and maybe if you get out for that daily walk it won’t seem so … so … scandalous ;)

Cream Cheese and Hazelnut Cookies

Cream Cheese Hazelnut Chocolate Dipped Cookies

Print
Cream Cheese and Hazelnut Cookies
 
Ingredients
  • 4 cups all-purpose flour
  • 1 tsp salt
  • 1 pound butter, softened
  • 6 oz cream cheese, softened
  • 1 1/4 cups sugar
  • 2 Tbsp plus 1/2 tsp vanilla
  • 1 1/2 cups hazelnuts, toasted and chopped fine
  • 1 cup hazelnuts, chopped very fine (to roll logs in)
Instructions
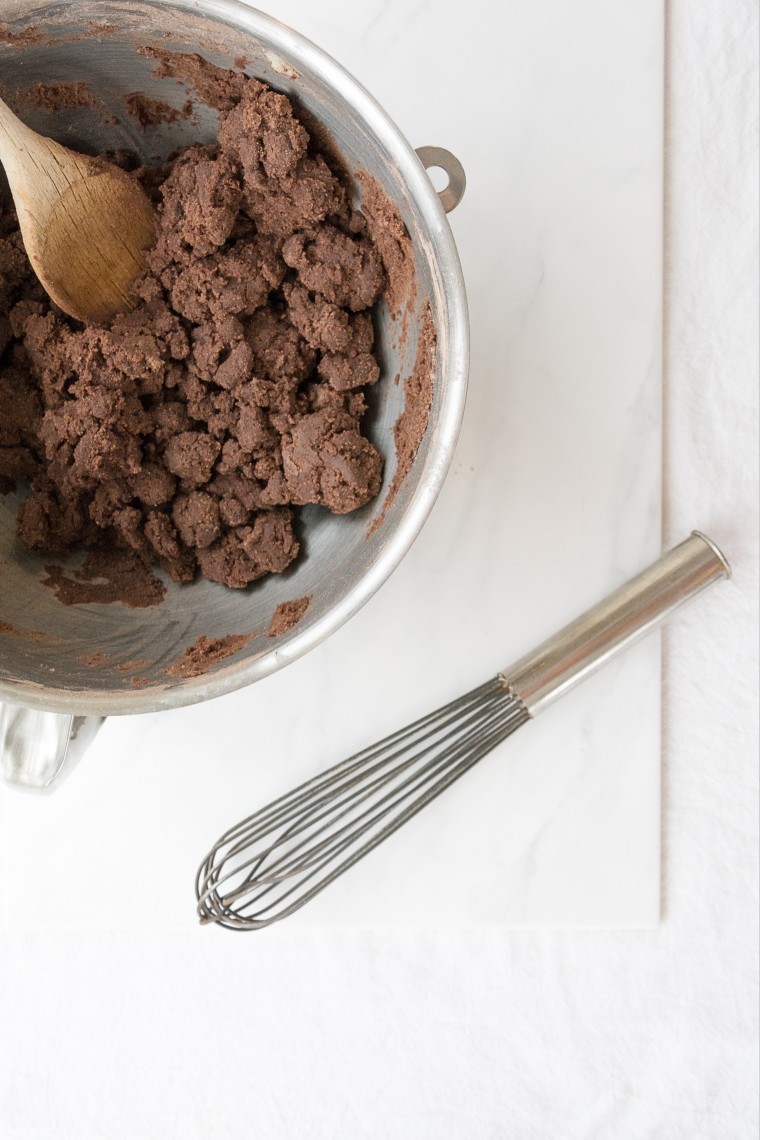
  1. Sift together flour and salt. Cream butter and cream cheese on medium until pale and fluffy, about 2 minutes. Mix in sugar and vanilla. Reduce speed to low and add flour mixture. Mix until just combined (do not over mix). Mix in toasted hazelnuts.
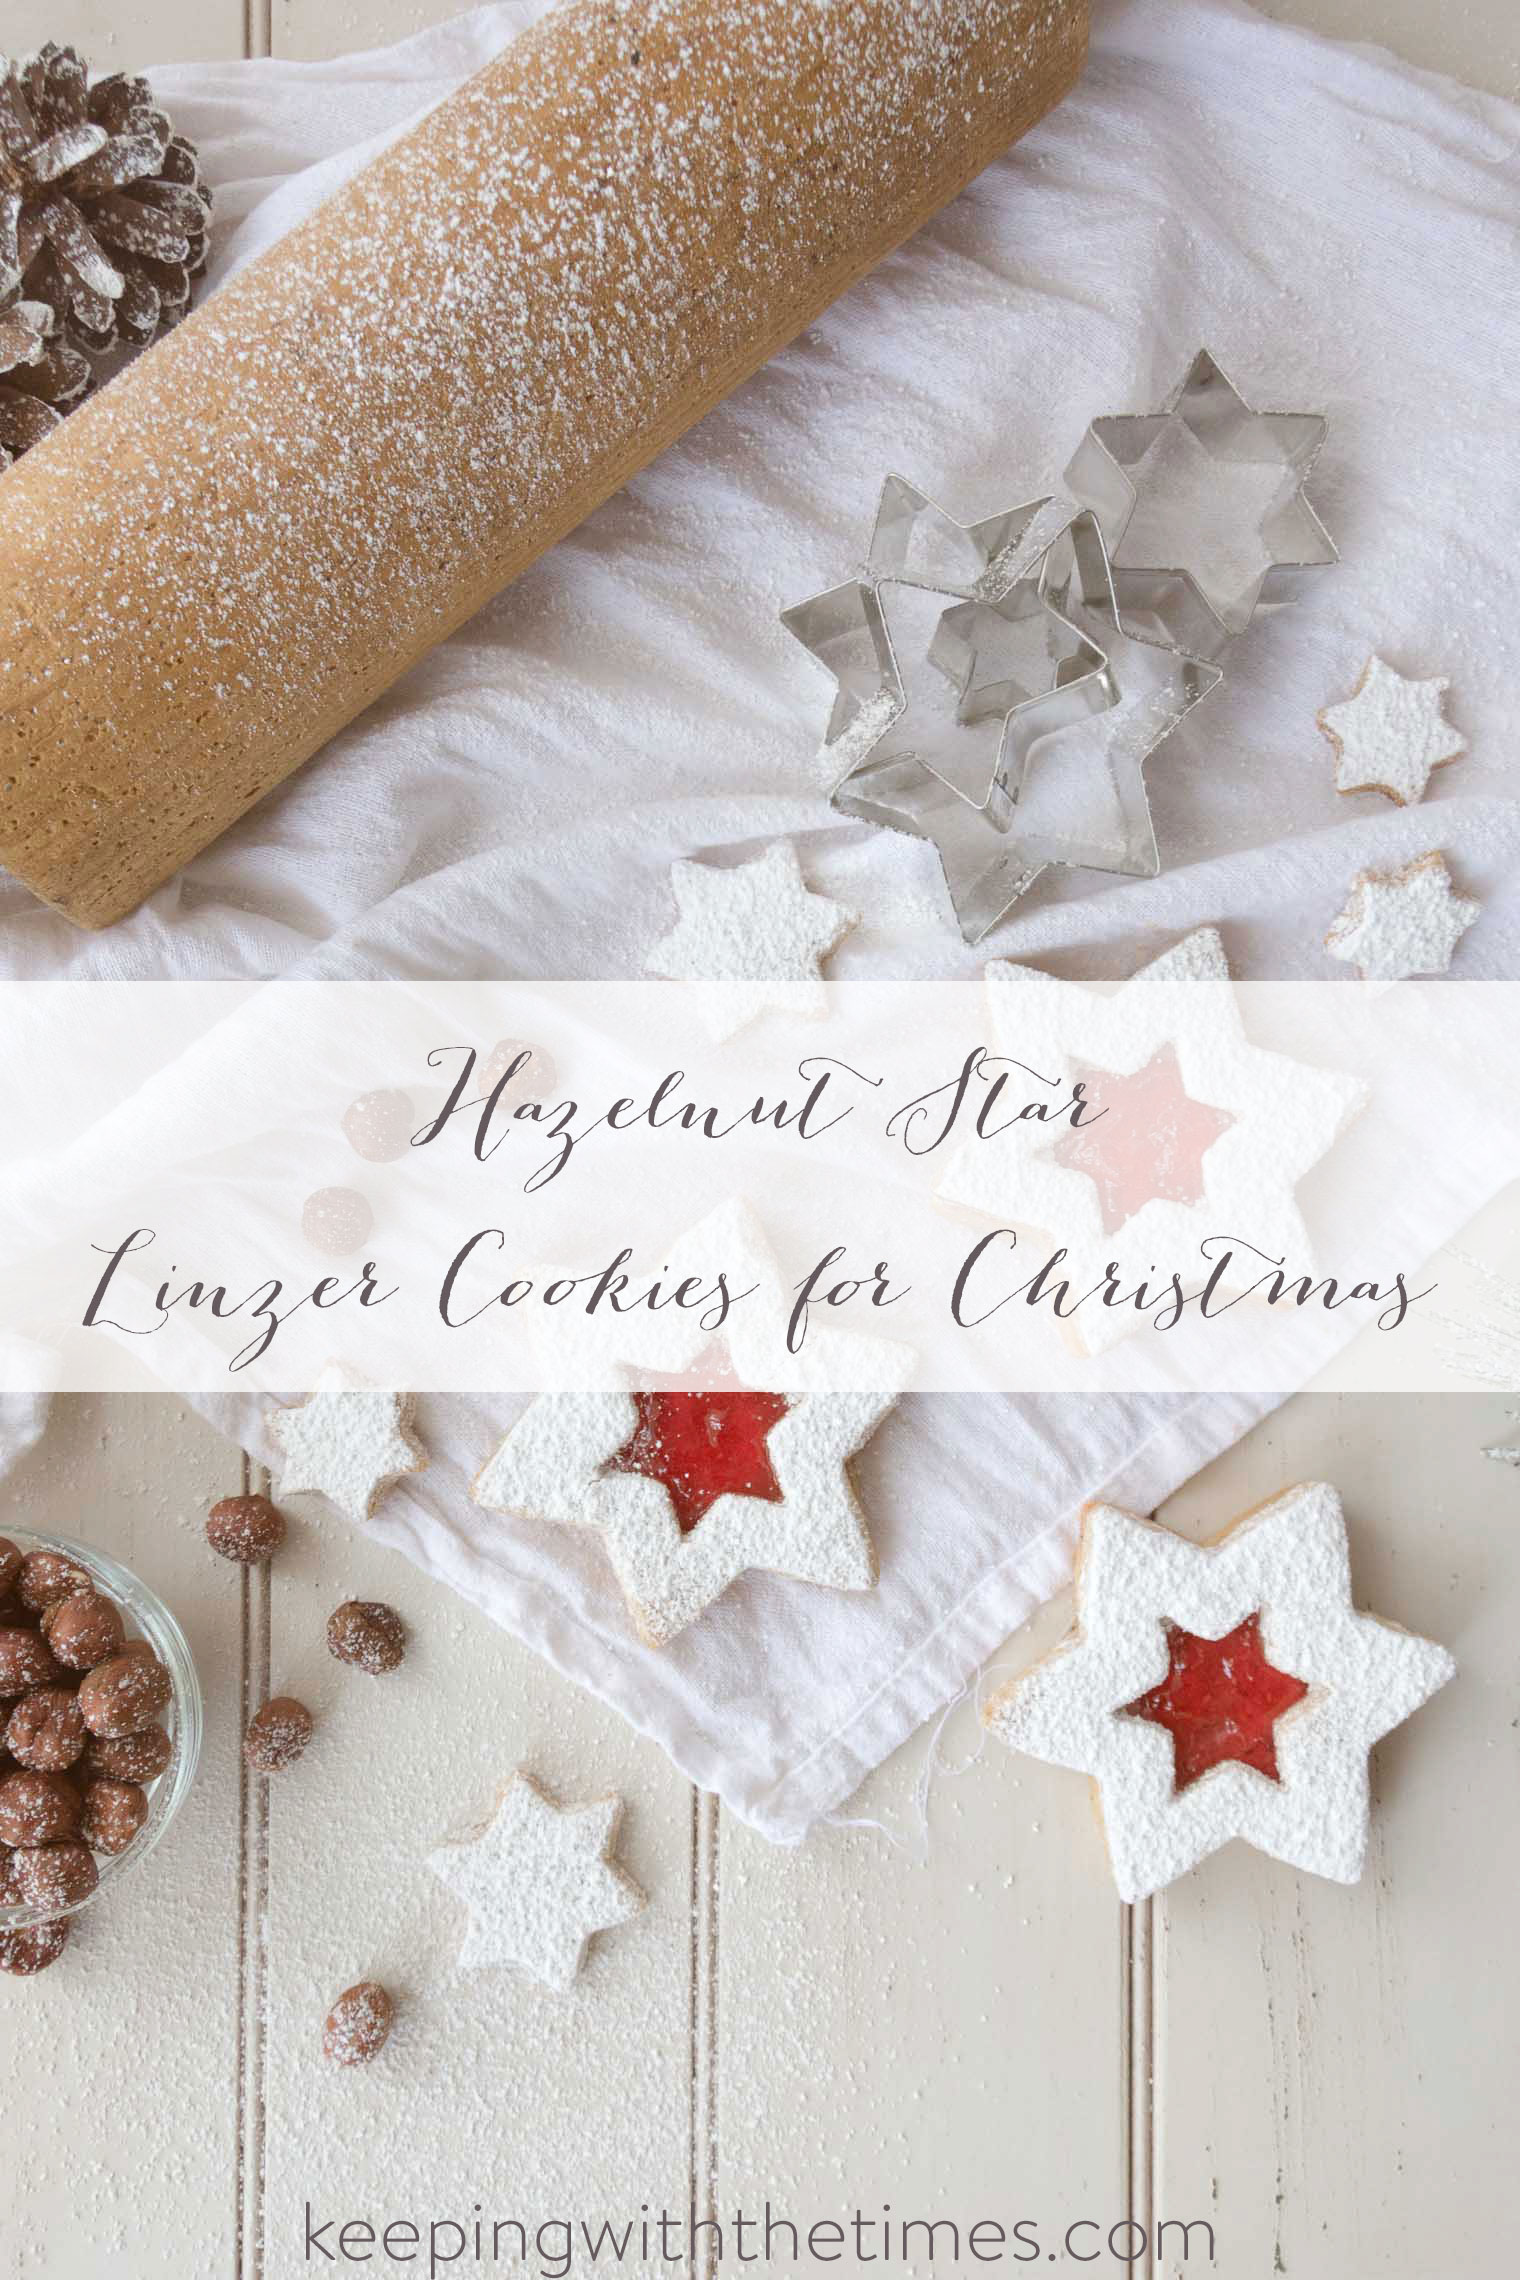
  2. Divide dough into two equal amounts and shape each piece into an 8 1/2 inch long log (about 2 inches in diameter). Roll each log in 1/2 cup finely chopped hazelnuts.Wrap each log in parchment and freeze until firm, about 30 minutes.
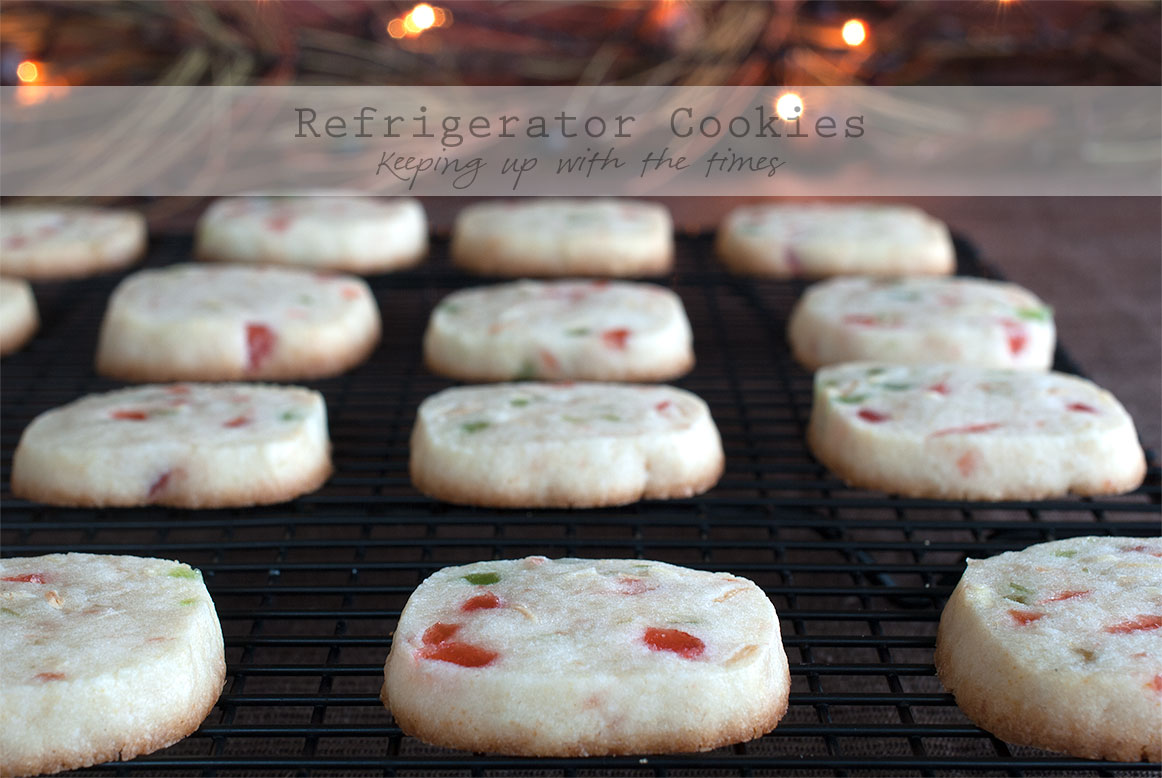
  3. Preheat oven to 350 degrees with racks in upper and lower thirds. Remove one log from freezer. Cut log into 1/4 inch thick rounds. Transfer to baking sheets.
  4. Bake, switching positions of sheets and rotating halfway through, until cookies are golden around the edges, 18 - 20 minutes. Transfer to wire racks; let cool. Repeat the process with remaining dough using cooled cookie sheets.
Notes
Recipe adapted from Martha Stewart
3.2.1682

Filed Under: Cookies Tagged With: cream cheese, hazelnuts, sweet

5 Christmas Cookie Recipes You’ll Love

December 7, 2016 by Barb 1 Comment

Today I have a roundup of  Christmas cookie recipes that, in the last few years, have become family favourites around here.

First up are these beautiful Hazelnut Star Cookies. This is the third year I’ve made them and they are irresistible:

Christmas Cookie Recipes, Keeping With the Times
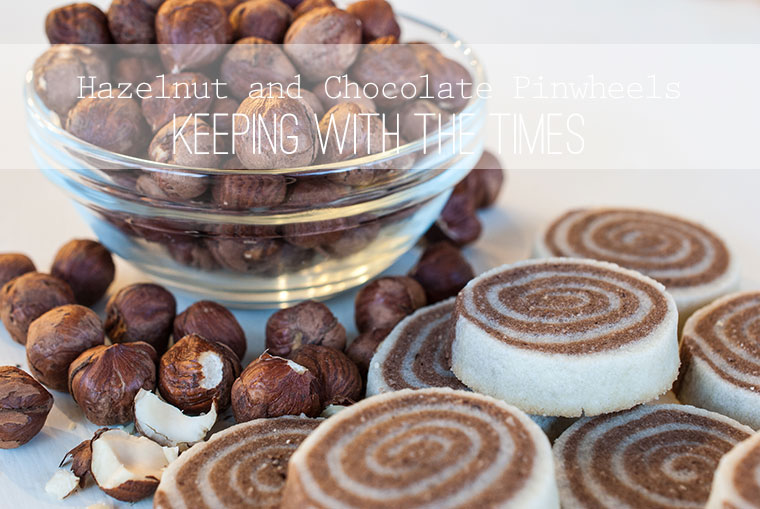
I think I must be a real fan of hazelnuts because 3 out of 5 Christmas cookies polled have hazelnuts :)

Cream Cheese and Hazelnut Cookies
Hazelnut and Chocolate Pinwheels
Chocolate Truffle Cookies

Oh ha! I don’t have five cookie recipes! but I do have a Naked Cake with Peppermint Bark and Mascarpone Buttercream (please don’t hate me ;)


Filed Under: Cookies Tagged With: hazelnuts, sweet

Linzer Cookies for Valentines

January 29, 2015 by Barb 15 Comments

Linzer cookies are something I hadn’t tried baking until late last year when I made my Hazelnut Star Cookies for Christmas. I have to tell you – they are so fun to make … and eat for that matter.

These cookies look innocent enough, but this yummy chocolate version with a Nutella filling scored a 10 at our house! A Nutella and chocolate cookie lovers dream!

Linzer Cookies, Valentines, Chocolate Hearts, Keeping With the Times dot com

On the day I made these cookies, I didn’t have any Nutella in the house … so I made my own using chocolate, hazelnuts, cream, etc … but I would recommend buying the Nutella since I think the texture would be better. Although, I mean … my home-made version was absolutely delicious … and no one was complaining that’s for sure (especially not me since I was eating it out of the jar). I can’t remember where I got the Nutella recipe, but you could search around for one like I did.

Linzer Cookies, Valentines, Chocolate Hearts, Keeping With the Times dot com

Linzer Valentines, Chocolate Hearts, Keeping With the Times dot com

Linzer Cookies, Valentines, Chocolate Hearts, Keeping With the Times dot com

Linzer Valentines, Chocolate Hearts, Keeping With the Times dot com

Linzer Cookies, Valentines, Keeping With the Times

So here’s the long awaited recipe! I found it at The Smitten Kitchen quite a few years ago and it’s the perfect recipe for rolled and cut out cookies since it really holds its shape when baked. Enjoy!

Print
Linzer Chocolate Nutella Cookies
 
Ingredients
  • 3 cups flour
  • 1/2 teaspoon salt
  • 1/2 teaspoon baking powder
  • 1 cup butter
  • 1 1/2 cups sugar
  • 2 large eggs
  • 1 teaspoon vanilla
  • 2/3 cup unsweetened cocoa
Instructions
  1. Preheat oven at 350 degrees.
  2. Sift flour, salt and baking powder in bowl and set aside.
  3. Mix butter, sugar, eggs, vanilla and cocoa in mixer.
  4. Gradually add flour mixture, and mix until smooth.
  5. Wrap in plastic and chill for at least one hour.
  6. Roll out cookie dough on floured counter. Cut into desired shapes.
  7. Bake for 8 to 11 minutes until the edges are firm and the centers are slightly soft and puffed.
Notes
Recipe from The Smitten Kitchen
3.2.2925

Linzer Cookies, Keeping With the Times
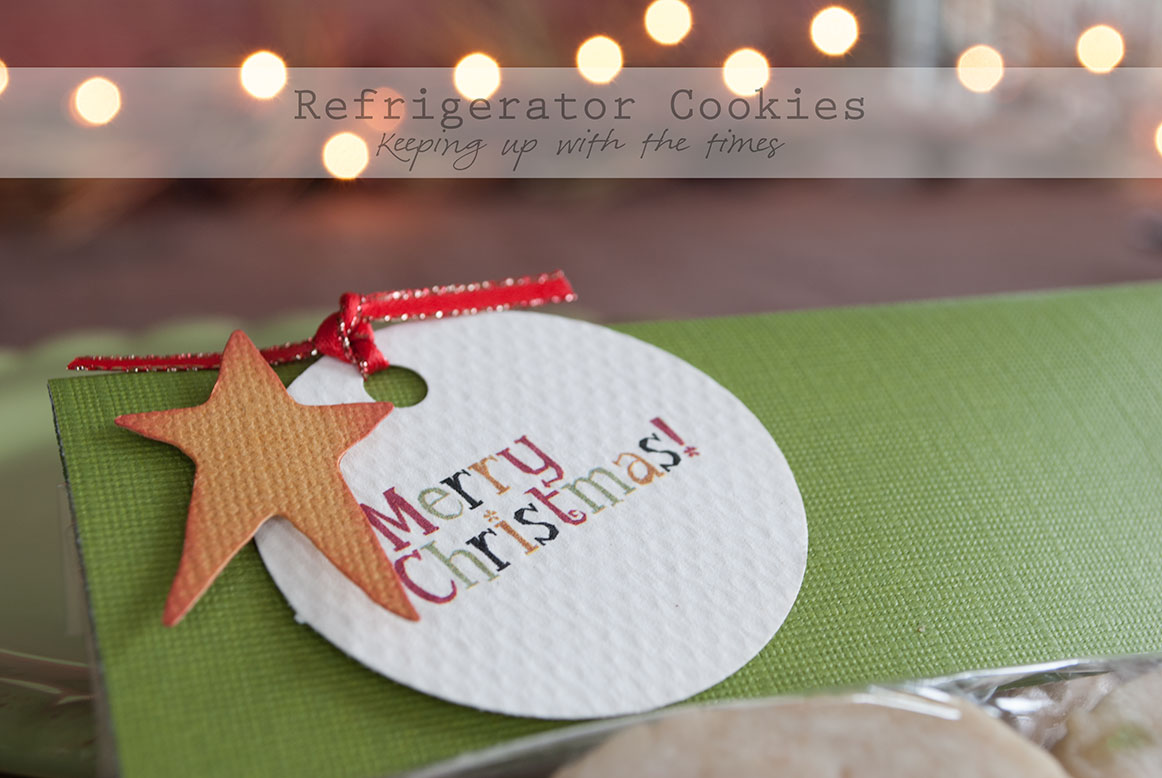
Oh, and I’m sending out the link to this word art in my next newsletter!

Chocolate Word Art, Keeping With the Times

Filed Under: Cookies Tagged With: chocolate, cocoa, sweet

Hazelnut Star Cookies

December 10, 2014 by Barb 13 Comments

I found that these tasty, crispy-tender hazelnut star cookies needed to “set” a bit after being put together with the jam (even overnight). So this morning when I was having coffee … oh my, well you get the idea …

Hazelnut Star Cookies, Keeping With the Times

Hazelnut Star Cookies, Keeping With the Times

Hazelnut Star Cookies, Keeping With the Times

Hazelnut Star Cookies, Keeping With the Times

Print
Hazelnut Star Cookies
 
Ingredients
  • 2 1/2 cups all-purpose flour
  • 3/4 cup granulated sugar
  • 3/4 teaspoon baking powder
  • 1/2 teaspoon salt
  • 1/2 teaspoon cinnamon
  • 1 cup hazelnuts, toasted
  • 1 cup butter, room temperature
  • 3 large egg yolks
  • 2 teaspoons pure vanilla extract
  • Icing sugar for dusting
  • Filling of your choice. I used the crabapple jelly I made this summer.
Instructions
  1. Sift together flour, sugar, baking powder, salt, and cinnamon.
  2. In a food processor, pulse the hazelnuts with 1/4 cup of the flour mixture until fine. Add remaining flour mixture and pulse, then add the butter, and pulse once again to combine into coarse crumbs.*
  3. Place in a bowl and use a fork to blend in egg yolks and vanilla until the dough comes together.**
  4. Shape into two disks, wrap in parchment, and let chill in refrigerator for 30 minutes.
  5. Remove one disk from fridge and roll between two pieces of parchment paper to 1/8 inch thickness. If it's too stiff to roll, let it sit for a few minutes.
  6. Leave the dough on the parchment, and set it on a cookie sheet. Refrigerate for another 30 minutes or more.
  7. Remove from fridge and cut with cookie cutters. Place on another parchment lined cookie sheet and cut out the centres from every second cookie.
  8. Bake for 10 to 12 minutes at 350F.
  9. Remove from oven and let cool.
  10. Dust tops of the star-shaped cookies with icing sugar.
  11. Put filling on bottom cookie, and gently set the star cookie on top. Don't press or it will break.
  12. Let sit for at least a couple of hours or even over night.
Notes
*I don't have a "real" food processor so I used my trusty (vintage) pastry cutter and it worked just fine.**I also found that once the butter and egg were added, I had to (gently) knead the dough to get it to come together (very similar to making pie crust).

*recipe adapted from Martha Stewart
3.5.3229

Hazelnut Star Cookies

Hazelnut Star Linzer Cookies, I found that these tasty, crispy-tender treats needed to "set" a bit after being put together with the jam (even overnight). So this morning when I was having coffee ... oh my, well you get the idea ...

Thanks to all for entering the give-away and for subscribing to my newsletter!

SaveSave

SaveSave

SaveSave

SaveSave

Filed Under: Cookies Tagged With: hazelnuts, sweet

Chocolate Truffle Cookies

October 23, 2014 by Barb 8 Comments

I spent the better part of a day baking, photographing, and then eating these decadent Chocolate Truffle Cookies … oh. my. heavens… be sure to put this one on your holiday baking list. They’re like a cross between a truffle and a snowball; totally down my alley.

But now the kitchen in an epic mess, I need to have shower to get all the cocoa off me, and I think I’ve gained 5 pounds. Egads, I feel like I’ve been up to no good.

Don’t let all that put you off. If you don’t want to eat them all, you could package them into little containers and give as gifts … (ahem) that’s if you don’t want to eat them all …chocolate truffle cookies

Photographic ingredients: chocolate, brown paper, and one kitchen utensil.

chocolate truffle cookies

chocolate truffle cookies

kk_darklight

So here’s the recipe for you. Please, throw caution to the wind and try making these. I don’t think you will regret it!

Print
Chocolate Truffle Cookies
 
Ingredients
  • 1 cup butter, softened
  • 1/2 cup icing sugar
  • 1 1/2 teaspoon vanilla
  • 1 oz. square unsweetened chocolate, melted
  • 2 1/4 cups flour
  • 1/4 tsp salt
  • 1 cup semi-sweet chocolate chips
  • Coating
  • 1/4 cup icing sugar
  • 2 Tbsp cocoa
Instructions
  1. Preheat oven to 375F.
  2. In a large bowl, cream butter and 1/2 cup icing sugar.
  3. Blend in vanilla and melted chocolate.
  4. At low speed, blend in flour and salt.
  5. Stir in chocolate chips.
  6. Shape into 1 inch balls and place on cookie sheet.
  7. Bake for 10 minutes and let cool.
  8. In a small bowl, combine icing sugar and cocoa, roll cooled cookies in cocoa mixture.
  9. Store in an airtight container.
Notes
*Recipe from The Best of Bridge
3.2.2807

… now I’m going out for a very long walk.

Filed Under: Cookies Tagged With: chocolate, cocoa, sweet

Refrigerator Cookies

December 5, 2012 by Barb 10 Comments

I just love.love.love. refrigerator cookies at Christmas time. Such convenience! Whip up a batch of dough, roll into logs, wrap in parchment paper. You can store the logs in the fridge for a day or two or freeze for a month. Take them out any old time and you can have fresh baked cookies in an instant!

They also make an awesome little hostess gift if you wrap them up in a cellophane bag and add a pretty Christmas topper with a tag.

After countless years of using an old family recipe, I decided to try something new. I couldn’t have been happier with the results. They are buttery, light, and tender with a bit of chewy goodness from the cherries. They are also prettier!! And we all know it’s all about how it looks, right? OK, maybe not, but it’s nice.

I like to bake these cookies just before guests arrive so that the buttery sweet smell fills the house and makes me feel like Mrs. Claus herself…

Print
Refrigerator Cookies
 
Ingredients
  • 1 cup unsalted butter
  • 1 cup white sugar
  • 1 egg
  • 1 1/2 tsp pure vanilla extract
  • 2 2/3 cup flour
  • 1/2 tsp baking powder
  • 1/4 tsp salt
  • 3/4 cup very finely chopped red and green glace cherries
  • 1/2 cup toasted sliced almonds
Instructions
  1. Cream butter, sugar, egg, and vanilla.
  2. Sift together dry ingredients. Add to the butter/sugar mixture. Mix well. Fold in the cherries and almonds.
  3. Divide the dough into thirds, place each on a separate piece of wax or parchment paper. Shape into 7" rectangular logs. Wrap the paper around each one and chill for several hours.
  4. Slice the logs into 1/4" slices and bake at 375 degrees for 8-10 minutes. Watch closely--you don't want to brown the bottoms too much.
Notes
*The uncooked logs can be frozen for one month. When you want to make cookies, remove logs from freezer and let sit for a few minutes to warm up before slicing. *Adapted from The Joy of Baking
3.2.1682


Slice into 1/4 inch slices.
Watch the bottoms so they don’t burn!
Package up for gifts.
Add a pretty homemade tag.

Filed Under: Cookies

Hazelnut and Chocolate Pinwheels

November 28, 2012 by Barb 29 Comments

I always admired the pinwheel cookies that other people made but never considered trying it myself. I thought it was just too much work. But wait a minute… I’m the person who has made hundreds of perogies, cabbage rolls and pyrizhky and I can tell you it doesn’t get any pickier than that.

These do take a bit of patience but the satisfaction of having these pretty little delicacies is so worth it! Just take your time and don’t give up if the first ones aren’t perfect… they taste as delicious and because you won’t want to display them on your Christmas cookie plate, you’ll just have to eat them…

hazelnut, chocolate, cookies, pinwheels

Print
Hazelnut and Chocolate Pinwheels
 
Ingredients
  • 1 cup unsalted butter
  • 3/4 cup sugar
  • 1 egg
  • 1 1/2 tsp vanilla
  • 2 1/2 cups flour
  • 1/8 tsp salt
  • 1/3 cup toasted ground hazelnuts*
  • 2 Tbsp cocoa powder
Instructions
  1. Cream together the butter and sugar until fluffy. Add egg and vanilla and blend well.
  2. Sift flour with salt and add to the butter mixture--blend well.
  3. Divide dough into two balls - making one ball about 1/3 cup smaller.
  4. Mix the hazelnuts with the cocoa and add to the smallest ball of dough. Return to mixer and blend well.
  5. Divide the white dough and form into two flat rectangular shapes about 8 inches long. Divide chocolate dough and form into two flat rectangular shapes about 8 inches long. Wrap in plastic film and chill for 30 minutes.
  6. Roll out one piece of the white dough to about a 10 x 8 inch rectangle (rolling it on parchment paper will help to lift it off the counter). Repeat with one chocolate piece.
  7. Place one piece of rolled out chocolate dough on top of one white one. With a piece of parchment paper on top, roll gently over the top with a rolling pin to help stick the two pieces of dough together.
  8. Start from the 10 inch edge and roll tightly into a 2 inch diameter log and chill again for 30 minutes.
  9. Slice into 1/4 inch slices, place on cookie sheet and bake at 375 degrees for 8 - 10 minutes.
Notes
*Toasting hazelnuts adds a richer, nuttier flavour. Spread nuts out on a cookie sheet and toast in the oven at 250 degrees for 10 - 15 minutes--stirring several times. Let cool and then grind.
3.2.2124


Enjoy!

Filed Under: Cookies Tagged With: chocolate, cocoa, sweet

Brownie Cookies and Peppermint Icing

March 2, 2012 by Barb 26 Comments

I can’t even tell you how delicious these cookies are.

I had frozen some dough that was left over from the Brownie Cookies that I made for Valentine’s Day (from the Smitten Kitchen) and it has been calling me from the freezer ever since.

So today I pulled it out, defrosted it, and rolled it out.

I kept thinking shamrocks, and green, and hmmmm, brownies and hmmmmm . . .  peppermint icing!

Brownie-Peppermint-Cookies

Egad, I almost made myself sick on the icing alone!

It’s just the usual butter icing – 2 cups icing sugar, 4 – 5 Tbsp butter, a splash of milk, a drop of green food colouring and a dash of peppermint flavour. Splash. Drop. Dash. Then I made some green tea to serve as a bit of a tonic to my sugar overdose and I had myself a simply divine teatime all by myself. No regrets.

Print
Brownie Cookies
 
Ingredients
  • 3 cups all-purpose flour
  • 2/3 cup unsweetened cocoa powder
  • 1/2 teaspoon salt
  • 1/2 teaspoon baking powder
  • 1 cup butter
  • 1 1/2 cups sugar
  • 2 large eggs
  • 1 teaspoon vanilla extract
Instructions
  1. Preheat oven to 350 degrees.
  2. Sift flour, cocoa, salt and baking powder together and set aside. Mix butter, sugar, eggs, vanilla in mixer. Gradually add flour mixture, and mix until smooth.
  3. Form into two discs, wrap in plastic and chill for at least one hour.
  4. Roll out cookie dough on counter – I use a bit of cocoa to dust on the surface to keep the dough from sticking. Cut into desired shapes – of course I used hearts for Valentine's Day and Shamrocks for St. Patrick's Day!
  5. Bake on cookie sheets for 8 to 11 minutes until the edges are firm and the centres are slightly soft and puffed. Transfer to a wire rack to cool.
Notes
Recipe from the Smitten Kitchen
3.2.1682


Filed Under: Cookies Tagged With: cocoa, peppermint

Flourless peanut butter cookies

February 20, 2011 by Barb 4 Comments

My mom was using this recipe for flourless peanut butter cookies 20 years ago. I’m sure she got the recipe from one of her church or school cookbooks, and they are so delicious, I can’t believe I haven’t made them before!

I became inspired to bake them because our youngest daughter and two precious grandsons are coming to visit today! and you can’t come to Grandma’s and not find some home-made cookies . . . can you?

There are countless recipes on-line for these, but this is the recipe my mom used:

Flourless Peanut Butter Cookies, Keeping With The Times

Peanut-Butter-Cookie-Stack-1-copy-2

Print
Flourless peanut butter cookies
 
Ingredients
  • 1 cup peanut butter
  • 1 cup brown sugar
  • 1 egg
  • 1 tsp baking soda
  • 1 tsp vanilla
Instructions
  1. Preheat oven to 350 degrees.
  2. In an electric mixer, mix together the brown sugar, egg, peanut butter, baking soda and vanilla until well combined.
  3. Roll dough into 1 1/2 inch balls, place on cookie sheet and press down with a fork.
  4. Bake for about 10 minutes, rotating and switching the cookie sheets around in the oven, so as not to burn the bottoms.
3.2.2158

Enjoy!


Filed Under: Cookies Tagged With: flourless, peanut butter, sweet

Welcome! I'm Barb, and this is where I practice my mantra to "learn something new, try something different". It's my hope that something I do here may inspire you! Read More…

Categories

Archives

Copyright 2020 * Keeping with the Times * All rights reserved.