Keeping With The Times

living, learning, and keeping with the times

  • Home
  • About
  • Site Information
  • Privacy Policy

Highway 93A – The Old Banff/Jasper Highway

September 16, 2015 by Barb 8 Comments

Backing up a bit here … rather than taking the Icefields Parkway (HWY 93) to Athabasca Falls, we turned off onto the old Banff/Jasper Highway (HWY 93A), which parallels HWY 93 and ends up at the falls. It was a last minute decision and one we were astounded that we hadn’t considered before. It was spectacular.

If you like to avoid major highways in Jasper National Park for the peaceful meander of a Canadian Rockies backroad, then Highway 93A or “the old highway” is for you. Part of the original Banff/Jasper Highway, it now sees much lighter traffic.

Jasper National Park dot com

It was such an unexpected and delightful drive … we met approximately 2 cars and saw an older couple on bikes …
Highway 93A, Canadian Rockies Getaway, Barb Brookbank, Keeping With the Times
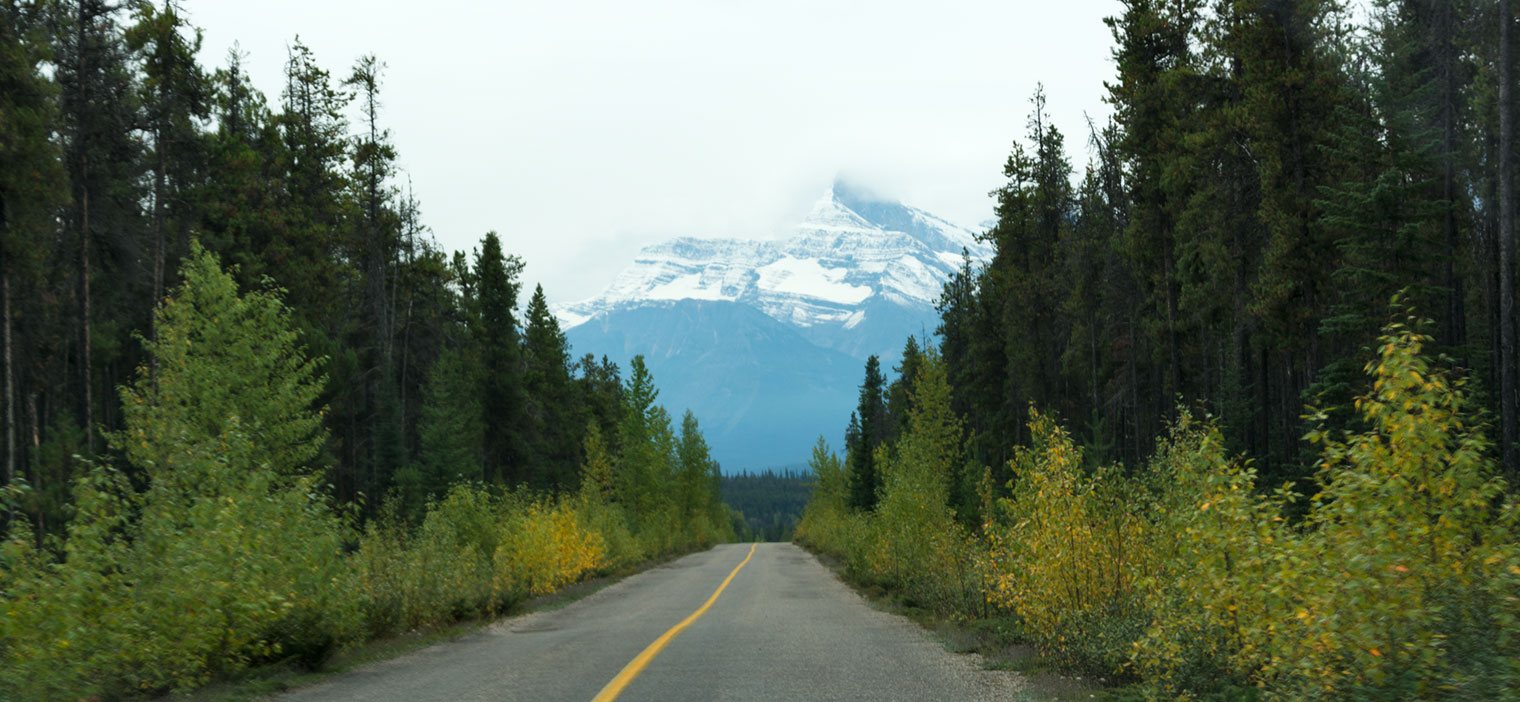
When we stopped to take a closer look at a lake peeking through the trees, this is what we were presented with …
Highway 93A, Canadian Rockies Getaway, Barb Brookbank, Keeping With the TimesI haven’t been able to identify the mountains …
Highway 93A
hwy93A_canoe_barbbrookbank-copy
Highway 93A, Canadian Rockies Getaway, Barb Brookbank, Keeping With the Times

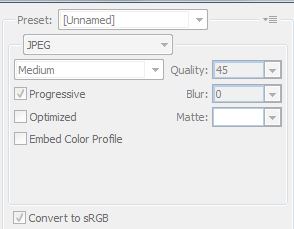
It was a dull, drizzly day so most of my photos turned out kinda dark … however, I used several actions by Linda Sattgast from the “Fix Photos Fast” class she teaches at Digital Scrapper.

Just a few clicks to adjust exposure, contrast, and shadows/highlights. Two more clicks … one to flatten layers, and one of my own actions to “save for my blog” … done, done, and done!

Thanks for stopping by today!

See Sunwapta Falls and Old Man Mountain for Part VI

Filed Under: TRAVEL Tagged With: Canadian, digital scrapper, Linda Sattgast, photoshop, photoshop actions, rocky mountains, travel

Fix Photos Fast! My Experience

June 26, 2015 by Barb 2 Comments

Have you had a chance to check out the class Fix Photos Fast with Actions by Linda Sattgast which I’m offering at a discount price?  If you are at all interested, please don’t wait … I can personally attest to the fact that you will be getting more than your money’s worth, and the offer ends tomorrow night.

Fix Photos Fast with Actions, Keeping With the Times, Actions, Linda Sattgast, Digital Scrapper

Final Image

I used a few of Linda’s Photoshop actions on this peony image to create an invitation for an “imaginary” garden party I plan to hold in July ;) oh wait … I think I’m having a garden party all summer long …

Here’s my original image, straight out of camera:

Fix Photos Fast with Actions, Keeping With the Times, Actions, Linda Sattgast, Digital Scrapper

Original

I played the action “Lighter: Shadows/Highlights-minimum” and with one single click I achieved what I was going for; I wanted to lessen the shadows but I didn’t want to blow out the highlights on the peonies. Ya gotta love these results …

Fix Photos Fast with Actions, Keeping With the Times, Actions, Linda Sattgast, Digital Scrapper

Lighter_Shadows_Highlights-minimum

Then I played “Smart Sharpen-Low” and “Color: Boost” which gave just the right amount of color without being overwhelming. I could have played more using the mask to brush away some color, but I had to stop somewhere! It’s addictive and it could not be easier.

Subtle, but powerful changes:

Fix Photos Fast with Actions, Keeping With the Times, Actions, Linda Sattgast, Digital Scrapper

Lighter: Shadows/Highlights-minimum, Smart Sharpen-Low, Color: Boost

The class comes with a money back guarantee so you simply cannot lose … .

Click here to find out more about this class.

Thank you for dropping by and have a wonderful weekend!!

Filed Under: Photography Resources Tagged With: affiliate, digital scrapper, Linda Sattgast, photoshop, photoshop actions, Tutorial

Layer Mask Basics Free Tutorial

June 25, 2015 by Barb Leave a Comment

If you like adding artistic effects to your photos, I have the perfect short (approximately 6 minute) Layer Mask Basics how-to video for you.

For the Photoshop version, click here. For the Photoshop Elements version, click here.

You’ll learn how to blend a photo of an old wooden clipboard with an ordinary photo to create extraordinary results!

Start with a photo like this cute kitty sitting on a column.
Layer Mask Basics Free Tutorial

Add a photo of an old wooden clipboard above the kitty.

Layer Mask Basics Free TutorialLayer Mask Basics Free Tutorial

Change the blend mode of the clipboard layer and use a layer mask to put the slightly grungy effect exactly where you want it.

Layer Mask Basics Free Tutorial

This tutorial is especially helpful for anyone who doesn’t really understand how to use layer masks or why they’re even useful in the first place. The instructor, Linda Sattgast, says, “I use layer masks all the time when fixing or enhancing photos. It’s one of my most often used tools!”

Linda is the instructor for the Fix Photos FAST class I’m offering, so if you’re wondering whether you should take her class, this is a great way to see how she teaches.

Now through Saturday, June 27, 2015, I’m offering a discount on the Fix Photos FAST class. Click here to see my original post, and to get all the details.

Please don’t wait! This is an amazing class at an incredibly low price, and I can hardly believe Linda offers it at such a discount!

Again, for the Layer Masks Basics how-to video, Photoshop version click here. For the Photoshop Elements version, click here.

Filed Under: Photography Resources Tagged With: affiliate, digital scrapper, Linda Sattgast, photoshop, photoshop actions, Tutorial

Fix Photos Fast with Actions

June 23, 2015 by Barb 3 Comments

Actions: Fix Photos Fast! Header
As a new affiliate with Digital Scrapper, I’m thrilled to have the opportunity to offer the class “Fix Photos Fast with Actions” by Linda Sattgast, at a discount price!

But first, a little background information … I joined Digital Scrapper in March of 2009, and it has to have been one of the best decisions I’ve ever made. I’d just purchased a copy of Photoshop Elements 4 which included the “Learn Digital Scrapbooking” CD by Linda Sattgast. Linda’s teaching style is friendly, clear, and concise, and 95% of what I know about Photoshop and scrapbooking I found at Digital Scrapper. Amazingly, I went from learning Photoshop to teaching Photoshop! True story!

What if you don’t scrapbook? I say … no matter … we all use photos! We have them in our personal albums, on our blogs, on Instagram and/or Facebook … so why not make it easy on yourself (and your viewers) by using Photoshop actions to enhance them?

Click on the following image to be taken to the full class outline, and an opportunity to purchase at a discount price!

Actions: Fix Photos Fast! Class Contrast

I firmly believe in Linda and her dedicated team of professionals at Digital Scrapper, and am confident you will love this class (I know I did!)

Here’s an excerpt from the class description:

Here’s What You Get With Fix Photos FAST (by Linda Sattgast)

  • Receive my personal set of 36 time saving photo editing actions that I use constantly to fix my photos.
  • These actions are available for the following versions: Photoshop Elements 7 through 12 and Photoshop CS2 through Photoshop CC.
  • You receive both versions of this class: Photoshop Elements and Photoshop, so if you change versions, I’ve got you covered.
  • Print out my action “Cheat Sheet” to use as a quick reference until you get acquainted with what each action does.
  • For those who want more training, I’ve provided more than 25 video tutorials on various topics from how to use individual actions more effectively to my personal approach to photo editing.
  • I’ve also included more than a dozen Watch-Over-My-Shoulder videos where I go through a photo from beginning to end and tell you my thought process. In my opinion, this alone is worth the price of the class. You’ll pick up so many tidbits and ideas you may never have thought of before!

Limited Time Discount

For 4 days only this class is on sale for $10 off, so if you’re interested in a faster way to quickly fix your photos using actions,  click here to find out more about the class.

Here’s what one class member had to say:

I learned in a few weeks what I had tried (and failed) to learn in the prior 14 years.
Terri Fullerton, Michigan

This is a sample video from the Fix Photos FAST class:

Actions lighter less contrast video button

In the spirit of full disclosure, this is an affiliate link, which means I may get a commission if you decide to purchase this class. I only recommend products & systems that I use and love myself. I truly believe in Digital Scrapper.

Do you have questions or concerns? Please leave a comment and I’ll be very happy to answer them!

Click here to find out more about the Fix Photos FAST class.

Filed Under: Photography Resources Tagged With: affiliate, digital scrapper, Linda Sattgast, photoshop, photoshop actions, Tutorial

How to Write an Action to Re-size and Save Images for your Blog and a Special Offer

February 16, 2014 by Barb 25 Comments

Writing Actions in PhotoshopI’m pretty sure most of us know that our images need to be re-sized before uploading to the web. The photo needs to fit within the width of your blog, and it needs to load fast or you will lose readers. True story.

I’m no expert on this subject, but I found a great article at photoshopessentials.com which gives an in-depth look at why, and how to do it. It’s very informative and enlightening and explodes a few myths about size, resolution, etc.

However, I thought I’d go over how I do it and show you how to write an action to automate this task. One click of a button and your image is re-sized and saved in a folder. Perfectly sized and hard for someone to steal it for printing purposes, although they could steal it and use it for the web, but that’s just not cool.

Actions can only be written in Photoshop, but don’t despair, I have a little surprise for you and you’ll find it at the end of this post.

Since Photoshop CC has a bit different dialog box, I wrote this action in CS6. So here we go:

How to Write an Action in Photoshop to Re-size and Save Images for Your Blog

To start with, make sure you have a folder created where you want to save your re-sized images.

  • Open a photo that you have already adjusted exposure, white balance, and cropped etc. Make sure all your edits are complete before re-sizing.
  • From the Actions panel, make sure that Button Mode is not checked. Actions can’t be written in Button Mode.
  • Click on the down-facing arrow and choose New Action. In the Dialog box, type in the name you want to use for your action. I’m using the name “Resize and Save for Web”.
  • Choose Default Actions as the Set. This will save the Action in the Default set (of course). You can create your own sets, but I won’t go there right now.
  • Choose None for the Function key, and choose a Color if you like. This will give the Action a Color when in Button Mode. For this Action, I did not choose a color.
  • Click Record. Everything you do from now until you press the Stop key will be recorded. It doesn’t matter how long you take, PS will sit there and wait all day if it has to so you can go slow and make sure you take only the steps that you want recorded.
  • In the Menu Bar, choose Image > Duplicate, and click OK.
  • Choose Image > Image Size.
  • Make sure that Scale Styles, Constrain Proportions, and Resample Image are checked.
  • Click on the down-facing arrow and choose Bicubic Sharper (best for reduction).
  • Set the Resolution to 72 Pixels/Inch.
  • For the Pixel Dimensions, set the Width. I set the width to 760 Pixels/Inch because that is the maximum width for images that will fit on my blog. Yours will most likely be different. Accept the Default Height to maintain proportions. Click OK.
  • In the Menu Bar, choose File > Save for Web. Choose JPEG, Medium with a Quality of 45. Click Progressive. I left the rest of the settings at the Default. Click Save.

Free Photoshop Action

  • Navigate to folder where you want to save your re-sized images. Accept the default name of your image. If you give it another name, the action will save every image with that name and of course will end up overwriting every image you run the action on.
  • Close the duplicate image, then close the original image (do not save the changes).
  • Click the Stop key.

Here are the final Pixel Dimensions for my image. Notice that the file size went from 28.7M to 1.11M. The other thing to note is that I do not touch the Document Size dialog box when re-sizing. It gets reduced automatically.

Free Photoshop Action

Clean as a whistle and faster than a speeding bullet!

But the fun part today is my little give-away! I will write a custom action for the first 10 people who comment. I can only record it to the point of re-sizing the image since I can’t create a path to a folder on your computer. Once you run this action on an image, you will have to then save it yourself.

If you want a custom action, make sure you say so in the comments, and make sure that I can contact you.

You give me the info – I give you the action!

Want a few more tips on Photoshop? Check out my page “Photoshop Tips”!

Have a wonderful Sunday!

Filed Under: UNCATEGORIZED Tagged With: blogging, freebie, photoshop, photoshop actions, Tutorial

Welcome! I'm Barb, and this is where I practice my mantra to "learn something new, try something different". It's my hope that something I do here may inspire you! Read More…

Categories

Archives

Copyright 2020 * Keeping with the Times * All rights reserved.