Inspiration to create my own vintage book paper flowers came after visiting a beautiful (but expensive) little shop in my hometown.
As I was browsing their display of silk flowers and branches, I spied a paper bunch for only $20.00 … eek! and there were exactly 4 per bunch! Needless to say, it took me a nano second to figure out how I could make my own version for $0.00.
PLUS … would you believe it … just that very morning I had salvaged about 5 old Reader’s Digests from our local “take it or leave it” which is to say “take it or leave it and it goes into the dump.” Hmmm, yes … my name is Barb and I’m a dumpster diver … and that is another story … oh hey, maybe you’d like to read about my Rustic Photography Background which also came from said dump.
Anyway, I couldn’t wait to get home and start creating.
Sometimes it pains me to rip up a book, sometimes it doesn’t … It’s funny how things go … I needed a craft idea, not for any other reason than I was missing working with my hands, and voila, it appeared, seemingly out of nowhere. And did you know that March is National Craft Month? how cool … and serendipitous …
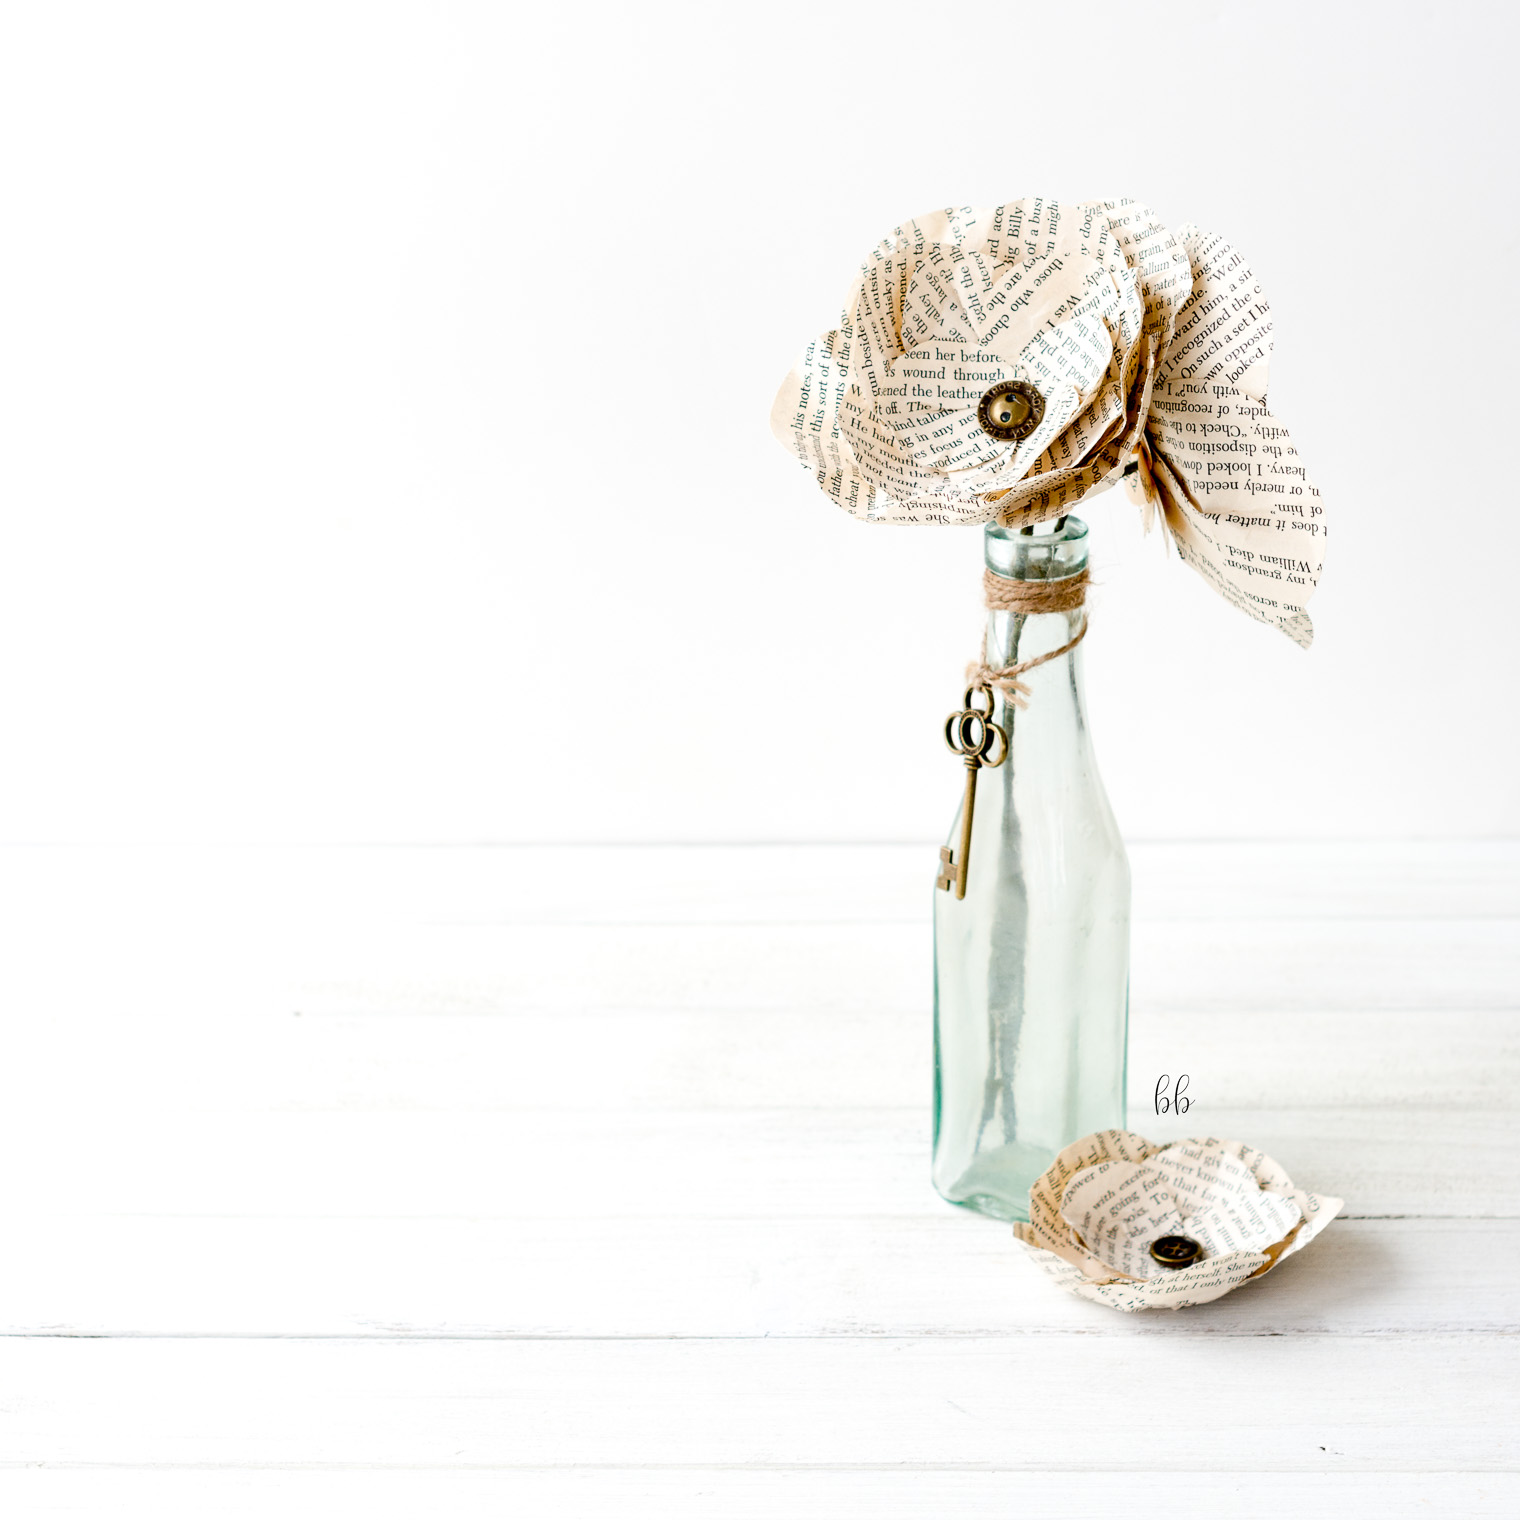
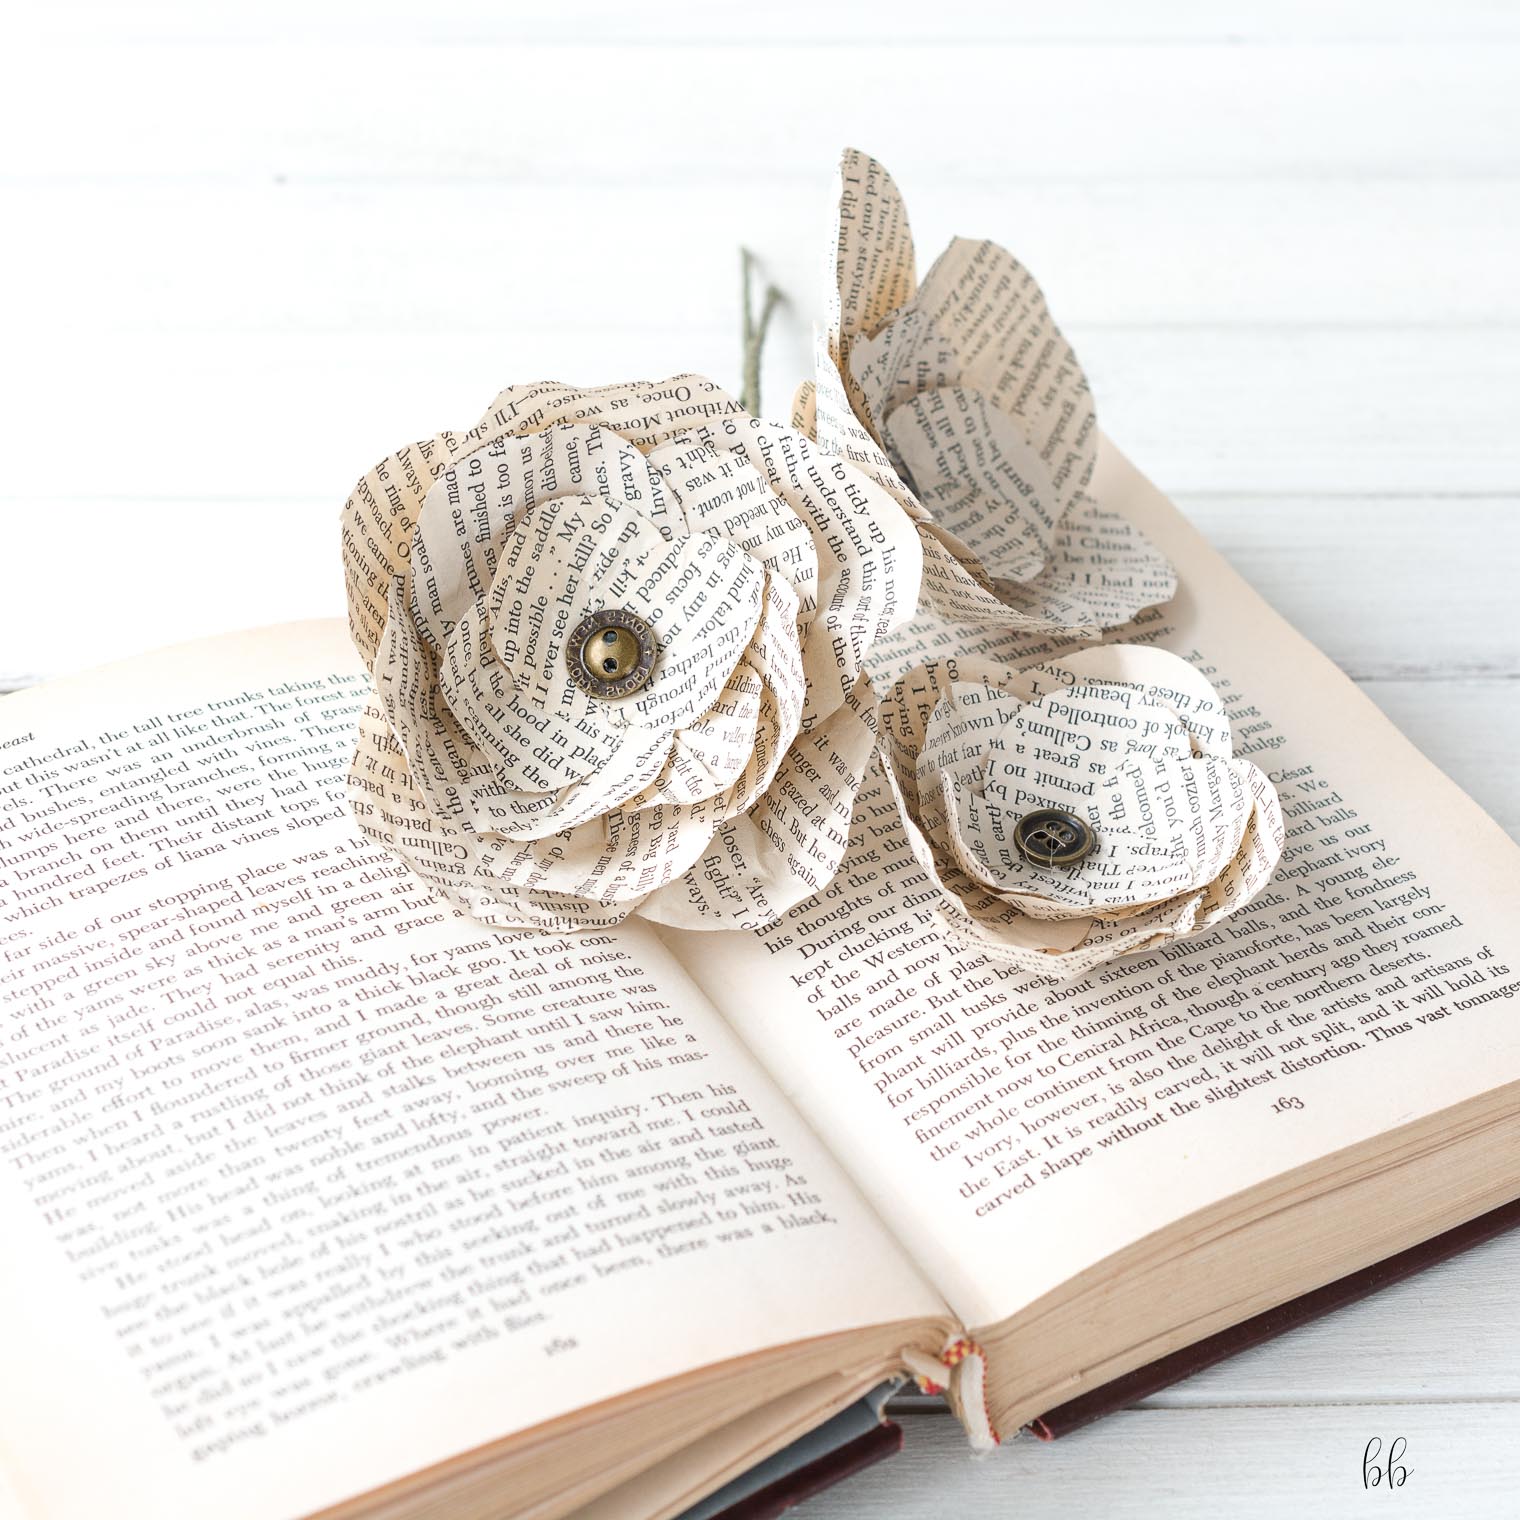 I thought they’d make lovely toppers for presents …
 I purchased a tiny cardboard box from Michaels, tied twine around it, and topped it with a flower …
 I love how they look in vintage glass jars. For this flower, I didn’t crumple the petals:

Here’s a quick little tutorial for you!
Vintage Book Paper Flowers
Use a punch, or simply cut 5 circles of varying sizes for each layer.
Here I used three different sized punches … I have a thing for punches and believe wholeheartedly that a person cannot have too many punches :)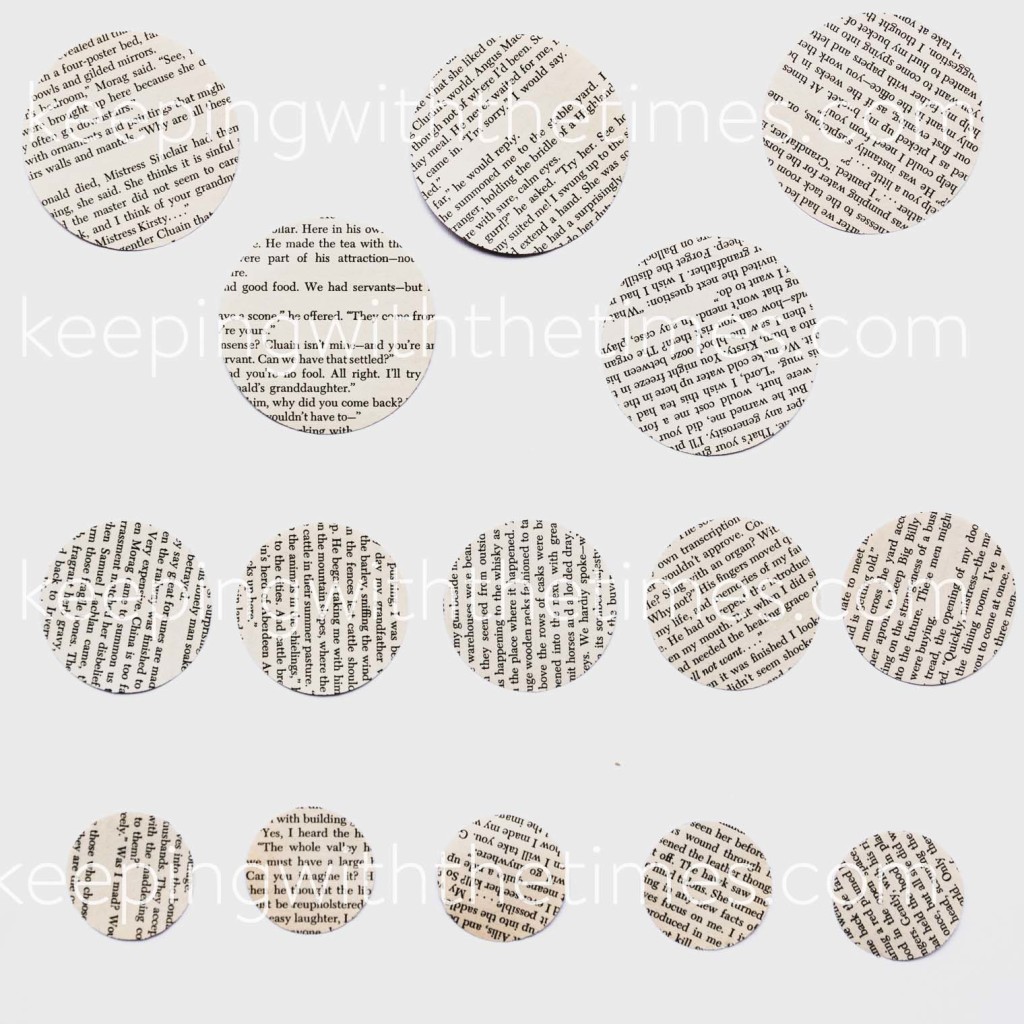 Gently crumple each circle, but be careful because the paper is fragile. Also, you can try making some without crumpling the paper—they’re pretty too.
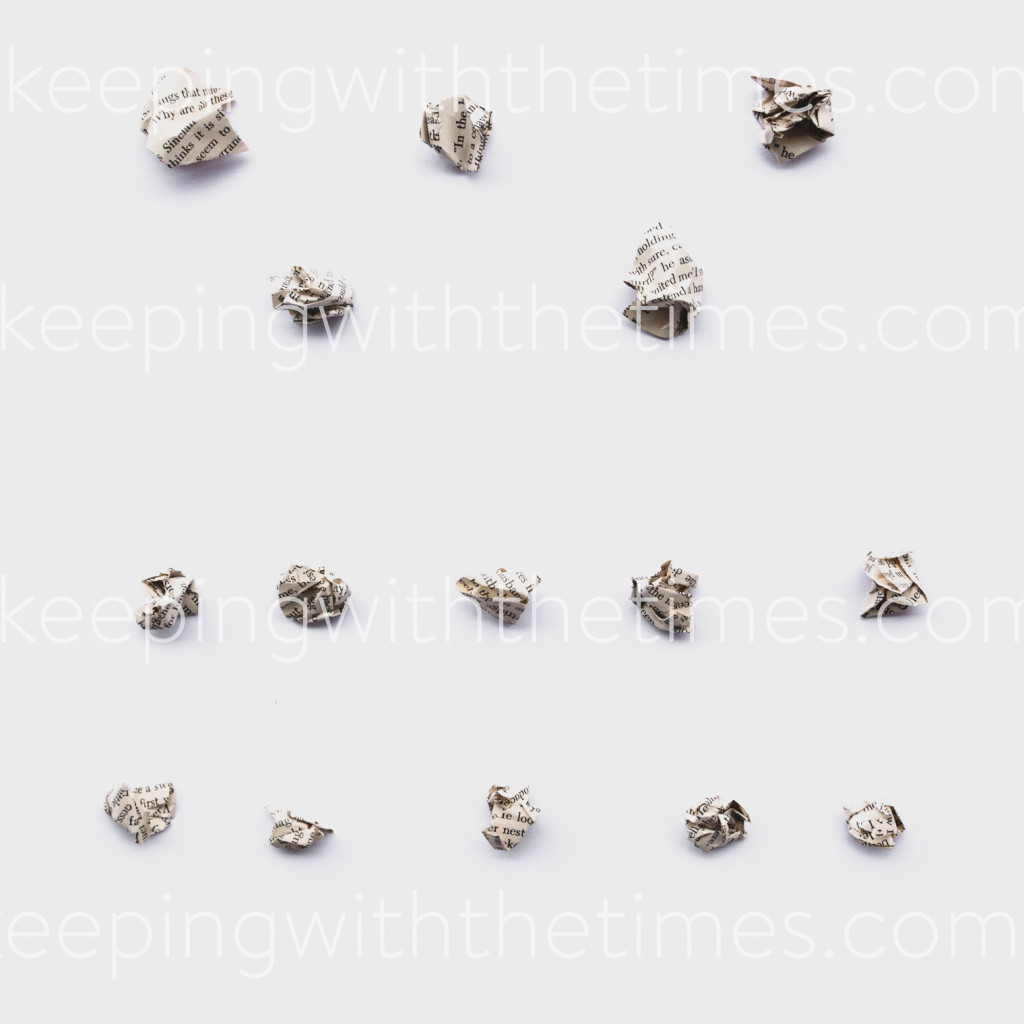 Gently uncrumple:
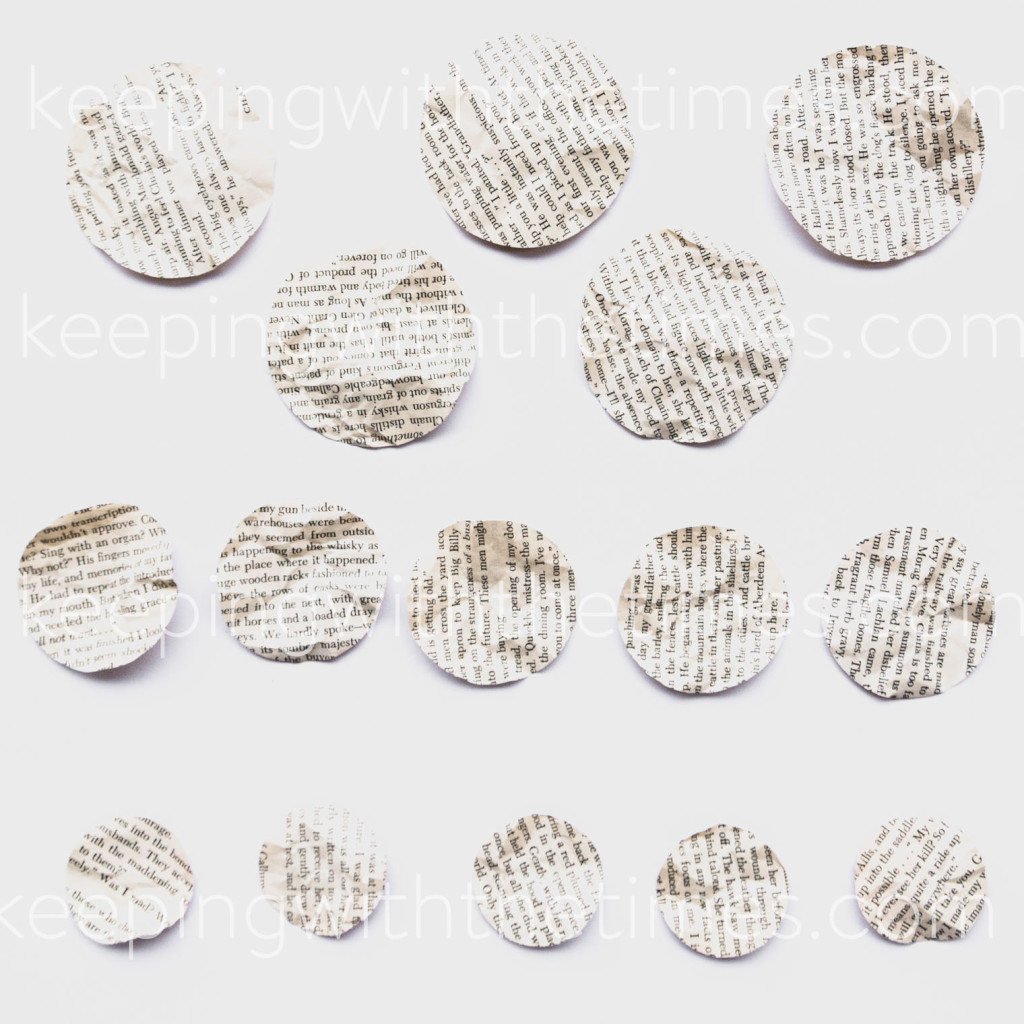 Fold in half, pinching only the bottom of each circle:
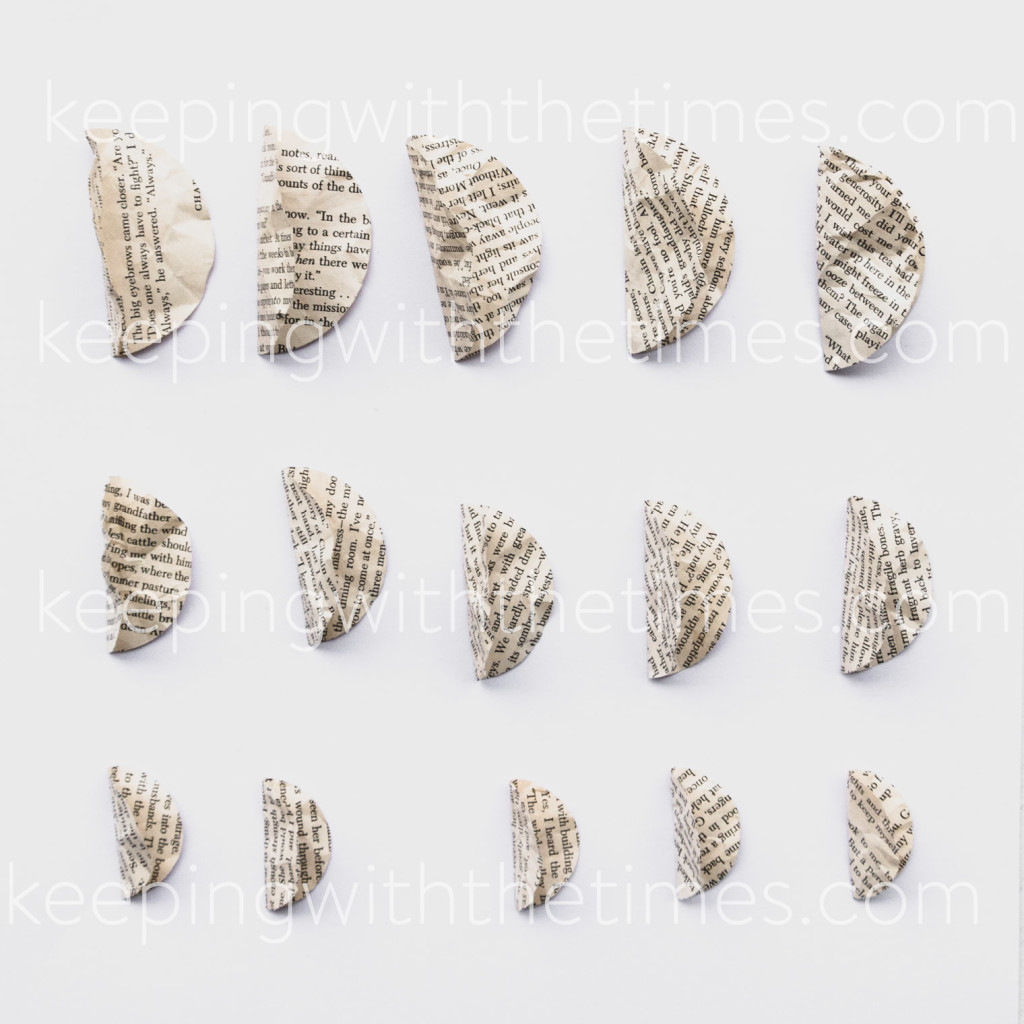 Using white glue, fold and pinch to glue the bottom of each circle together:
 Glue the petals of each layer together. White glue works better than a glue gun since it allows for readjusting the petals:
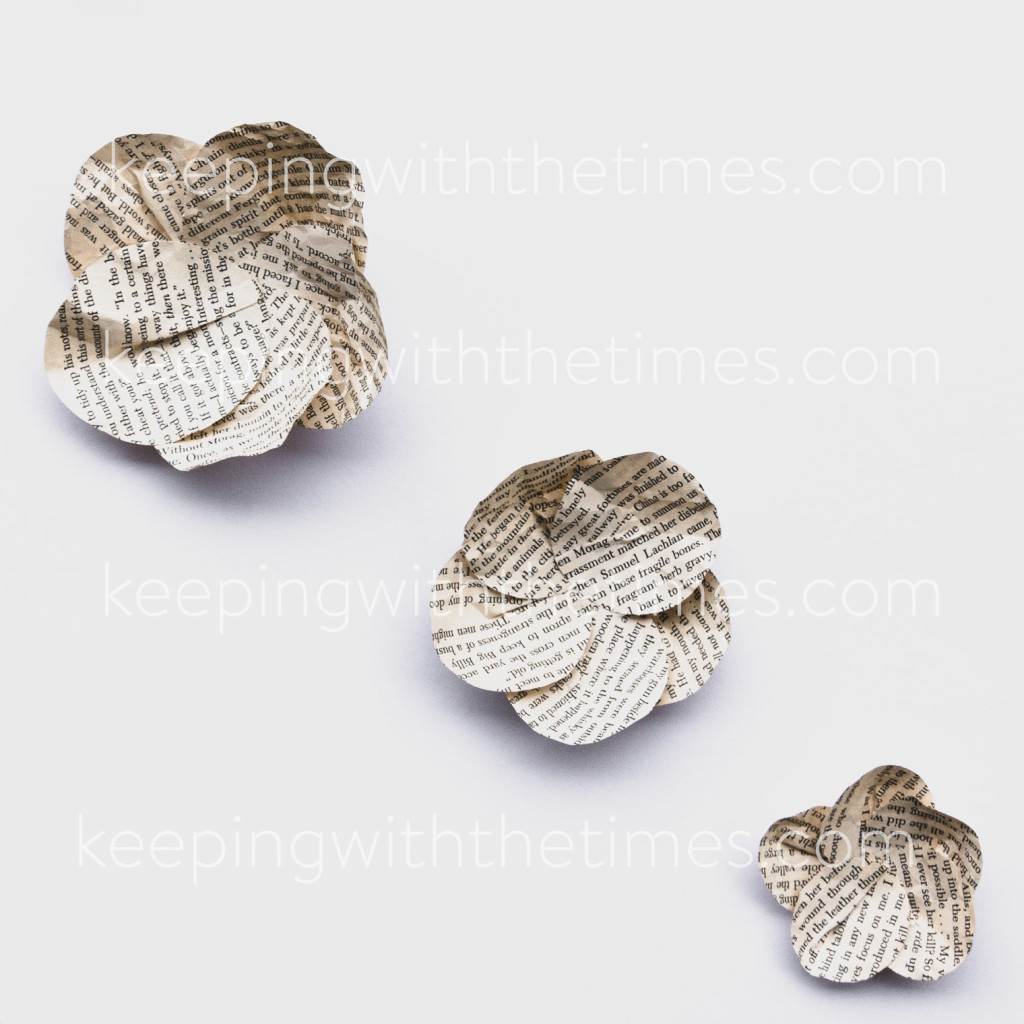 Glue together, off-setting each layer:
 Poke a hole through the middle using a strong toothpick or a skewer. I switched to a wooden skewer which was a lot stronger. Insert a piece of heavy florist wire, and bend the end over to keep it in place. Later, when you add a button with the glue gun, it will secure the wire:
 Wrap the stems with florists tape:
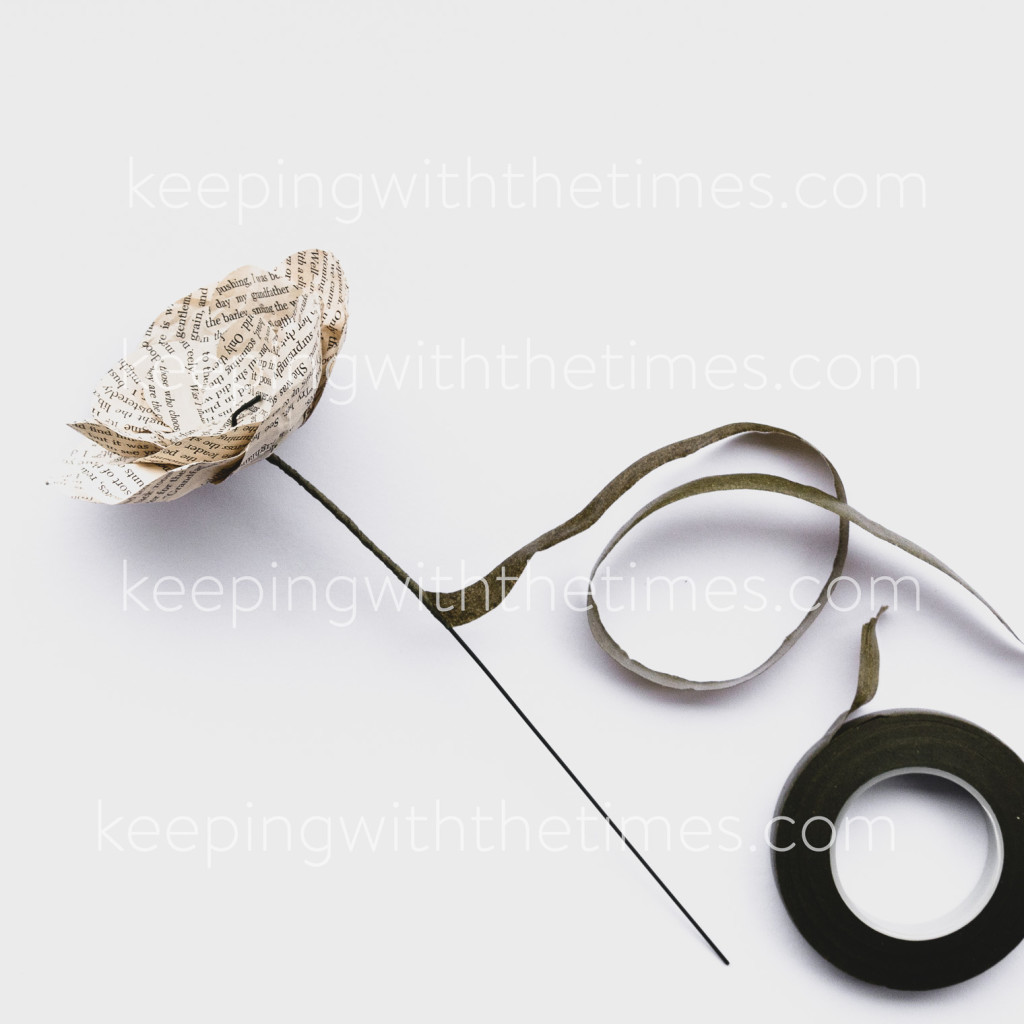 Glue a vintage button onto the paper flowers for the perfect centre:
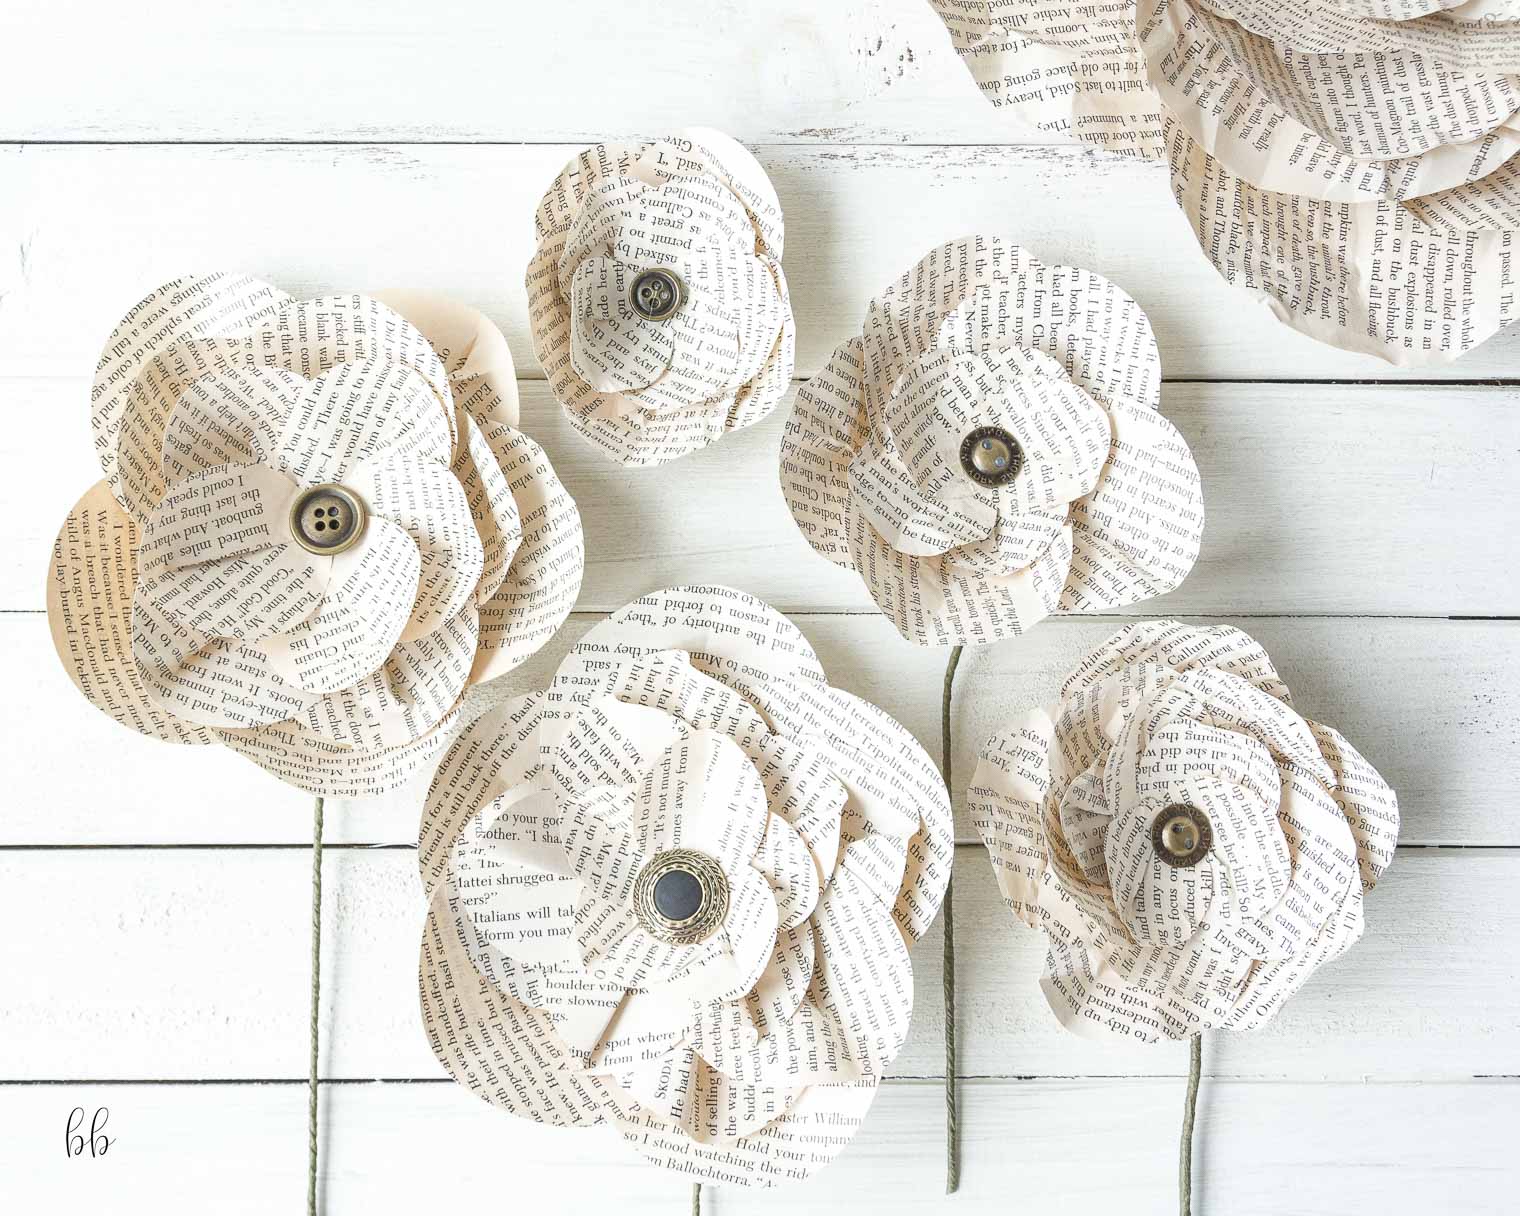 PIN IT: