Keeping With The Times

living, learning, and keeping with the times

  • Home
  • About
  • Site Information
  • Privacy Policy

The colours of Thanksgiving

October 5, 2011 by Barb 45 Comments

I was looking at all the fall decor out in bloggyland and I kept seeing front doors painted with a dark paint. Now I know this trend is nothing new but I suddenly decided I must try it! I’m quite brave reckless when it comes to decorating so I very quickly went to town and picked up the paint and a foam roller. We’d had warm summery weather all September so I was certain it would stay nice until I got my door finished . . . wrong. Monday morning a fog rolled in, temperatures plummeted and a slight drizzle of rain proceeded to fall. Well, I thought – if I’m going to do this I have to do it now or our weather may even get worse. The door is under an overhang – what could go wrong?

. . . is this kale just not the most gorgeous shade of green? and oh, so autumn (y)!
 

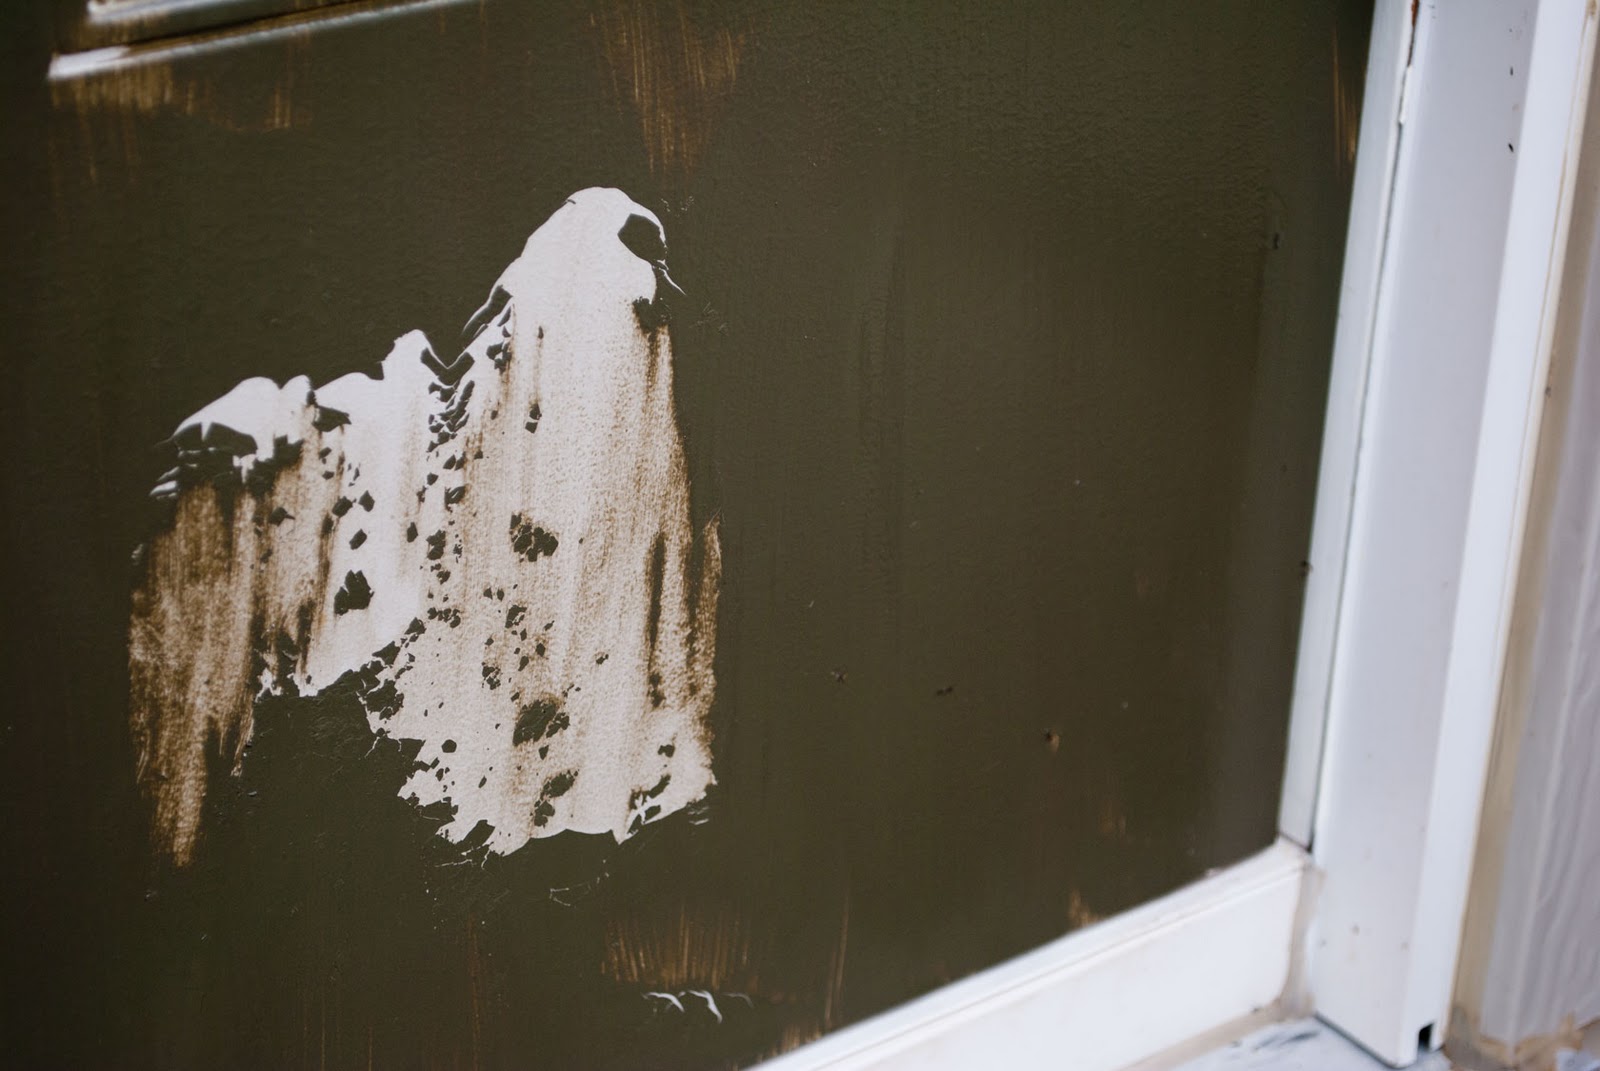
Well, I started to roll the paint on and to make a long story short – what a mess! This foam roller was not cooperating – it seemed to slip and slide all over and the paint was going on all streaky – it looked terrible. So I got out a brush (don’t use a brush) and started to paint with it and I could see streaks and splotches and areas that had too much paint and areas that had too little. OMG – what am I going to do? I decided I was going to have to let this first coat dry and then see what I could do about it – but not before I actually rubbed some paint off with a rag – can you believe that? The next morning I rushed back into town and went to a specialty paint store for advice. Apparently the paint I was using was OK but some people (me) can’t use foam rollers and he proceeded to give me a tiny plush roller. Thank goodness – it worked. After a couple of restless nights spent worrying that my door was going to be a mess all winter, I managed to get another coat on and have proclaimed that “I can live with that!” Whew. If warmer weather returns I will give it another coat, but for now – it’s good enough. After I added some plants and twigs and pumpkins and wreaths I felt a whole lot better. My door is dressed and ready for Thanksgiving (in Canada, it’s this week-end).

. . . you see? it looks OK!
. . . yes!! . . .
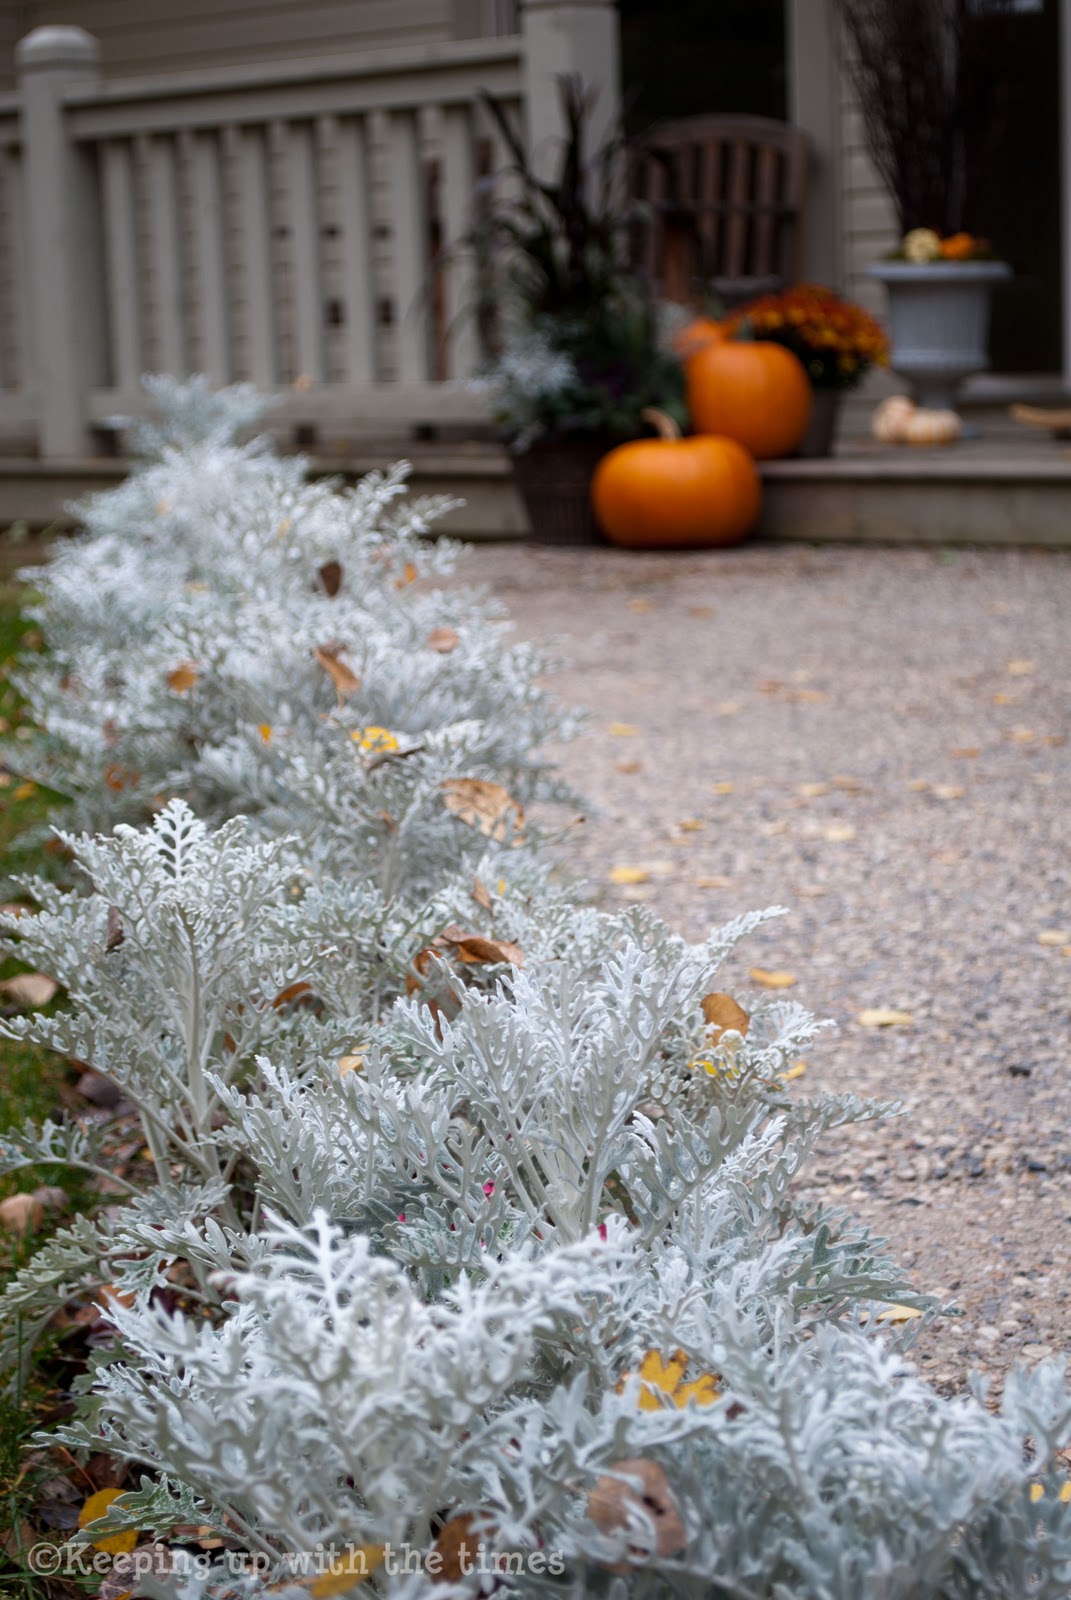
. . . my dusty miller is still thriving . . .
. . . how can you go wrong with cute pumpkins and mums . . .
. . . a sparkly ribbon on a bright wreath . . .
. . . what?

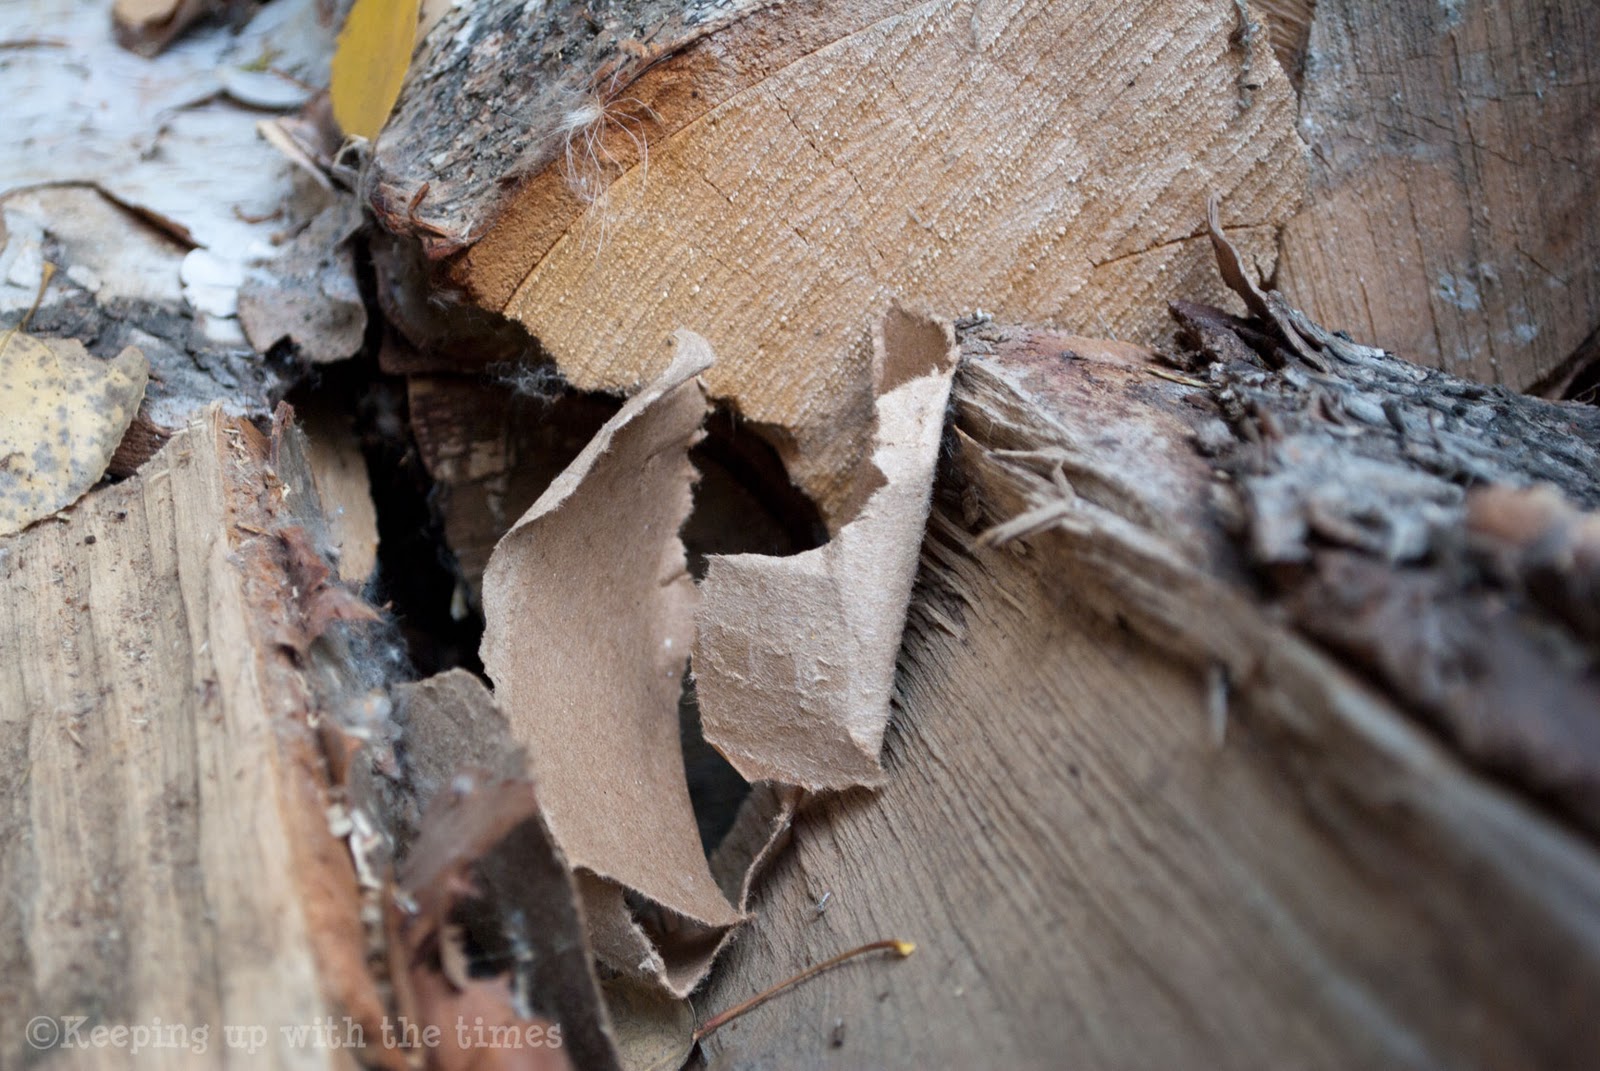
I forgot to mention that during all this a squirrel decided it was going to take some of the cardboard I had used to protect the deck and make a bed in the woodpile.

. . . I don’t think so . . .
. . . you get outta here . . .
. . . now!
. . . aaack . . .
. . . what a horrid start . . .
. . . autumn leaves are calming . . .
. . . so are flowers . . .
. . . and all’s well that ends well . . .

Door/Outdoor Link Party at Southern Hospitality

Filed Under: HOME DECOR Tagged With: autumn, photoshop

A rustic country welcome

September 28, 2011 by Barb 26 Comments

I always put something on my front step for autumn (well, for any season for that matter). Today I dragged my willow bench, my big barrel and my pot of tansy onto the veranda. My Rustic, Country, Whole Grain Wreath graces my front door now, and I set my dried thyme wreath on the willow bench with a pot of globe thistle and some gourds. The step gets covered in leaves this time of year and we have our wood stacked and ready for winter.
 
Starting to feel cozy . . .
aren’t these gourds amazing? we got them at our local U-pick for $2.50/ea
my wreaths – the one on the bench is made from thyme from my garden and my rustic country door wreath is oats
years ago I made this willow bench – it sits in my garden and is pretty weathered
globe thistle from my garden – prickly!
big and beautiful!
the crow mat from my favourite little country store bids you to enter . . .

Filed Under: HOME DECOR Tagged With: autumn, wreath

Autumn mantle love

September 25, 2011 by Barb 25 Comments

I’ve decorated my mantle and house for autumn and Thanksgiving (our Thanksgiving is in October). The weather has been nice but it won’t be long until it gets quite chilly and it will start getting dark earlier and earlier. That’s where these bright colours and sparkly lights and candles come to the rescue. I kept a few things from my spring inspired mantlescape but I added some new elements plus some things I already had around the house. For my mantle I decided to try the (fake, battery operated candles). I have straw and leaves scattered all around and now I don’t have to worry about burning the house down! I admit that they aren’t romantic, but they do add some sparkle and I have come to like them. The other thing is, that I have real candles on the hearth and the coffee table so I think the combination works – at least it does for me.

cozy
my homemade millet topiaries
simple elegance
I kept my heron
new vases (from HomeSense) filled with oats
oats gathered from a nearby field (goes with my rustic country wreath on my door)
my antique decoy – centre stage
my banister – all colourful and twinkly
. . .  a friendly little bird I found at my country store . . .
. . .  couldn’t get just one . . .

So there you have it, my simple autum mantle. I started with a trip to HomeSense because I know they have seasonal decorations and I wanted a new picture (my winter moose just wasn’t going to cut it). I also bought new candle holders, potpourri to fill my glass vases, a wreath, and some candles. I added two new brown vases and filled them with oats, then stood back and was happy with what I saw: my house – looking very twinkly, inviting and colourful! a celebration of autumn and Thanksgiving!

Filed Under: DIY AND CRAFTS, HOME DECOR Tagged With: autumn, mantel

Simple country topiary

September 14, 2011 by Barb 19 Comments

This plant which I think is millet grows in the ditches around my yard. Every July I pick a bundle, dry it, and fashion it into a sort of topiary-style arrangement. I’ve made dozens of these and given a few to my daughters. I’m always delighted to see that they are displaying them and that they look quite nice, perched either on their mantles or tables or end tables. They are so easy to make but bring an element of simple country elegance to your house.

Dried Topiary Tutorial

Dried Topiary Tutorial

Here’s a quick and easy tutorial:

Pick the millet, tie it into bunches and hang from a hanger until dry (1 month or so).

Dried Topiary Tutorial

Dried Topiary Tutorial

Strip off leaves and arrange in an even bunch secure with elastic bands and cut stems at bottom.

Dried Topiary Tutorial

Insert into rustic container and pack tightly with newspaper add some sphagnum moss voila!

20110907_4390-copy

20110907_4391-copy

Total cost, since I had all the material on hand from other projects over the years: $0.00! How much more frugal can you get?

Filed Under: DIY AND CRAFTS, HOME DECOR Tagged With: autumn, mantel

An explosion of pussy willows!

April 25, 2011 by Barb 23 Comments

Every spring I go out into the countryside and gather pussy willows. I create these wreaths as soon as I get enough gathered and while the branches are fresh and pliable – it’s amazing how durable they are when fresh.

I used to sell these wreaths at craft fairs and one year I had them all sold before I even got into the building! as I carried them in, people in the parking lot snapped them up – it was crazy. However, I don’t sell them anymore, I just give them as gifts to a very few select people!

Pussy Willow Wreath

Pussy Willow Wreath

Pussy Willow Wreath

Pussy Willow Wreath Tutorial

The ‘how to’ is really very simple. Start with a purchased 18″ willow wreath base. It doesn’t have to be the best kind – actually the looser the base the better since all you do is start stuffing the branches into it! There is no glue or wire involved – the pussy willows themselves hold the wreath together if you stuff in enough. I have never had one fall apart and when I’m tired of it I always end up pulling the branches out and it isn’t easy.

Start by inserting branches from the left and from the right to form the beginning of a spray at the bottom.

Pussy Willow Wreath

Continue to add branches to the spray, building up the middle.

Pussy Willow Wreath

Pussy Willow Wreath

Add the rest of the branches from the bottom up towards the top until they meet at the top.

Pussy Willow Wreath

I went over the top with my wreath and crammed in branches until I couldn’t cram in any more – why not! it’s over the top, but fun!

I would caution you, however, to start smaller and that you periodically hang it where you are going to put it to make sure it fits – it’s better not to have to trim it after the fact since it removes the wild looking branch ends.

And lastly, it’s wonderful while fresh but if you hang it where it isn’t going to be bumped it will practically last forever.

Filed Under: DIY AND CRAFTS, HOME DECOR Tagged With: pussy willow, spring, wreath

« Previous Page

Welcome! I'm Barb, and this is where I practice my mantra to "learn something new, try something different". It's my hope that something I do here may inspire you! Read More…

Categories

Archives

Copyright 2020 * Keeping with the Times * All rights reserved.